Baking & Pastry
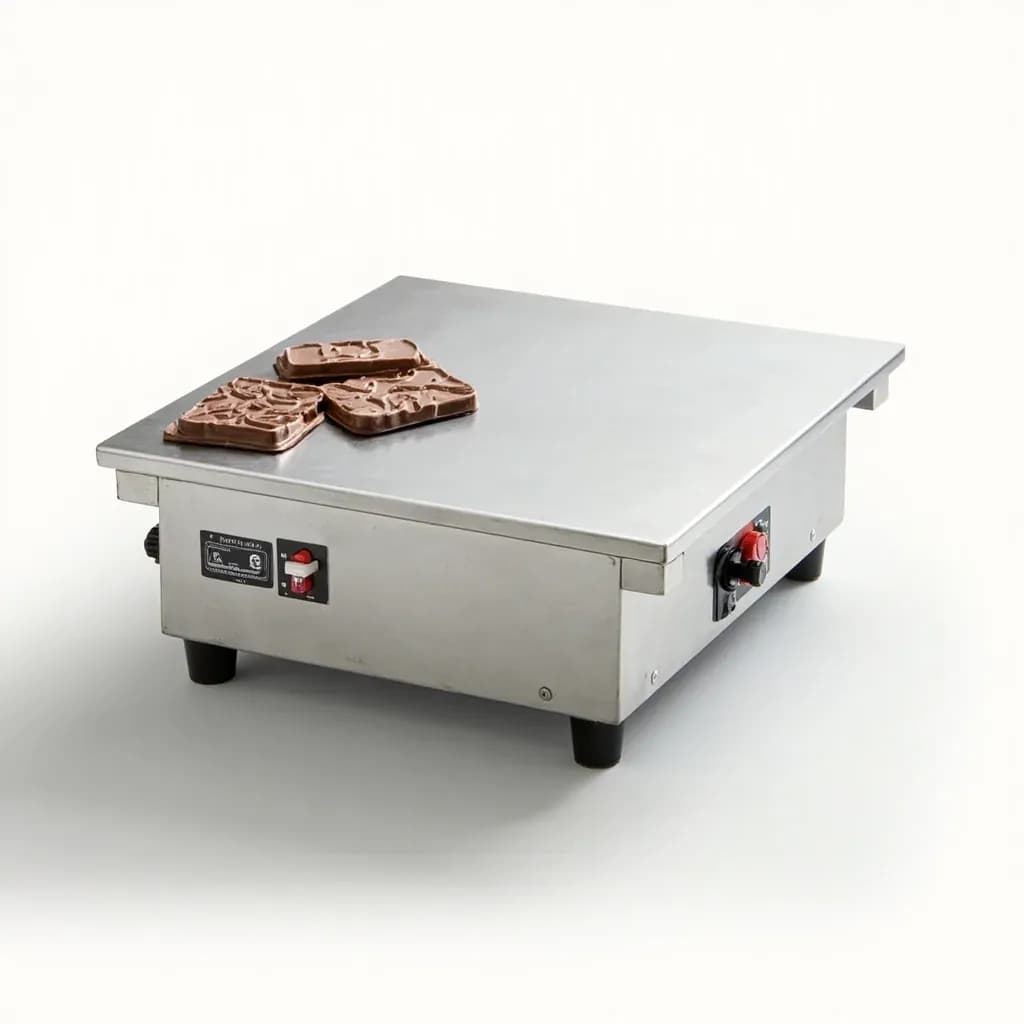
Vibrating Table
A vibrating surface that settles poured chocolate or batter to remove air bubbles.
A vibrating table shakes a poured mold or pan so trapped air bubbles rise and burst, giving chocolate bons-bons, bars and cast desserts a smooth, glossy, void-free finish. Chocolatiers tap filled molds on it after pouring tempered chocolate. The even vibration also helps the liquid flow fully into intricate mold cavities.
A vibrating table is a stationary work surface that shakes at a controlled frequency and amplitude to settle poured chocolate, batters, and chilled creams into molds. It does the same job as the traditional sharp-tap-and-burst technique that chocolatiers and pastry cooks have used for generations — releasing trapped air and leveling the surface — but with far less effort and much greater consistency from pour to pour. In a professional chocolate shop, where polycarbonate molds must fill to a precise wall thickness with no bubbles against the shell, the table is considered standard equipment; it is just as useful in a pastry kitchen for settling génoise, financier, and madeleine batters, and for flattening chilled mousse, ganache, and bavaroise fills poured into rings or silicone molds.
Mechanically the tool is simple: a flat stainless-steel plate driven by an electric motor or shop-air piston, switched on by hand, foot pedal, or pressure regulator. Benchtop models sit beside a tempering machine and handle one or two molds at a time; floor-standing units cover a full sheet pan or several molds simultaneously. The vibration changes nothing about the recipe or technique — it speeds up and standardizes a step that has always been part of molding work, making it one of the few pieces of specialty equipment that improves the appearance of finished pieces almost immediately.
Alternatives
Types & varieties
Compact, single-motor unit with a flat stainless plate; the most common model in small pastry kitchens and chocolate shops.
Larger surface, often with adjustable vibration intensity; used in production kitchens handling full sheet-pan molds or several molds at once.
Driven by shop air rather than a motor; prized by chocolatiers for a softer, more controllable vibration that is gentler on tempered chocolate.
Built-in raised edges or corner brackets that hold polycarbonate chocolate molds flat and square during vibration.
Some tempering machine enclosures integrate a vibrating shelf directly beneath the dispensing nozzle so molds fill and settle in one motion.
Working with tempered chocolate
The table earns its keep on bonbons, molded bars, and figures where any air pocket against the polycarbonate shell will read as a dimple or pit on the demolded face. Pour the tempered chocolate, then run the table only until the last stream of bubbles stops breaking the surface — typically five to ten seconds for a standard bonbon mold. Stop there: continued vibration thins the chocolate against the mold walls, can drop well-tempered chocolate below its working range, and often ends in fat bloom or streaking as the chocolate sets. Brace the mold by its corners against any built-in stops or with your fingertips at the edges; pressing the palm flat onto the mold flexes the polycarbonate and leaves an imprint on the chocolate back.
Working with batters and chilled creams
For génoise and sponge batters the goal is to release entrained air so the crumb bakes evenly without large holes — a short pass on the table (a few seconds) is usually enough. Financier, madeleine, and other low-viscosity batters need a gentler setting; a too-vigorous table drives the batter up the fluted sides of the mold and leaves an uneven bake. Chilled fillings (ganache, pastry cream, mousse piped into rings) benefit from three to five seconds of vibration to flatten the top and pop any surface bubbles before they set. Work over a parchment-lined sheet so any overflow stays contained, and never run frozen items on the table — the shock will crack tempered chocolate and break the seal on a set mousse ring.
Common uses
Tips & pitfalls
- For chocolate, vibrate only until bubbles stop rising to the surface — over-vibrating can drop the chocolate out of working temper and cause streaking or fat bloom.
- Hold or brace molds by the edges rather than pressing on the surface; polycarbonate molds flex and the palm can imprint on the chocolate back.
- Lower the amplitude for thin, delicate batters (financier, madeleine) so the batter does not climb the sides of the mold unevenly.
- Set a kitchen timer for five to ten seconds per mold on chocolate work; most of the air is gone well before the chocolate noticeably thins.
- Wipe the table surface between batters and especially between colors of chocolate — residue transfers and mars the next pour.
- Use a foot pedal or hands-free switch whenever possible; it keeps both hands on the mold and gives finer control over when the vibration starts and stops.
- Place molds flat against the corner stops before starting the table; molds that creep during vibration produce bonbons with one thick side and one thin side.
- Do not vibrate frozen or very cold items — the shock can crack tempered chocolate or cause a mousse to break the seal on a ring.
Good to know
- Also called
- Chocolate vibrator table, vibrating chocolate table, settling table
- Primary use
- Settling poured chocolate, batters, and creams to release trapped air and level surfaces
- Drive type
- Electric motor or pneumatic (compressed-air) vibration
- Typical surface
- Flat stainless steel, sometimes with raised edge dams or corner stops
- Form factors
- Benchtop (compact) and floor-standing (larger work surface) versions
- Control
- On/off switch, foot pedal, or pressure regulator; some models offer adjustable amplitude
- Where it fits
- Chocolate room, pastry lab, or finishing station, placed near a tempering machine or workbench
- Skill level
- Beginner-friendly; the tool replaces a manual tap-and-burst technique
Also called
Chocolate Vibrating Table · Vibration Table · Settling Table
Related

Muffin Pan
Multi-cup pan for muffins, cupcakes, and egg bites

Bundt Pan
Fluted ring mold for showstopping cakes with a center hole

Springform Pan
Latch-release pan that frees delicate cakes without flipping

Pie Dish
Sloped round dish for crisp-bottomed pies and quiches

Tart Pan
Fluted pan with a pop-out base for clean-edged tarts

Rolling Pin
Rolls dough into even sheets for pastry and bread

Pastry Brush
Brushes on egg wash, glaze, butter, and marinades

Bench Scraper
Flat blade that divides dough and clears your work surface