Prep Tools
Cheese Board
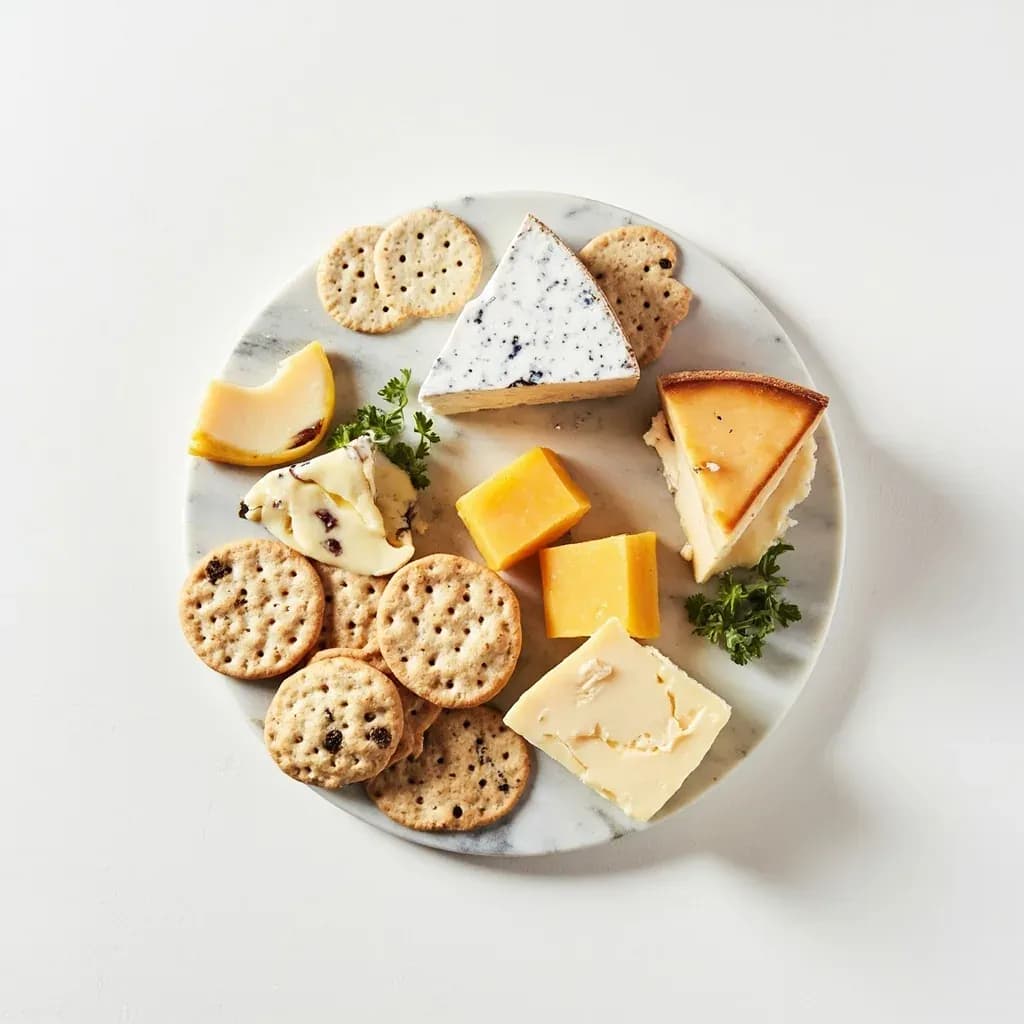
A flat serving board for cutting and presenting a spread of cheeses and accompaniments.
A cheese board is a serving surface, often marble, slate, or hardwood, used to cut and present an assortment of cheeses alongside fruit, nuts, crackers, and charcuterie. Cooks and hosts arrange it as a grazing centerpiece for gatherings, sometimes pairing it with dedicated cheese knives. Marble versions stay cool to help keep soft cheeses firm during service.
A cheese board is the serving surface that does double duty as both a cutting platform and a presentation stage for cheese and its accompaniments. Unlike a dedicated cheese plate, a board gives you room to slice, portion, and arrange a full selection in one place — which matters because the act of building a cheese course is really a balance of textures, milk types, and ages spread out for guests to graze.
The material you choose quietly shapes the experience. Hardwoods (maple, walnut, cherry, acacia, teak, olive) are the workhorses: warm to the touch, gentle on knife edges, and neutral in temperature so cheese neither chills nor sweats. Marble and slate behave differently — they pull heat out of the cheese, which keeps soft, bloomy-rind, and triple-cream varieties from slumping on a warm kitchen counter, but they are hard on blades and unforgiving to dropped knives. Bamboo is lighter and budget-friendly, though harder and less forgiving than the softer hardwoods.
A good board earns its place by doing three things well: giving cheese room to breathe, accepting a knife without scarring, and surviving years of use. Sizing is part of that — count on roughly 2–3 oz (55–85 g) per person as a starter and 4–5 oz (110–140 g) if cheese is the main event, then scale the board up accordingly. Most home boards land between 12×16 and 14×20 inches, which holds four to five cheeses plus a generous ring of crackers, fruit, and condiments.
Alternatives
Types & varieties
Pale, closed-grain hardwood from North America; classic butcher-block material, gentle on knives, and a quiet backdrop for colorful cheeses.
Dark, dense hardwood with rich color contrast; favored when you want the board itself to read as a design element.
Reddish hardwood that deepens with age; smooth, food-safe surface with a warm tone.
Hard, water-resistant tropical wood with dramatic grain; common in mass-market boards and a good budget workhorse.
Naturally oily hardwood with high moisture resistance; long-lasting and often used for end-grain construction.
Dense, aromatic Mediterranean wood with striking figured grain; traditional in Italian and Spanish service.
Stays cool naturally; ideal for soft, bloomy-rind, and blue cheeses that slump at room temperature.
Can be pre-chilled and written on with chalk to label cheeses; non-porous and food-safe when sealed.
Fast-growing grass-based board; lightweight, budget-friendly, and harder than many hardwoods.
Wood fibers run vertically; the most knife-friendly and self-healing, but heavier, pricier, and usually overkill for serving.
Drawers or magnetic slots holding wire, cheese plane, and spreader knives — useful when counter storage is tight.
Rotating round board for shared tables; lets every guest reach every selection without passing the board around.
Choosing the Right Material
Pick the board around the cheese you'll serve most often, not the other way around. If your repertoire leans toward Brie, Camembert, triple-creams, or blues that weep at room temperature, a marble or slate board — pre-chilled for 20 minutes in the fridge — buys you valuable serving time. If you serve a wider mix of firm and aged cheeses, a hardwood board is the more versatile choice because it doesn't chill the cheese and it tolerates the knife work that harder cheeses demand. End-grain is the gold standard for knife care, but on a board that is mostly presentation rather than heavy slicing, a long-grain hardwood is plenty.
Building a Balanced Board
Think of the board as a small composition: anchor it with the cheeses first, then fill. Variety is the goal — vary the milk (cow, goat, sheep), texture (soft, semi-soft, firm, hard, blue), and age (young to aged) so each bite offers something different. Arrange cheeses roughly an inch apart to keep runny styles from bleeding into neighbors, and lay out the strongest cheese last so guests' palates aren't overwhelmed on the first bite. Accompaniments — crackers, sliced baguette, nuts, fresh and dried fruit, a small pot of honey or mostarda, cornichons — should sit in the gaps without crowding the cheese. Always label; guests are far more adventurous when they know what they're trying.
Common uses
Tips & pitfalls
- Take cheese out of the fridge 30–60 minutes before serving — flavor, aroma, and texture all bloom at room temperature, and cold cheese (especially aged hard cheese) crumbles when you try to cut it.
- Give each cheese its own knife or spreader; dragging one cheese's flavor into another is the single most common way a good board goes sideways.
- Place cheeses on the board first, then fill the gaps with crackers, bread, nuts, and fruit — crowding the cheese makes cutting awkward and slices harder to lift.
- Space cheeses about 1 inch (2.5 cm) apart so runny or washed-rind cheeses don't bleed into their neighbors.
- On a wooden board, blot very wet or oily cheeses (washed-rind styles especially) with a paper towel first to prevent staining.
- Pair flavors from mild to strong in a clockwise arc so guests' palates aren't overwhelmed on the first pass around the board.
- Condition wooden boards every few weeks with food-grade mineral oil — never vegetable or olive oil, which go rancid and leave a sticky film.
- Avoid the dishwasher, never soak a wood board, and dry it upright after wiping; trapped moisture is what warps and cracks even the best hardwood.
Good to know
- Category
- Prep & serving tool
- Typical materials
- Hardwoods (maple, walnut, cherry, oak, teak, acacia, olive wood), marble, slate, bamboo
- Common sizes
- Small 8×12 in (2–3 cheeses); medium 12×16 in (4–5 cheeses); large 14×20 in or larger for spreads
- Thickness
- Typically ¾ to 1¼ inches for wood; ½ to ¾ inch for marble/slate
- Surface options
- Flat, recessed well, or perimeter juice groove
- Temperature role
- Wood is neutral; marble and slate can be chilled to keep soft cheeses cool
- Maintenance
- Wood needs periodic conditioning with food-grade mineral oil; never soak or dishwasher
- Knife convention
- One knife or spreader per cheese to prevent flavor cross-over
Also called
Marble Cheese Board · Cheese Platter · Charcuterie Board
Related

Peeler
Swift blade for stripping skin off fruit and vegetables

Grater
Sharp-toothed surface for shredding cheese and vegetables

Microplane
Ultra-fine rasp for citrus zest, garlic, and hard cheese

Mixing Bowl
All-purpose bowl for combining, whisking, and tossing

Whisk
Looped wires that beat air into eggs, cream, and sauces

Spatula
Flat blade for flipping, lifting, and scraping

Slotted Spoon
Pierced spoon that lifts solids and drains the liquid behind

Wooden Spoon
Gentle, heat-friendly spoon for stirring anything