Knives & Cutting
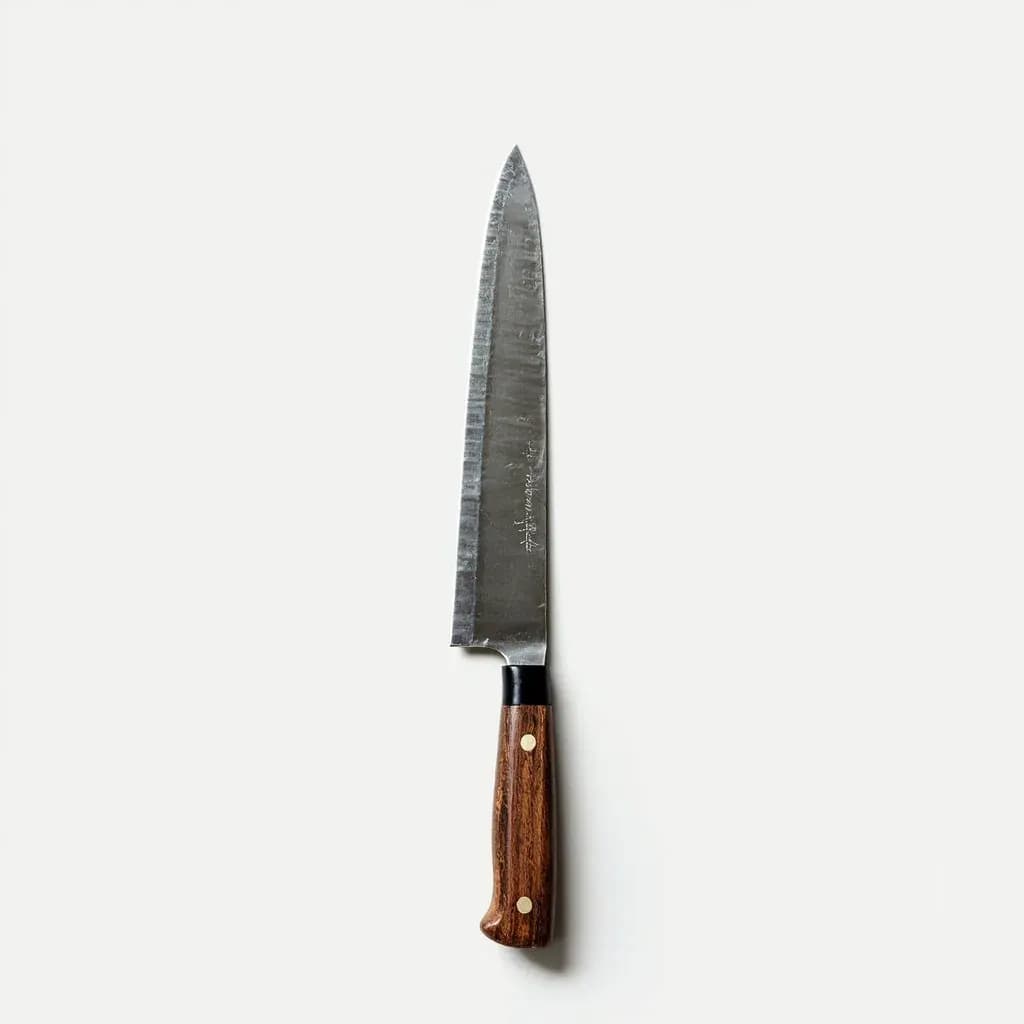
Single-Bevel Honyaki Knife
Premium single-bevel Japanese knife forged from a single high-carbon steel for ultra-clean slicing.
A honyaki is a top-tier Japanese knife forged from one piece of high-carbon steel and differentially hardened like a katana, giving it an exceptionally hard, keen edge. Its single bevel shears fish and delicate ingredients with minimal cell damage, prized for sashimi and sushi work. Honyaki knives demand careful sharpening and rust prevention but reward with the cleanest possible cut.
A honyaki knife is a single-bevel Japanese blade forged from one solid piece of high-carbon steel — no core, no cladding, no soft jacket welded to a hard cutting layer. The term describes a forging method, not a shape, but in practice it is almost always applied to the traditional kataba (single-bevel) forms: yanagiba, takohiki, usuba, deba, kiritsuke, and their relatives. Before the advent of laminated construction in the twentieth century, this is how every serious Japanese kitchen knife was made.
What distinguishes honyaki is the differential hardening. The smith coats the spine and sides of the blade with a thin layer of refractory clay, then quenches the polished edge. The edge cools almost instantly to a glass-hard state (roughly HRC 62–65), while the clay-coated spine cools more slowly and stays tougher. The result is a visible hamon line, a hard, fine-grained cutting edge, and a spine that is less prone to snapping under lateral stress. Cutting feel is accordingly different from a clad knife: honyaki slides through protein with almost no resistance and can be thinned to a geometry that no laminated blade matches.
The trade-offs are real. Honyaki blades are expensive, often two to three times the cost of a comparable san-mai or kasumi knife, and they will rust if you look at them sideways. They are also unforgiving of abuse — no soft outer layer to absorb twisting, no thick spine to shrug off a board strike. In exchange, an edge properly developed on a honyaki yanagiba or usuba will do things in a sushi bar or kaiseki kitchen that no other knife quite can.
Alternatives
Types & varieties
Long, slender sashimi slicer; the classic honyaki form, designed for single-pull cuts on fish.
Yanagiba with a flatter spine and squared tip; Kansai tradition for octopus and rectangular sashimi cuts.
Kengata-style knife with an angled tip; a senior chef's knife, almost always honyaki in serious sushi kitchens.
Thin, tall-bladed vegetable knife; honyaki usuba is prized for katsuramuki (rotary peeling) and paper-thin shavings.
Heavy single-bevel knife for breaking down whole fish; honyaki version prioritizes edge hardness and retention, with less margin for hard bone work than a clad deba.
Hybrid between deba and yanagiba; honyaki mioroshi handles medium fish with a slicer's profile and a deba-like heel.
Long, thin knife originally for fugu preparation; honyaki construction is standard where the precision matters.
Tuna sashimi knife, 300–400 mm; honyaki is the benchmark for a true maguro-bocho.
Honyaki vs. Kasumi and San-Mai
Most modern Japanese knives you see in shop windows are san-mai, meaning a hard core steel sandwiched between two layers of softer, often stainless, jacket steel. The jacket protects the brittle core from impact and corrosion, and it forgives a wider range of technique. Kasumi is the older and simpler construction, forge-welding a softer iron (or low-carbon steel) body directly to a hard carbon edge — a two-material blade rather than the three-layer sandwich of san-mai. Honyaki removes the second material entirely: one steel, heat-treated unevenly so that the edge is hard and the spine is tough. The payoff is geometry — a honyaki can be thinned below what any laminated blade tolerates, which is exactly what a sushi chef wants when pulling a long slice through tuna or tai.
- Honyaki: one steel, differentially hardened, hardest and most demanding edge geometry.
- San-mai: hard core, soft stainless jacket; easier to maintain, more forgiving of abuse.
- Kasumi: soft iron or low-carbon steel forge-welded to a hard carbon edge; traditional middle ground.
- Honyaki-grade skill set: confident single-bevel sharpening, careful drying, controlled cutting strokes.
Reading the Steel: Hamon and Patina
A genuine honyaki carries a hamon — the visible boundary where the clay-coated spine meets the quenched edge. It is not decoration; it marks the transition from hard martensite to tougher pearlite. As you use a honyaki, the blade will also develop a patina: a soft gray to blue-gray film that forms on the carbon steel and actually protects it from rust. A patina is desirable. Orange or red spotting, by contrast, is active rust and should be polished off promptly with a mild abrasive, then oiled.
- Hamon: the line of differential hardening; a useful quick check that the blade is properly heat-treated.
- Patina: a stable gray-blue oxidation that develops with use; leave it alone.
- Flash rust: orange spotting within minutes of moisture; remove, dry, oil.
- Avoid bleaching patina away with vinegar or citric acid unless you intend to re-establish it deliberately.
Sharpening a Single-Bevel Honyaki
Sharpening honyaki follows the same logic as any kataba blade, but the consequence of error is higher because the steel is hard and the geometry is already thin. Work through a progression of whetstones — typically a #1000 to set the bevel, a #3000–4000 to refine, and a #6000–8000 to polish. The cutting face (omote) takes the entire edge geometry; the flat back (ura) is only deburred, not ground, on anything coarser than a finishing stone. Maintain the original angle the smith set; do not chase a steeper edge in pursuit of durability. Touch up on a high-grit stone or strop frequently rather than re-profiling on a coarse one.
- Omote (cutting face): the only face that is ground; this is where the edge angle lives.
- Ura (back): stays flat; deburr on a finishing stone, never grind.
- Strop on newsprint or leather with a touch of compound to align the apex between sessions.
- If you lose the edge geometry, send the knife back to the maker or a specialist — power grinding will burn the steel and destroy the hamon.
Common uses
Tips & pitfalls
- Wipe the blade dry between cuts and again the moment you set it down; high-carbon steel will flash-rust in minutes if you do not.
- Oil lightly with camellia (tsubaki) oil before long storage; avoid food-grade mineral oils that stay wet on the surface.
- Cut only on soft boards — hinoki, magnolia, or quality end-grain poly. Glass, marble, ceramic, and bamboo will chip the edge.
- Never twist, pry, or lever with the blade; the unbacked geometry is hard and brittle and will crack before it bends.
- Sharpen only on whetstones, deburring the ura on a finishing stone; power grinders will burn the steel and ruin the heat treat.
- Respect handedness — a right-hand honyaki will not cut cleanly for a left-handed user without re-grinding the omote.
- Store in a saya (wooden sheath) or on a magnetic strip; drawer storage without protection is a fast way to chip a honyaki edge.
- Resist aggressive thinning early in a knife's life — the blade thickens from the spine toward the edge and the geometry is meant to be developed slowly.
- Expect a patina; embrace it. Wipe away any orange rust immediately with a mild abrasive and re-oil.
- For yanagiba and other long slicers, always finish a cut in a single long draw from heel to tip; the blade and steel are designed for that motion, and sawing will chip the edge.
Good to know
- Construction
- Forged from a single piece of high-carbon steel; no core, no cladding, no jacket layers
- Bevel
- Single-bevel (kataba): ground on the cutting face only, flat on the back (ura); ground for right- or left-hand use
- Typical steels
- Shirogami (white) #1 or #2, Aogami (blue) #1 or #2, or Aogami Super; carbon content roughly 1.0–1.5%
- Hardening
- Differentially hardened with a clay coat and water quench; produces a real hamon and edge hardness of about HRC 62–65
- Bevel angle
- Effective edge angle of about 10–15° on the cutting side; the ura is left flat to ride against the food
- Forging time
- Roughly two to four weeks per blade, including forging, clay application, quenching, tempering, and hand finishing
- Major centers of production
- Sakai (Osaka), Seki (Gifu), Echizen (Fukui), and Sanjo (Niigata)
- Maintenance
- Hand wash, dry immediately, oil with camellia (tsubaki) before storage; never put in a dishwasher or leave wet on a board
Also called
Honyaki Knife · Sushi Knife · Yanagiba Honyaki
Related

Knife
The fundamental cutting tool every kitchen is built around

Chef's Knife
The do-everything blade for chopping, slicing, and mincing

Paring Knife
Small, nimble blade for peeling and detailed in-hand work

Serrated Knife
Saw-toothed blade that slices crusty bread without crushing

Cleaver
Heavy broad blade for chopping through bone and bulk prep

Cutting Board
The stable surface every cut starts on

Mandoline
Adjustable blade for paper-thin, perfectly even slices

Kitchen Shears
Heavy-duty scissors for poultry, herbs, and packaging