Prep & Assembly
Cocoa Butter Airbrushing
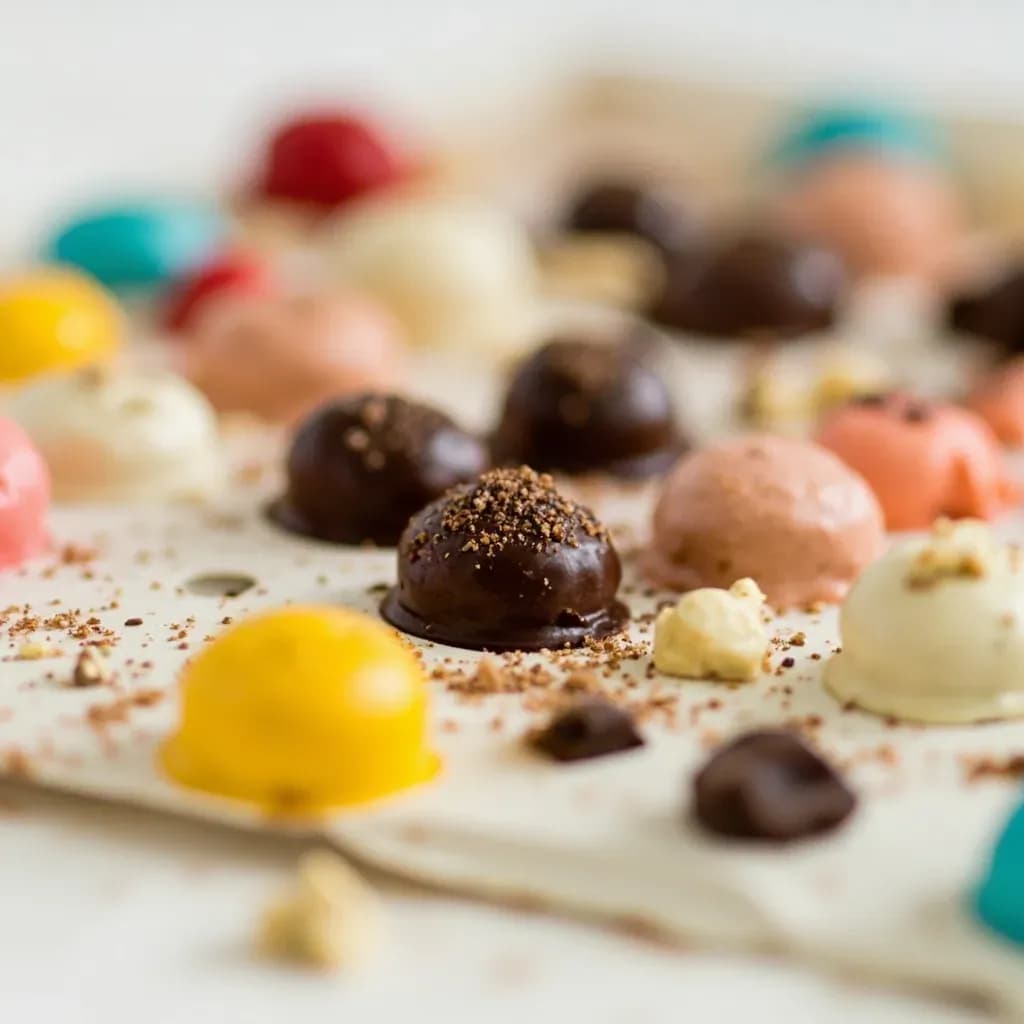
Spraying colored cocoa butter onto chocolate molds or confections for glossy, vivid finishes.
Cocoa butter airbrushing sprays warm, tinted cocoa butter through an airbrush onto chocolate molds or finished bonbons to create vibrant, shiny decorative effects. The cocoa butter and chocolate must be at compatible temperatures so the color sets with a glossy snap rather than blooming dull. It is a hallmark of modern chocolatiers for striking, jewel-like surfaces.
Cocoa butter airbrushing is the confectioner's method for laying vivid, controllable color onto chocolate work. A fine mist of melted cocoa butter, tinted with fat-soluble pigment, is sprayed through a precision airbrush onto either the inside of a polycarbonate mold or the surface of a tempered chocolate piece. Because the carrier is pure cocoa butter — the same fat that gives chocolate its snap and gloss — the color fuses with the chocolate rather than sitting on top of it. The result is a finish that looks painted on but behaves like part of the chocolate itself: it snaps, melts, and ages with the piece.
The technique rewards patience and a light hand. Cocoa butter re-solidifies quickly at room temperature, which is what makes the colors "set" almost on contact, but it also means the window for blending or correcting is short. A single heavy pass runs and pools; thin, repeated passes build a saturated, even coat without disturbing the chocolate's temper. Color behaves differently than it does on paper or canvas, because cocoa butter is a warm, pale-yellow fat: blues tend to drift toward green, reds lean warm and bright, and whites pick up a buttery cast.
It sits between two neighboring techniques. Dry luster dusting lays pigment on top of a chocolate surface with a brush or powder airbrush and is more fragile. Pre-colored cocoa butter callets melt into the chocolate itself and produce a solid, opaque shell color rather than a painted effect. Cocoa butter airbrushing is the middle path: an applied, decorative layer that bonds to the chocolate and reads as part of the surface.
- Difficulty
- Hard
Types & varieties
Coloring the inside of a polycarbonate mold before pouring tempered chocolate — produces a colored shell with a clean chocolate interior.
Coloring already-tempered, set chocolate pieces for decorative finishes.
Paper or acetate stencils laid flat against the surface or mold for crisp motifs and patterns.
Varying density or layering multiple colors to produce soft transitions across a surface.
Spattering or overlapping two or more colors to mimic stone, malachite, or painted-marble effects.
A saturated, opaque layer built up in several light passes rather than one heavy one.
Pulling back the trigger at close range to produce a controlled spatter of fine dots.
Sequential spraying with masking between layers for crisp color separations.
How to do it
- 1
Prepare the colors
If using powdered fat-soluble color, disperse a small amount into fully melted cocoa butter (roughly 30–35 °C / 86–95 °F) and stir until smooth. Pre-made liquid cocoa butter colors should be warmed gently until fluid but not hot. Strain if any pigment clumps remain.
- 2
Set up the air system
Connect the airbrush to a clean, oil-free compressor. Set a low working pressure suitable for fine atomization, and run a quick burst through the empty gun to clear condensation or dust from the line.
- 3
Prepare the chocolate or mold
If spraying the inside of a mold, ensure it is polished, dry, and at room temperature. If spraying finished chocolate, confirm it is fully tempered, set, and free of fingerprints or bloom. Lay out stencils or masking as needed.
- 4
Load the airbrush and test spray
Fill the color cup, reassemble the airbrush, and test the spray on scrap paper or parchment to confirm an even, fine mist with no spatter. Adjust pressure and trigger pull as needed.
- 5
Apply in light passes
Hold the airbrush 15–30 cm from the surface, nearly perpendicular, and move in smooth, overlapping strokes. Build the color gradually with multiple thin coats, allowing each to set briefly before the next.
- 6
Set and follow through
Cocoa butter re-solidifies within moments. If you sprayed a mold, pour tempered chocolate promptly so the color fuses to the shell. If you sprayed a finished piece, leave it undisturbed in a clean spot until fully set.
- 7
Clean the equipment immediately
Empty remaining color, flush the cup and nozzle with clean melted cocoa butter, then disassemble and rinse parts with isopropyl alcohol. Dry thoroughly before storage to keep the nozzle from clogging.
Why cocoa butter is an unusual painting medium
The carrier behaves nothing like water-based paints, airbrush inks, or drying-oil lacquers, and that changes how every color looks and how long the artist has to work. Three characteristics matter in practice, and they catch out chocolatiers who come to the airbrush from cake decorating or fine art.
- The natural yellow of cocoa butter warms every color. Blues shift toward teal, purples toward plum, and whites become a buttery cream. Mix colors a touch cooler than the target, or compensate with a higher pigment load on the cool side.
- Pigment loading is finite. Cocoa butter can only hold so much color before the pigment begins to drop out of solution as the fat cools. Stick to manufacturer-recommended ratios, and don't stockpile mixed color in the cup between batches.
- The film is alive until it sets. For roughly the first 30–60 seconds after spraying, the surface can be reworked — a soft brush dragged through a stencil, a second color laid on top to marble, a finger-blended gradient. Once cocoa butter resets, it locks in place and can only be removed by re-melting.
- The wet film is a magnet. Freshly sprayed cocoa butter grabs onto anything airborne — lint, dust, even breath moisture — until it sets. Workspace discipline is part of the recipe.
Common uses
Tips & pitfalls
- Use only colors specifically labeled for chocolate or cocoa butter — standard food colorings and airbrush paints are water-based and will make chocolate grainy or seize.
- Cocoa butter is naturally pale yellow; this warm undertone shifts blues toward green and brightens reds into warm tones, so calibrate your color expectations accordingly.
- Always temper chocolate that will receive a surface spray; untempered chocolate streaks and blooms where the cocoa butter lands.
- Apply in multiple light passes — a single heavy coat runs, pools, and can disturb the surface of the chocolate beneath.
- Keep the airbrush moving and maintain a consistent distance to avoid soft-focus blobs and hard-edged rings of overspray.
- Stencils must lie flat against the surface; any gap allows a soft halo of overspray that blurs the pattern edge.
- Purge the airbrush with clean melted cocoa butter at the end of a session, then disassemble and clean with isopropyl alcohol — dried cocoa butter will clog jets.
- Hold the airbrush nearly vertical to the target for a clean dot; angling it produces a kidney-shaped pattern.
- Warm the airbrush cup before loading color so the cocoa butter does not solidify in the nozzle mid-spray.
- Never leave mixed color sitting in the cup longer than needed; cocoa butter can fractionate as it cools and the pigment drops out.
- Work in a draft-free, low-dust space; the wet cocoa butter film attracts airborne particles and lint until it sets.
Good to know
- Carrier medium
- Pure cocoa butter (the natural fat of cacao)
- Color requirement
- Fat-soluble, oil-based colors only — water-based colorings seize chocolate
- Typical airbrush
- Dual-action gravity-feed with a small nozzle for fine atomization
- Working distance
- 15–30 cm (6–12 in) from the target surface
- Cocoa butter temperature
- Melted and warm to the touch, roughly 30–35 °C (86–95 °F)
- Setting behavior
- Re-solidifies within moments at room temperature, locking the color layer in place
- Skill level
- Intermediate to advanced — requires basic airbrush handling and chocolate tempering
- Ventilation
- Strong ventilation recommended — fine cocoa butter mist is flammable and unpleasant to inhale
- Cleanup
- Flush with warm cocoa butter, then disassemble and rinse with isopropyl alcohol; never use water while cocoa butter is present
Also called
Cocoa Butter Spraying · Chocolate Airbrushing · Coloring Molds
Related

Whisk
Beat ingredients smooth and aerated with a looping wire motion

Sift
Pass dry ingredients through mesh to aerate and remove lumps

Strain
Pour through mesh to separate solids from liquid for a smooth result

Filter
Pass liquid through fine material to clarify out the smallest particles

Rice
Press cooked potatoes through small holes for fluffy, lump-free texture

Mash
Crush soft cooked food into a rustic, creamy purée

Grind
Crush food into a coarse to fine texture, from spices to meat

Grate
Shred food into fine bits against a sharp-toothed surface