Prep Tools
Measuring Cup
A graduated cup or jug for measuring liquid and dry ingredients by volume.
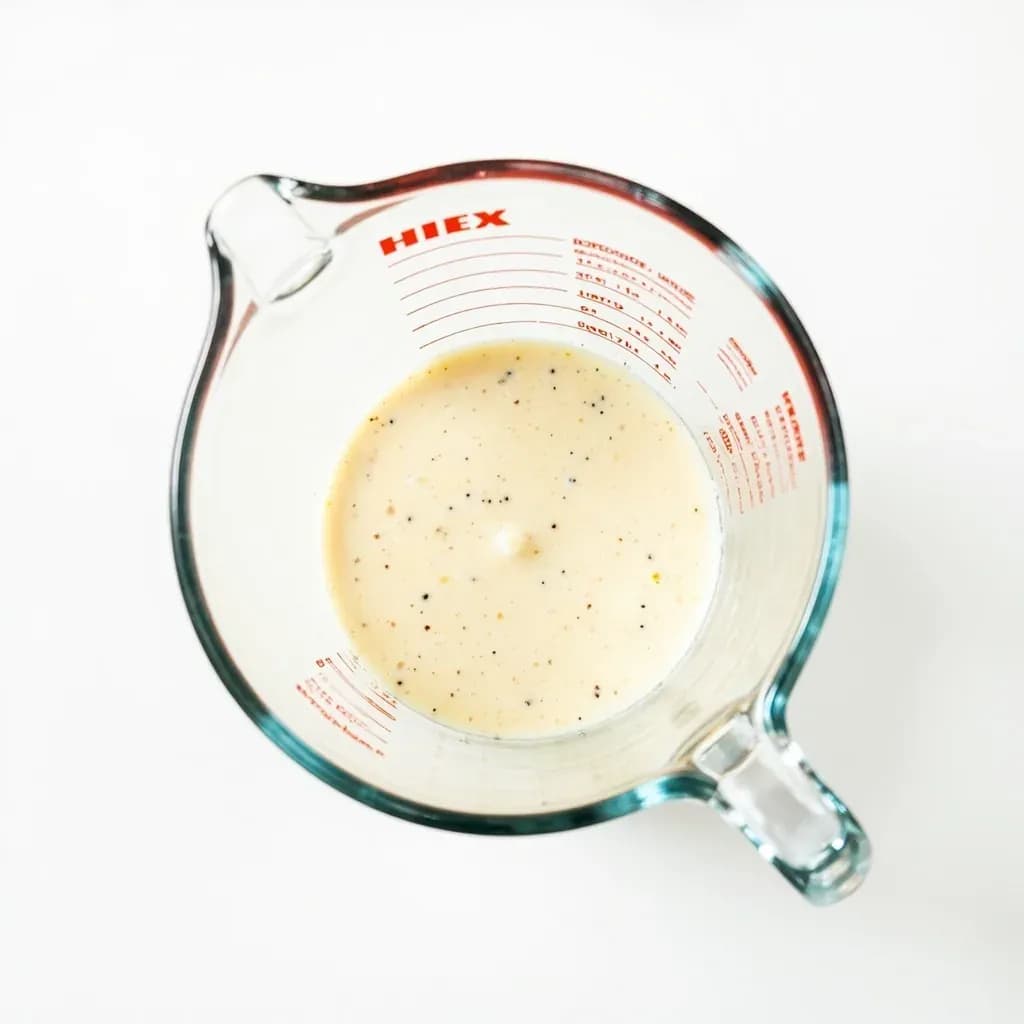
A measuring cup is a graduated vessel marked with volume lines used to portion liquids and dry ingredients accurately for cooking and baking. Liquid measuring cups are usually clear with a pour spout, while dry measuring cups come in nested fixed sizes leveled off flat. They are a core tool for following recipes consistently, especially in baking where ratios matter.
A measuring cup is the workhorse of American home baking and a near-constant companion at the stovetop, allowing cooks to portion both liquid and dry ingredients by volume with reasonable speed and acceptable accuracy. The tool comes in two fundamentally different forms — the clear, spouted vessel designed for liquids, and the opaque, brim-level cup designed for dry goods — and understanding the difference is the single most useful piece of measuring-cup knowledge a cook can carry into the kitchen. The standardized set most American cooks inherit or buy descends directly from Fannie Farmer's 1896 Boston Cooking-School Cook Book, the first major U.S. cookbook to insist on level measurements rather than the "a pinch, a handful" approximations of 19th-century domestic cooking.
Volume measurements are inherently less precise than weight, and a "cup" means different things depending on where you are. The U.S. customary cup is 236.6 ml; the U.S. legal cup used in FDA nutrition labeling is 240 ml; the metric cup used in Australia, New Zealand, and South Africa is 250 ml; and the United Kingdom has largely abandoned the cup in favor of grams and milliliters. Within the U.S. system, a cup of flour and a cup of water are not interchangeable in practice — flour compacts, brown sugar is packed, and liquids must be read at eye level. For baking especially, where ratios drive the chemistry, a kitchen scale offers a level of consistency that volume can never match, but the measuring cup remains the right tool for everyday cooking and for bakers who have learned to measure it well.
Alternatives
Types & varieties
Clear glass or plastic vessel with a pour spout and side gradations, read at eye level; available in 1, 2, 4, and 8-cup sizes.
Opaque, solid cup (usually stainless steel or plastic) with a flat rim; filled to the brim and leveled with a straight edge. Sold in nested sets of 1/4, 1/3, 1/2, 2/3, 3/4, and 1 cup.
Innovated by OXO Good Grips; gradations ramp upward from the rim so the measurement can be read by looking straight down into the cup, eliminating the need to crouch to eye level.
Has a sliding interior or rotating dial that lets one vessel measure a range of volumes (often 1/4 to 1 cup), useful for small kitchens.
Stainless-steel dry cups that snap together magnetically for rattle-free drawer storage.
Flexible silicone or plastic body that folds flat; favored for small kitchens, RVs, and camping kits.
Marked for brewing ratios (tablespoons of grounds or 1–4 cup servings) rather than recipe volume; Hario's glass beaker-style cup is a common example.
Built for sticky ingredients like honey, molasses, corn syrup, and shortening, with a soft plunger or paddle that pushes the contents out cleanly.
Dry vs. liquid: why two designs matter
The dry measuring cup and the liquid measuring cup look interchangeable but behave very differently, and using one in place of the other is one of the most common measurement mistakes in home kitchens. A dry cup is short, wide, and opaque, with a flat rim that lets you sweep a knife across the top to level off a heaped scoop of flour or sugar. A liquid cup is taller, has a pour spout, and is made of clear material with gradations running up the side so you can sight the meniscus at eye level. Dry cups don't work well for liquids because they have no spout for clean pouring, are often opaque so the level is invisible, and are designed to be filled to the brim and leveled rather than read against a gradation mark. Liquid cups don't work for leveling dry goods because their sloped, spouted rim prevents a clean sweep of a knife. Cooks who routinely use a single Pyrex jug for both are introducing real, if small, errors into everything they make.
- Dry cups are filled and leveled; liquid cups are filled and read at eye level.
- The flat rim of a dry cup is the key feature — it gives a straight edge to sweep against.
- The clear wall and pour spout of a liquid cup are the key features — they let you read the meniscus and pour without a second vessel.
The case for weighing
Even with the best technique, a "cup" of flour can vary by 15–20% depending on how packed it is, how humid the day is, and how fine the grind. For bread, cakes, and pastries — where flour-to-liquid ratios drive crumb and rise — professional bakers measure by weight in grams for this reason. A kitchen scale with 1-gram resolution and a tare button eliminates the entire question of how to scoop. The measuring cup is not obsolete, but it is best understood as a tool for liquids, sticky ingredients, and looser dry goods (oats, rice, chopped nuts), while flour, sugar, and butter in baking are increasingly measured by weight.
- A 'cup' of all-purpose flour can range from about 110 g (lightly spooned) to 140 g (scooped and compacted).
- Brown sugar is typically packed to roughly 213 g per cup; granulated sugar is not packed.
- A digital scale with 1-g resolution is the single biggest upgrade a baker can make to a measuring-cup setup.
How to measure correctly
Two techniques, one for dry and one for liquid, cover nearly every home-cooking situation. For dry ingredients, fluff the ingredient in its container, spoon it lightly into the cup until it overflows, then sweep a straight-edged knife or spatula across the rim to level it. For liquids, set the cup on a flat surface, pour in slightly more than needed, and bend down to read the meniscus at eye level — pouring off or topping up until the bottom of the curve rests on the line. A quick reference for the gram weight of the ingredients a recipe uses most is worth keeping on hand, since a fluid ounce of honey weighs considerably more than a fluid ounce of water.
- Fluff, spoon, level — that is the dry-ingredient sequence, in that order.
- Sighted-at-eye-level reading is the only reliable way to read a liquid measure.
- Sticky ingredients benefit from a light grease or the use of a squeeze-release cup.
Common uses
Tips & pitfalls
- For flour, spoon it lightly into the cup and level with a straight-edged knife — never scoop directly from the bag, which compacts the flour and can add 15–20% more than the recipe intends.
- For brown sugar, pack it firmly into the cup with the back of a spoon or your fingers so it holds its shape when turned out; granulated sugar and flour should not be packed.
- Always read a liquid measuring cup at eye level, sighting across the bottom of the meniscus, not from above — reading from above typically under-measures.
- Use dry measuring cups for dry ingredients and liquid measuring cups for liquids; they are not interchangeable, and substituting one for the other introduces real error.
- For sticky ingredients like honey, molasses, peanut butter, and corn syrup, lightly grease the inside of the cup with cooking spray or a neutral oil so the contents release cleanly.
- Sift ingredients such as confectioners' sugar, cocoa, and cake flour before measuring to remove lumps and aerate them, giving a more accurate cup.
- For baking where precision matters, weigh ingredients in grams on a kitchen scale — a 'cup' of flour can vary by 15–20% depending on how it is measured.
- When halving or thirding a recipe, the small dry cups (1/4, 1/3) are far more useful than trying to eyeball a fraction of a 1-cup measure.
Good to know
- Primary function
- Measuring cooking and baking ingredients by volume
- Origin of standardized measures
- Fannie Farmer, principal of the Boston Cooking-School, standardized level measurements in her 1896 Boston Cooking-School Cook Book
- U.S. customary cup
- 8 U.S. fluid ounces, approximately 236.6 ml
- U.S. legal cup
- 240 ml; used in FDA nutrition labeling
- Standard dry set
- Six nested cups: 1/4, 1/3, 1/2, 2/3, 3/4, and 1 cup
- Common liquid sizes
- 1, 2, 4, and 8-cup capacities; 2 cups = 1 pint, 4 cups = 1 quart
- Equivalents
- 1 cup = 16 tablespoons = 48 teaspoons = 8 fluid ounces ≈ 237 ml
- International cup
- Australian, New Zealand, and South African metric cup = 250 ml; UK recipes now use grams and milliliters
Also called
Measuring Cups · Measuring Jug
Related

Peeler
Swift blade for stripping skin off fruit and vegetables

Grater
Sharp-toothed surface for shredding cheese and vegetables

Microplane
Ultra-fine rasp for citrus zest, garlic, and hard cheese

Mixing Bowl
All-purpose bowl for combining, whisking, and tossing

Whisk
Looped wires that beat air into eggs, cream, and sauces

Spatula
Flat blade for flipping, lifting, and scraping

Slotted Spoon
Pierced spoon that lifts solids and drains the liquid behind

Wooden Spoon
Gentle, heat-friendly spoon for stirring anything