Prep Tools
Instant-Read Thermometer
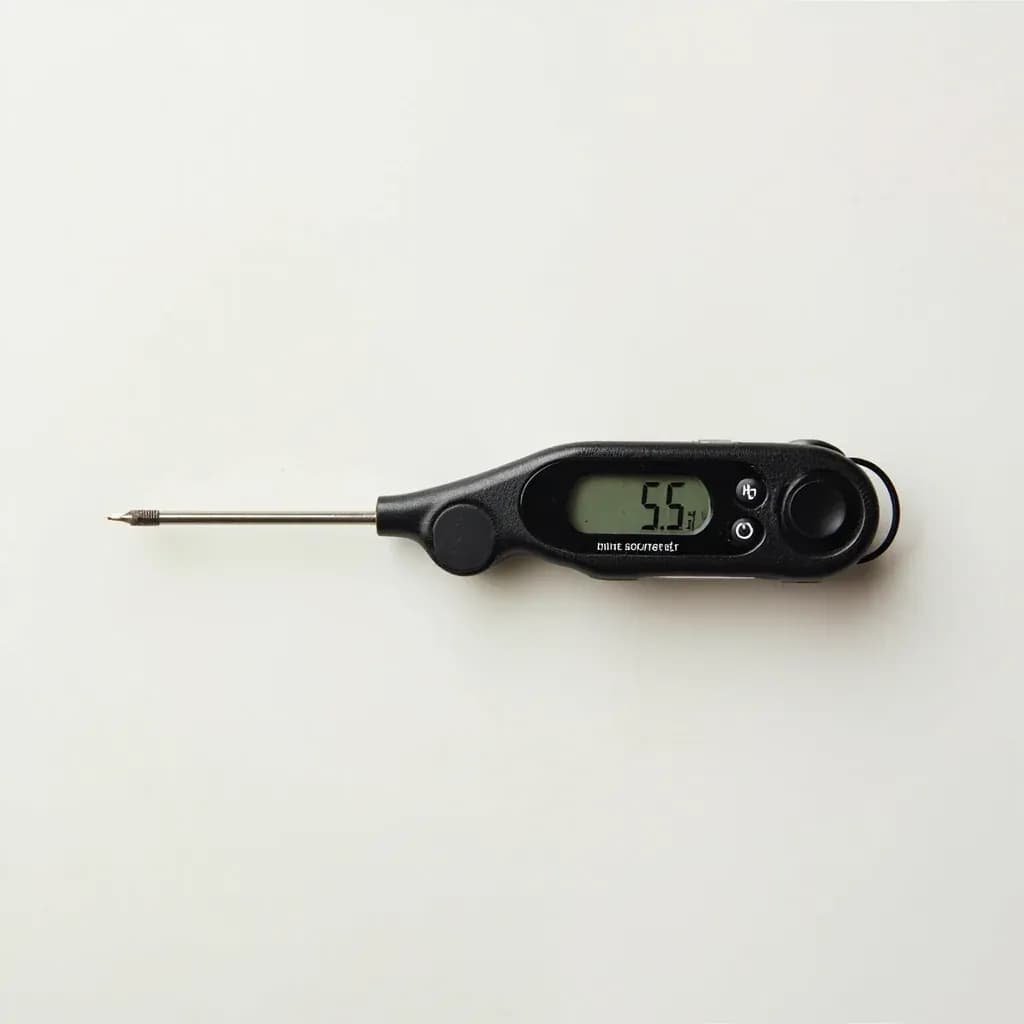
Quick-reading probe thermometer for checking doneness of meat, bread, and more.
An instant-read thermometer has a thin probe that gives a fast internal temperature reading when inserted into food, used to check doneness rather than left in during cooking. Cooks use it to verify safe temperatures for meat and poultry, judge bread and candy, and temper chocolate. Digital models read in a few seconds; it is removed between checks rather than staying in the oven.
An instant-read thermometer is a penetration probe that reports the internal temperature of food in seconds—usually 2 to 10, depending on the sensor. It is the single most useful instrument a cook can add to a kitchen drawer, because it replaces the most unreliable variable in cooking (doneness) with a hard number. Whether you are pulling a roast, judging bread, or confirming that chicken has cleared the safety line, this is the tool that turns guesswork into a controlled result.
Physically, it is a slim stainless-steel shaft (typically 4 to 6 inches long, narrowing to a 1/8- to 1/4-inch tip) attached to a handle with a display or dial. The sensor at the tip registers the temperature of whatever it touches, so the reading reflects the food at the insertion point—not the oven, not the surface. That distinction is what separates it from an infrared thermometer (surface only) and from a leave-in oven probe (designed to stay in the food during cooking). The instant-read is meant to be inserted, read, withdrawn, and cleaned, ideally once or twice near the end of cooking.
Used well, it changes how you cook. You learn that a steak hits medium-rare at 130 to 135°F and rises another 5 to 10°F while resting. You see that bread is done at 190 to 210°F internal, not when the crust looks right. You catch a ground-meat patty that looks cooked on the outside but is still below 160°F at the center. None of this is hard once you have the tool in hand; the only real learning curve is knowing where to put the probe and trusting the reading.
Alternatives
Types & varieties
Most common type; 6–10 second reads, ±1–2 °F accuracy, lower cost (~$15–$40); brands like ThermoPro, Lavatools, Taylor.
Faster 2–4 second reads and tighter ±0.5–0.7 °F accuracy; the professional benchmark (e.g., ThermoWorks Thermapen series); higher price ($50–$120+).
No battery needed; 15–60 second reads; dial face prone to fogging in hot foods; less precise; durable budget option.
Very fine 1/8 in tip for thin cuts of meat, hamburger patties, fish fillets, and pastries; minimizes the puncture hole.
Sealed body (often IP67) and reinforced shaft for high-volume kitchens; can be run under a faucet.
Units that combine instant-read with a leave-in probe, infrared surface reading, or a built-in timer.
Integrated into a carving fork; handy for grilling but slower and less accurate than dedicated probes.
Calibration and Care
A digital instant-read is reliable to about ±1 °F when new, but sensors drift, batteries weaken, and a hard drop can knock the calibration off. The fix takes a minute: fill a glass with crushed ice, add just enough cold water to make a slush, insert the probe so the tip sits in the slush (not touching the glass), and wait for the reading to settle. It should read 32 °F / 0 °C. If it doesn't, most digital models have a small calibration screw or a button-hold sequence described in the manual. Repeat every few months, or any time a reading seems suspicious.
- Ice-bath slush: crushed ice plus a splash of water, tip in the slush, target 32 °F (0 °C)
- Boiling-water check: 212 °F (100 °C) at sea level, minus roughly 1 °F for every 500 ft of altitude (water boils lower as elevation rises)
- Battery swap: change when the display dims, reads sluggishly, or returns erratic numbers
- Cleaning: hot soapy water or an alcohol wipe between uses; never the dishwasher—steam and detergent destroy the sensor
Where to Insert the Probe
The reading is only as good as the spot you choose. The goal is the geometric center of the thickest part of the food, with the tip in pure muscle (or pure crumb, for bread), not in fat, not against bone, and not touching the pan. For roasts and whole birds, slide the probe in from the end or side so the tip rests in the middle of the mass. For thin cuts—burgers, fish fillets, chicken breasts—insert horizontally from the side rather than straight down from the top; this puts the tip in the center without burying the handle in the food.
- Avoid bone: it conducts heat faster than meat and reads high
- Avoid large pockets of fat: they don't reflect muscle doneness
- For thick roasts, check in 2–3 places; heat doesn't always distribute evenly
- For bread, push the tip into the bottom-center of the loaf; 190–210 °F means the crumb is set
Choosing a Model
For most home cooks, a thermistor digital in the $15–$40 range is plenty fast and accurate. A thermocouple unit (the ThermoWorks Thermapen is the reference) reads in 2–3 seconds and holds calibration better, which matters if you check temperatures constantly or work in a professional kitchen. Analog bi-metallic dials are slow and fog-prone, but they need no batteries and can outlive every digital unit on the market. The most useful upgrades to look for are a thin tip (for minimal puncture), an auto-rotating display (so you can read it from any angle), and a waterproof body if you cook a lot of fish or work near liquids.
- Thermistor digital: 6–10 s reads, ±1–2 °F, $15–$40 — best value for most home cooks
- Thermocouple digital: 2–4 s reads, ±0.5 °F, $50–$120+ — professional benchmark
- Bi-metallic analog: 15–60 s reads, no battery, less precise — durable but slow
- Worth paying for: thin tip, auto-rotating display, waterproof rating (IP65 or higher), backlight
- Skip: built-in timers, Bluetooth, infrared modes — added cost, rarely used well
Common uses
Tips & pitfalls
- Calibrate in an ice-bath slush (crushed ice + water) before first use and periodically; the reading should be 32 °F / 0 °C.
- Insert from the side for thin items like burgers, fish fillets, and chicken breasts so the tip reaches the center without touching the pan or bone.
- Pull roasts 5–10 °F below your target — internal temperature will rise 5–10 °F during resting (carryover cooking).
- Don't leave an instant-read probe in the oven or on a hot grate unless it is specifically rated for that; most handles are heat-sensitive and can melt or give false readings.
- Wipe and sanitize the probe between raw and cooked foods to prevent cross-contamination; an alcohol wipe is fast and effective.
- A bent tip throws off readings — store in a sheath or drawer guard, and never use a damaged probe.
- If a reading seems off, retake it in a different spot — a pocket of fat or bone contact can give a false high or low.
- Avoid the dishwasher; steam and detergent can destroy the sensor and electronics, even on supposedly waterproof units.
Good to know
- Type
- Penetration probe thermometer designed to give a fast reading (typically 2–10 seconds) when inserted into food
- Typical probe length
- 4–6 in (10–15 cm) stainless-steel shaft, narrowing to a 1/8–1/4 in tip
- Response time
- Thermocouple: 2–4 s; Thermistor: 6–10 s; Bi-metallic analog: 15–60 s
- Accuracy
- ±0.5–2 °F (±0.3–1 °C) for quality digital units; bi-metallic is generally ±2–4 °F
- Sensor types
- Thermistor (most common) and thermocouple (premium); some models use thin-film sensors
- Calibration methods
- Ice-bath slush (32 °F / 0 °C) and boiling water (212 °F / 100 °C at sea level, adjusted for altitude)
- Power
- AAA or coin-cell batteries on digital models; analog requires none
- Key internal temperatures
- Beef/pork medium-rare 130–135 °F, medium 140–145 °F, well 160 °F; poultry 165 °F; ground meats 160 °F; bread 190–210 °F; fish 130–140 °F
Also called
thermometer-instant-read · digital-instant-read-thermometer · instant-thermometer · food-thermometer · digital-thermometer
Related

Peeler
Swift blade for stripping skin off fruit and vegetables

Grater
Sharp-toothed surface for shredding cheese and vegetables

Microplane
Ultra-fine rasp for citrus zest, garlic, and hard cheese

Mixing Bowl
All-purpose bowl for combining, whisking, and tossing

Whisk
Looped wires that beat air into eggs, cream, and sauces

Spatula
Flat blade for flipping, lifting, and scraping

Slotted Spoon
Pierced spoon that lifts solids and drains the liquid behind

Wooden Spoon
Gentle, heat-friendly spoon for stirring anything