Prep & Assembly
Latte Art Etching
Drawing detailed designs in microfoam with a thin tool after the milk is poured.
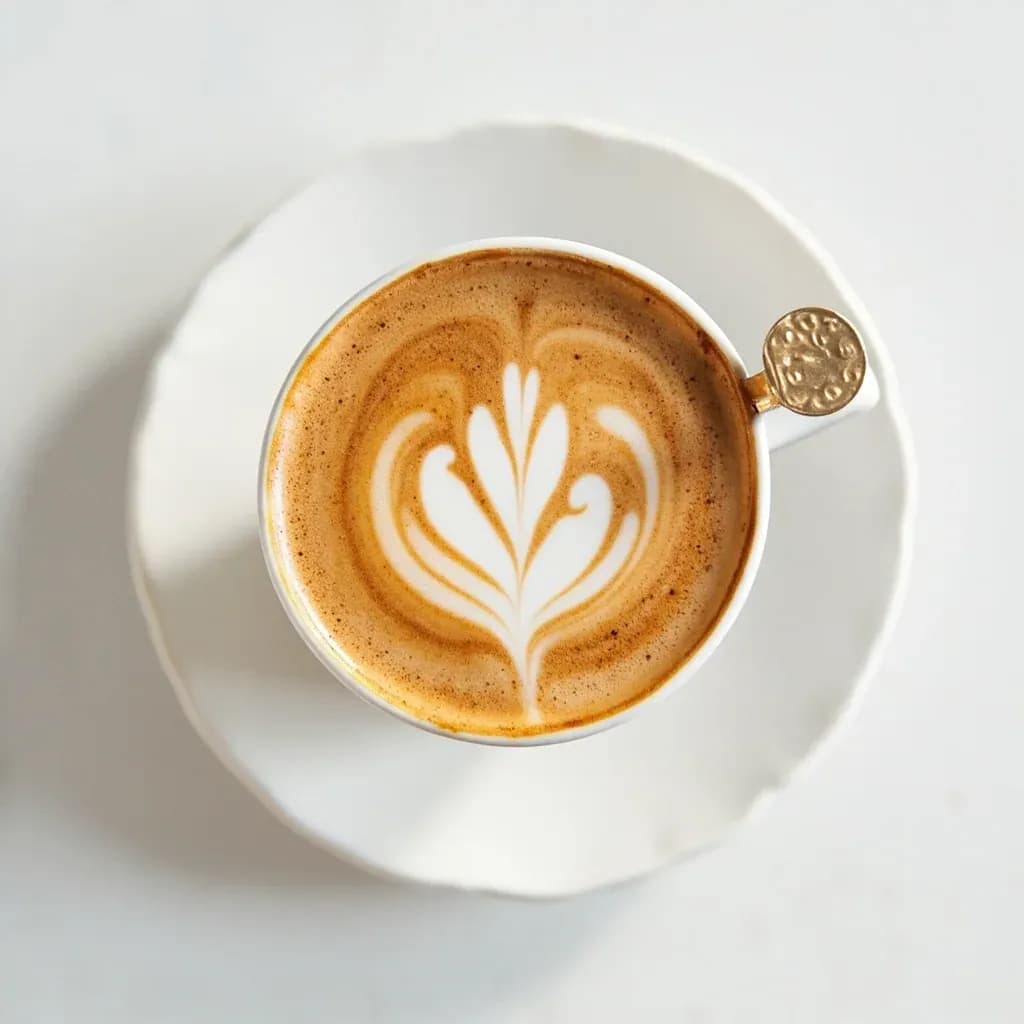
Latte art etching uses a fine pick or etching tool to draw lines and patterns in the surface of a milk-foam drink, often dragging crema or chocolate sauce to create detailed images. Unlike free-pour art, which is formed entirely by the pour, etching adds precision and lets the barista make shapes the pour alone cannot. It is typically done quickly before the foam settles.
Latte art etching is a post-pour surface decoration in which a fine tool is dragged through the white microfoam cap of an espresso drink to expose the darker crema beneath, using that contrast to draw lines, faces, lettering, or full illustrations. Where free-pour latte art manipulates foam in the act of pouring, etching manipulates it after the cup is full, which lets a barista render detail that the physics of a pitcher simply cannot produce — eyes inside a heart, hatching for shading, a customer's name across the surface. It works only on drinks with high tonal contrast: a stiff, pale microfoam floating over deep brown crema, ideally in a wide cup that gives the tool room to move.
The technique is forgiving on simple marks and punishing on ambitious ones. A toothpick can scratch a smiley face into a cappuccino in seconds, but a portrait demands glossy, well-textured foam, a fresh fine-tipped scribe, light pressure, and a steady hand working over a flat, level surface. Because the etched lines relax as the foam settles and the crema slowly diffuses back through the surface, every design is on a clock: it should be finished, served, and photographed within roughly a minute.
Although some free-pour purists once dismissed etching as outside the discipline, it is now a recognized category in its own right, regularly featured in competitions, training programs, and café branding. It is also one of the best teaching tools for foam structure, because the design reveals immediately whether the milk was steamed correctly — loose, bubbly foam collapses the moment the tool touches it.
- Difficulty
- Medium
Types & varieties
Single-stroke drawings — faces, cats, swans, simple logos — made with one continuous motion of a fine tip
Multi-line illustrations built up with several passes, including hatching, shading, and texture
Broad areas of foam cut away so the design sits in white against the crema, inverting the usual dark-on-white look
Series of small dots or flicks used for fur, shadows, and tonal effects rather than continuous lines
Café branding, customer names, or short words applied for service or photography
A free-pour base such as a rosetta, tulip, or heart, finished with etched details like a stem, leaves, or a face inside a heart
How to do it
- 1
Pull the espresso and texture the milk
Pull a fresh espresso into a wide cup — a cappuccino bowl or wide latte mug works best — and steam milk to a glossy, paint-like microfoam with no visible bubbles. The foam should be stiff enough that a spoon would sit on the surface.
- 2
Pour to a flat, white surface
Free-pour so the drink ends with an even, smooth layer of white microfoam covering the crema. Avoid residual bubbles or a domed surface; a flat canvas is essential for clean etched lines.
- 3
Set the cup on a stable, flat surface
Place the cup on a level counter or non-slip mat. If you need a working angle, tilt the cup toward you rather than holding it in hand, which causes the liquid to slosh and smudge the design.
- 4
Choose and prepare the tool
Select a fine-tipped etcher or scribe for line work, a slightly broader tip for negative-space cuts, or a toothpick for very simple marks. Wipe the tip clean before it touches the foam.
- 5
Visualize, then commit in one motion
Plan the starting point and stroke in your head. Place the tool on the foam, apply light pressure, and draw in one confident motion — hesitation leaves visible drag marks in the crema.
- 6
Build detail in layers
For portraits or shaded work, add hatching, dots, or fine secondary lines after the main outline. Always work outward from completed areas so your hand does not cross finished lines.
- 7
Wipe the tool and recrisp the lines
Pause briefly to wipe crema from the tip and inspect contrast. Touch up any softened edges with a clean pass before the foam relaxes further.
- 8
Serve and photograph immediately
Deliver the drink, or shoot it from directly overhead, within about a minute. Etched designs begin to blur as the foam settles and the crema diffuses back to the surface.
Why the technique depends on contrast
Etching is not really drawing on the foam; it is drawing on the interface between foam and crema. The tool only needs to break the surface tension of the microfoam and push it aside, and the dark liquid below does the visual work. That is why the drink must look like a sheet of white paper laid over a dark photograph: any color similarity between the two layers — from a very light roast, from syrups stirred into the milk, or from a thin, translucent foam — flattens the design into invisibility. Stiff, glossy foam also matters mechanically, because loose foam collapses around the tool and the line never forms cleanly in the first place.
- Use a wide cup such as a cappuccino bowl so the tool has room to maneuver without dragging through the rim
- Pour to a flat, even surface; a domed foam cap distorts every line you try to draw
- Avoid flavored syrups and very light-roast coffees that reduce the crema-to-foam contrast
- Steam milk to a glossy, paint-like texture with no visible bubbles; it should be firm enough to support a spoon on the surface
Common uses
Tips & pitfalls
- Pour microfoam that is glossy and stiff enough to hold a smooth surface; loose, bubbly foam collapses the moment the tool touches it.
- Use a fresh, sharp, fine-tipped tool — dull or wide tips smear the foam instead of cutting clean lines.
- Hold the cup on a flat surface or tilt it toward you rather than chasing the design with awkward wrist movements.
- Use light pressure: the tool should glide through the surface foam, not dig into the crema.
- Work from one side to the other so your hand does not cross finished areas and smudge them.
- Plan the design before the tool touches the cup; hesitation leaves visible drag marks in the crema.
- Finish and serve within about 60 seconds — etched designs soften quickly as the foam relaxes.
- Wipe the tool between drinks to keep lines crisp and avoid dragging crema into adjacent foam.
- Warm metal scribes slightly so they don't chill and contract the foam on contact.
- Photograph from directly above for accurate designs; shallow angles exaggerate perspective distortion.
Good to know
- Technique type
- Post-pour surface decoration applied after milk is poured
- Media worked on
- Espresso-based drinks with a stiff, glossy microfoam cap — lattes, cappuccinos, and flat whites served in wide cups
- How it works
- A fine tool displaces the white microfoam to expose the darker crema beneath, creating tonal contrast
- Typical tools
- Latte art etching pen, metal scribe or needle, wooden coffee stirrer, toothpick, cake tester, or a clean thermometer probe
- Best milk choice
- Whole milk, or any high-fat, high-protein milk, for the firmest, most paintable microfoam
- Skill level
- Beginner-friendly for simple marks; advanced for detailed portraits and lettering
- Time per drink
- 5–60 seconds once practiced; complete the design before the foam begins to settle
- Common limitation
- Etched lines soften and blur as the microfoam relaxes and crema diffuses back to the surface
- Origin
- Evolved within the specialty coffee scene in the 2010s as free-pour latte art reached its complexity ceiling and social media drove demand for photographic designs
- Featured in
- Specialty cafés, latte art competitions (including the World Latte Art Championship), and barista training programs
Also called
coffee etching · milk foam etching
Related

Whisk
Beat ingredients smooth and aerated with a looping wire motion

Sift
Pass dry ingredients through mesh to aerate and remove lumps

Strain
Pour through mesh to separate solids from liquid for a smooth result

Filter
Pass liquid through fine material to clarify out the smallest particles

Rice
Press cooked potatoes through small holes for fluffy, lump-free texture

Mash
Crush soft cooked food into a rustic, creamy purée

Grind
Crush food into a coarse to fine texture, from spices to meat

Grate
Shred food into fine bits against a sharp-toothed surface