Prep & Assembly
Latte Art
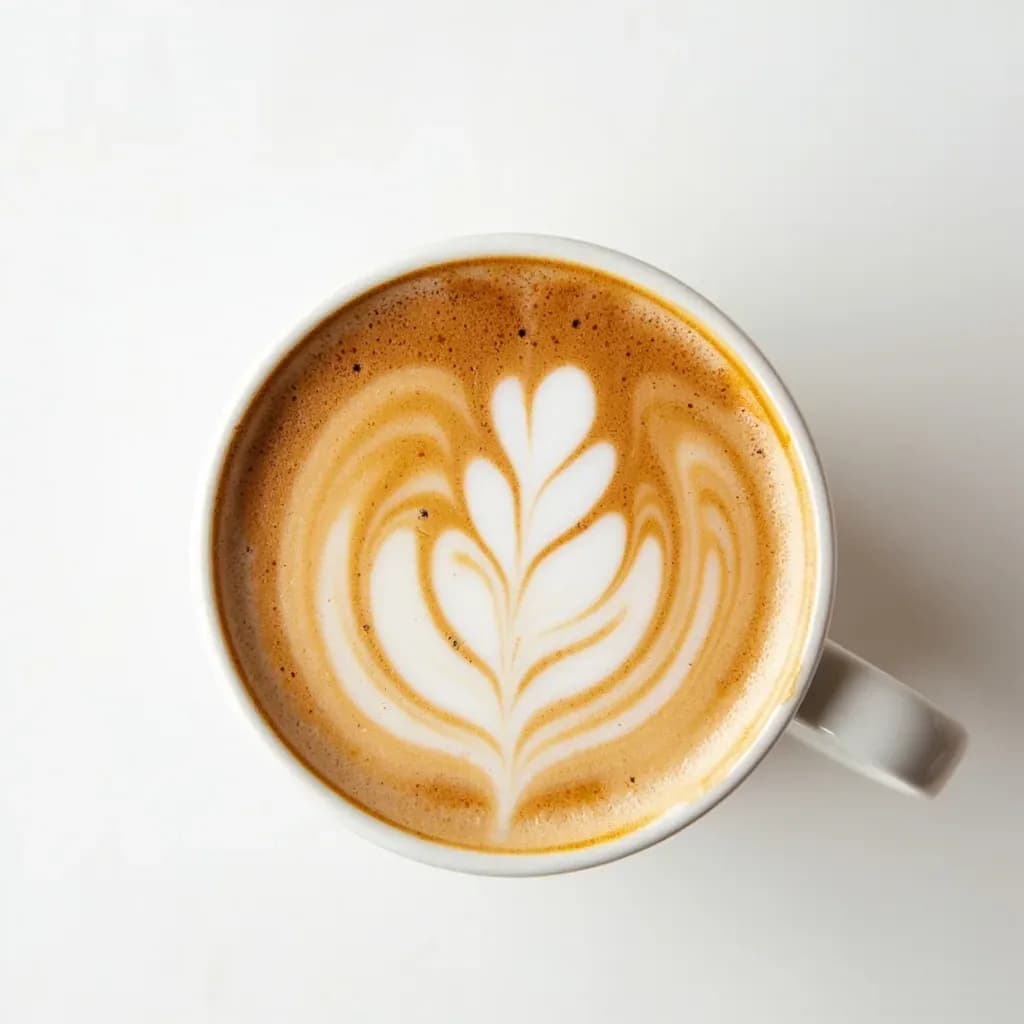
Pouring steamed milk into espresso to draw patterns in the crema.
Latte art is the barista technique of pouring finely textured steamed milk into espresso so the contrast between crema and microfoam forms patterns like hearts, rosettas, and tulips. It depends on smooth, glossy microfoam and controlled pour height and speed. Beyond looks, good latte art signals well-steamed milk integrated evenly with the coffee.
Latte art is the practice of pouring steamed milk into a freshly pulled shot of espresso so that milk and crema separate on the surface, producing a visible pattern. The contrast comes from the mechanics of the pour itself: thin, glossy microfoam floats while denser liquid sinks, and the barista uses pour height, spout position, and wrist movement to push white shapes through a tan canvas. Beyond decoration, a clean, symmetrical design is the most reliable visual proof that the espresso was properly extracted and the milk correctly textured — a muddy, asymmetric, or blobby pour almost always points to a problem upstream.
The modern form of the craft took shape in the late 1980s in Seattle, where David Schomer refined the free-pour technique and described it in his 1996 book. What began in a handful of coffee bars has since become a near-universal benchmark of café quality, taught in barista programs and judged in competitions worldwide. The skill runs from a simple heart, achievable after a few hours of focused practice, to rosettas and tulips that demand consistent repetition before they survive the pace of real service.
Two prerequisites must be in place before any pattern is possible. The espresso must carry a thick, stable crema — typically a double shot extracted in 25–30 seconds. The milk must be steamed to silky microfoam at 140–160°F (60–71°C), with the texture of wet paint rather than stiffened froth. Without either, the canvas and the ink are both wrong, and no amount of wrist technique will rescue the design.
- Difficulty
- Hard
Types & varieties
The entry-level pattern; a steady central pour that pushes a single white dot forward through the crema and closes with a straight pull-through.
Built by wiggling the pitcher side-to-side in short, even strokes while slowly walking it back, then closing with a clean pull-through. The most iconic latte art design.
A stacked series of small dots or nested heart shapes finished with a single pull-through, requiring controlled flow reduction between layers.
An advanced variation combining a rosetta body with a curved neck and head, produced by subtle changes in pitcher height and spout pressure.
A small leaf-like rosetta sitting on a rounded base; sometimes called a 'kitten' or 'bunny' depending on the café.
Beginner-friendly pours that rely on shaping two ears with the spout before closing the body into a rounded form.
Patterns drawn into already-poured foam with a thermometer stylus, toothpick, or latte art pen. Technically not free pour, but a common café decoration.
How to do it
- 1
Pull a fresh espresso shot
Extract a double shot (about 18–22 g in, 36–40 g out, in 25–30 seconds) into a warmed cup. The crema should be thick, tiger-striped, and a deep reddish-brown. Flat, pale, or patchy crema will not hold a pattern, and no pouring technique can compensate for it.
- 2
Steam milk to silky microfoam
Fill a cold pitcher about one-third full. Position the steam wand tip just below the milk surface and introduce air for 3–5 seconds — a soft hiss, not a screaming roar — then drop the tip deeper and angle the pitcher to roll the milk in a whirlpool. Stop at 140–160°F (60–71°C). The surface should look like wet paint with a glossy sheen and no visible bubbles.
- 3
Settle and tap the pitcher
Tap the pitcher firmly on the counter once or twice to pop any large bubbles, then swirl the milk to integrate the foam and liquid into a uniform, pourable texture. Properly textured milk should flow like thin pancake batter — not pour in a chunky, foam-first way.
- 4
Position the cup and pitcher
Hold the cup tilted slightly toward you. Bring the pitcher spout to the center of the cup, just above the crema — about 1–2 cm — and align the spout so its tip points along the cup's vertical axis. This alignment is what keeps the eventual design centered.
- 5
Begin the base pour
Start pouring from a slightly higher position (4–5 cm) with a thin, steady stream. This sinks the milk under the crema and blends the espresso. Keep pouring until the cup is roughly half full and the liquid turns a uniform light tan — this tan layer is the canvas the white pattern will sit on.
- 6
Drop close and form the pattern
Lower the pitcher spout to about 1 cm above the surface and bring it to one side of the cup. For a heart: pour a single white dot in the center and push straight through it with a quick forward motion of the pitcher. For a rosetta: wiggle the pitcher side-to-side in short, even strokes while slowly walking the pitcher straight back, then finish by pulling through the narrow end in one clean line.
- 7
Close the design and serve
As the cup nears full, raise the pitcher slightly and reduce flow to a thin stream to cut the pattern cleanly across the surface. Stop pouring, set the pitcher down, and serve immediately — the design will start to relax and the contrast will fade as the drink sits.
Reading the Pattern: Latte Art as a Diagnostic
Latte art is as much a sensory diagnostic as a decorative skill. Foam texture, crema condition, pour height, and cup geometry all reveal themselves in the final design, which is why competitions judge both the contrast and symmetry of the pattern and the taste of the drink beneath it.
- A sharp, high-contrast design with crisp white lines on deep tan crema signals well-textured microfoam and a fresh, properly extracted shot.
- A muddy, diffused pattern that loses its outline within seconds usually means oversteamed milk (too hot, or aerated too long), stale espresso, or a crema that has already broken down.
- A design that drifts to one side or sits off-center typically comes from an inconsistent pour height, a pitcher spout that is not aligned with the cup's axis, or a cup that was not leveled as it filled.
- Large visible bubbles popping through the pattern point to under-integrated foam — the milk needs another firm tap and a swirl before pouring.
- If the white shape sinks rather than floats, the milk is likely too thin (under-aerated) or the espresso shot is old and the crema has thinned.
Milk Science for the Pour
The texture of steamed milk is what makes a pattern hold or collapse. Understanding the window you are aiming for is more useful than memorizing numbers.
- Whole milk (around 3.25% fat) produces the glossiest, most stable foam and the best contrast; the fat carries flavor and slows drainage.
- Non-fat milk aerates more voluminously and looks impressive in the pitcher, but the foam breaks down faster and the pattern fades more quickly in the cup.
- Oat, soy, and other plant milks vary widely; barista blends are formulated with added fats, sugars, and proteins to behave more like dairy when steamed.
- The target texture is glossy and paint-like, with no visible bubbles — if the surface looks like shaving cream or stiff marshmallow, it has been over-aerated and will not draw cleanly.
- Many experienced baristas stop steaming just before the pitcher becomes too hot to hold, trading a few degrees of temperature for sweeter, denser microfoam.
Common uses
Tips & pitfalls
- Aim for silky, paint-like microfoam. If the milk looks like shaving cream or marshmallow, it has been over-aerated and will not draw cleanly — start a new pitcher rather than fight bad foam.
- Start the pitcher higher to sink the milk under the crema and blend the drink, then drop the spout close to the surface once the cup is about half full to begin drawing. Reversing this order produces a muddy, foam-on-top pour with no contrast.
- Keep the movement in the wrist, not the whole arm. The pitcher should pivot from the wrist rather than travel in long sweeps across the cup.
- Keep the cup tilted slightly toward you and level it as the pattern forms. Leveling mid-pour is what keeps the design symmetrical and centered rather than drifting off to one side.
- Pull through the design at the end with a quick, straight line of milk to 'cut' the pattern and close it cleanly — this final stroke is what defines the shape's edge.
- For rosettas, 'walk' the pitcher backward in small steps while wiggling so the leaf stays proportionate to the cup. Walking too fast makes a thin, sparse leaf; walking too slowly makes a wide, blob-like one.
- Use whole milk (about 3.25% fat) for the glossiest, most stable foam and the longest-lasting contrast. Non-fat foams more voluminously but breaks faster; oat and other plant milks need a barista blend formulated for steaming.
- Clean the steam wand and purge it before and after every use — milk fat and residue clinging to the tip will ruin foam quality, flavor, and eventually clog the wand.
- Stop steaming when the pitcher becomes too hot to hold comfortably; many pros stop just before that point for sweeter, denser microfoam.
- Practice consistently with the same pitcher, machine, and cup so muscle memory transfers reliably to service. Many trainers drill with water and a drop of dish soap in a pitcher to rehearse wrist control without wasting milk.
Good to know
- Origin
- Modern form developed in the late 1980s in Seattle, refined by David Schomer and published in his 1996 book.
- Prerequisites
- Properly textured microfoam and a double espresso shot with thick, stable crema.
- Ideal milk temperature
- 140–160°F (60–71°C); hotter milk loses sweetness and develops a scalded flavor.
- Key tools
- Espresso machine with steam wand, stainless steel milk pitcher (typically 12–20 oz / 350–600 ml), and a cup with a rounded interior.
- Foundational patterns
- Heart (cuore) and Rosetta, also called fern or foglia.
- Skill categories
- Free pour (basic and advanced) and etching with a stylus — a separate decorative method.
- Cups that work best
- Rounded, wide-mouthed cups (cappuccino cups) for hearts; narrower tulip or latte glasses for rosettas.
- Practice drill
- Water with a drop of dish soap in a pitcher is often used to simulate milk flow and train wrist control without wasting milk.
Also called
Free Pour Art
Related

Whisk
Beat ingredients smooth and aerated with a looping wire motion

Sift
Pass dry ingredients through mesh to aerate and remove lumps

Strain
Pour through mesh to separate solids from liquid for a smooth result

Filter
Pass liquid through fine material to clarify out the smallest particles

Rice
Press cooked potatoes through small holes for fluffy, lump-free texture

Mash
Crush soft cooked food into a rustic, creamy purée

Grind
Crush food into a coarse to fine texture, from spices to meat

Grate
Shred food into fine bits against a sharp-toothed surface