Water & Steam
Spiral Pour Technique
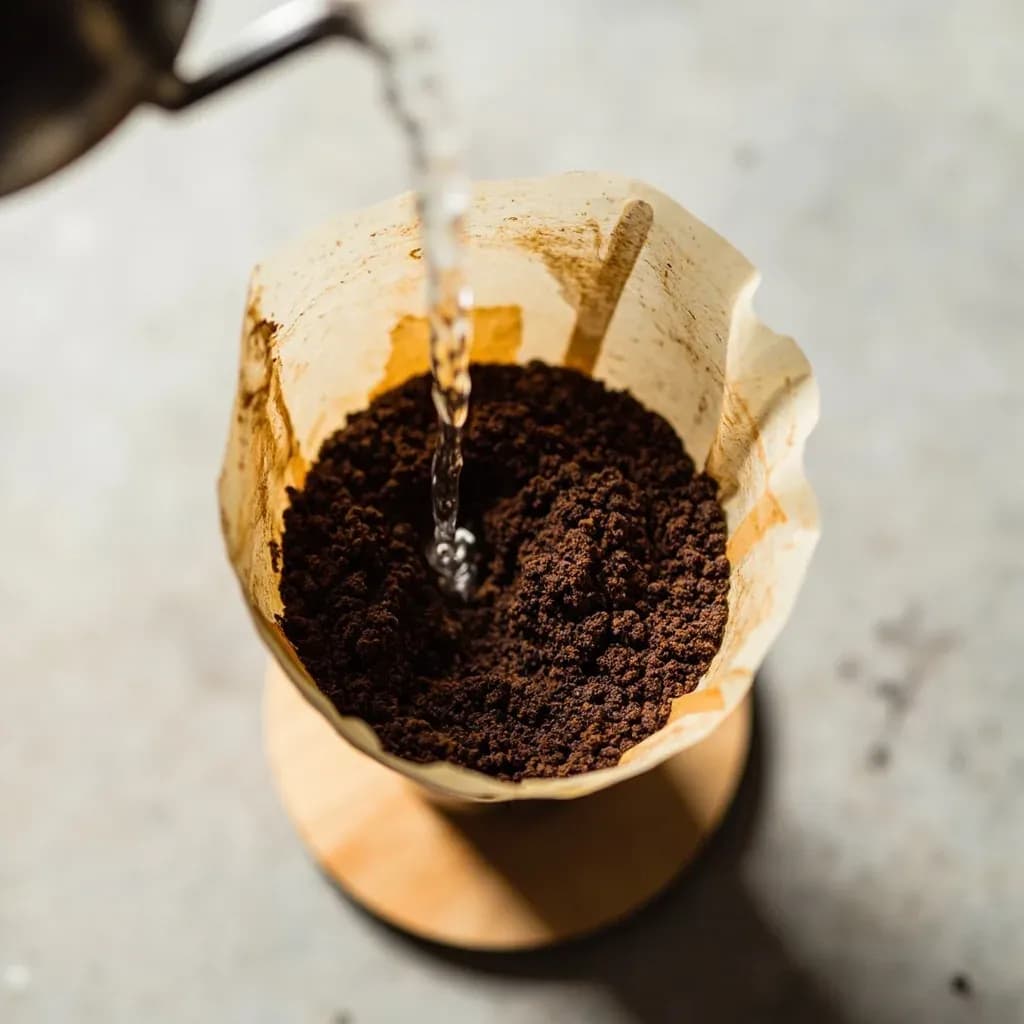
Pouring hot water in slow concentric spirals over coffee grounds for an even pour-over extraction.
The spiral pour guides hot water over a bed of coffee in slow, controlled concentric circles, starting at the center and working outward, so every ground is saturated evenly. Keeping the pour gentle and away from the filter edges prevents water bypassing the coffee and weakening the brew. It is the core motion of pour-over coffee, usually beginning with a bloom pour and continuing in measured pulses to control the total brew time.
The spiral pour is the workhorse technique of manual pour-over coffee: a slow, continuous stream of water traced in concentric circles over the coffee bed, beginning at the center and widening outward, or sometimes working inward from the edges. The principle is simple but consequential — by moving the pour continuously across the surface, the brewer keeps the bed evenly saturated and avoids the channeling that occurs when water lands in a single spot and is forced to find its own path through the grounds. Even saturation means even extraction: every particle of coffee sees roughly the same contact time with water at the same temperature, which is the difference between a balanced, sweet cup and one that tastes sour on one side and harshly bitter on the other.
The technique developed alongside Japanese pour-over culture and was codified in the training materials that accompanied the Hario V60 as it spread through specialty coffee in the early 2000s. It became the default method taught in barista curricula and in World Barista Championship preparation, partly because the visible spiral gives the brewer immediate feedback about pour rate, bed level, and extraction. A gooseneck kettle is strongly recommended for the technique to work as intended: only a narrow, controllable spout can reliably deliver a steady 6–8 g/second stream and trace a consistent circle without flooding one side of the bed.
In practice, the spiral works because coffee grounds extract in contact with water rather than under pressure. By keeping the slurry level steady at roughly half the dripper's height and the pour rate constant, the brewer maintains a stable contact time across the bed. The shape of the pour matters less than its consistency: a clean center-out spiral that stops a few millimeters short of the paper wall will produce a more even cup than a sloppy continuous stream that wets the filter edge and lets water bypass the grounds entirely.
- Difficulty
- Medium
Types & varieties
Starts at the center of the bed and spirals outward toward the edges, finishing back near the center. The most common form and the default in most barista training.
Begins at the outer ring and spirals inward, used to re-saturate the edges if the bed pulls away from the paper during the main pour.
A single uninterrupted pour in one expanding (or contracting) circle pattern with no pauses between stages.
Two or three short pours in spiral pattern with 10–20 second rests between, used to extend contact time on lighter, denser roasts.
Modern alternative using straight center pours with no spiral; frequently compared to the spiral method because it simplifies pour rate control and reduces channeling on some drippers.
How to do it
- 1
Rinse the filter and preheat
Place the paper filter in the dripper, set it on the server or cup, and pour hot water through to wet the filter and preheat the vessel. Discard the rinse water completely.
- 2
Grind and dose
Weigh the coffee (typically 15–20 g for a single cup) and grind to a medium-fine consistency, even and salt-like. Add to the rinsed filter and level the bed with a gentle shake; do not tamp.
- 3
Bloom
Start the timer and pour roughly 2–3× the coffee weight in water directly onto the center of the bed, just enough to wet all the grounds. Let the bed rest 30–45 seconds; the surface should look like wet sand with no dry pockets, and a gentle swirl helps even out the slurry.
- 4
Main pour — center-out spiral
Resume pouring in a slow, continuous spiral starting at the center of the bed and expanding outward. Stop the spiral a few millimeters before the paper wall so water does not run down the filter edge and bypass the grounds. Keep the pour rate steady at about 6–8 g per second and the slurry level consistent at roughly half the dripper's height.
- 5
Maintain and finish
If the pour reaches the target water weight before the drawdown finishes, pause briefly and continue; if it finishes too early, slow the pour or extend the spiral with a second pass. Aim to hit the final water weight (e.g., 270 g) by around 2:30–3:00 on the timer.
- 6
Drawdown and serve
Allow the bed to draw down completely, typically finishing between 2:45 and 3:30 for a single cup. Remove the dripper, swirl the server gently to even out the brew, and serve or taste immediately.
Reading the bed during the pour
The surface of the slurry tells you almost everything you need to know about whether the extraction is on track. A healthy bed looks like wet, even sand; a struggling bed telegraphs its problems through its shape and level.
- Bed pulls away from the paper wall: the edges are drying out. Do a quick edge-in spiral pour to re-saturate, and on the next brew coarsen the grind a touch.
- Slurry level drops faster than you pour: the pour rate is too slow or the bed is channelling. Speed up slightly and make sure the grounds were leveled in the dripper.
- Slurry level keeps rising above your target: the grind is too fine, the dose is too high, or the pour is too fast. Slow the kettle and check your grind setting.
- Drawdown stalls after the main pour is finished: the bed has compacted. Next time, grind one or two clicks coarser and avoid tapping or tamping the dose.
- Bed drains before you reach target water weight: grind is too coarse or the dose is too low for the dripper. Increase dose slightly or grind finer.
Common uses
Tips & pitfalls
- Always rinse the paper filter with hot water and discard the rinse — this removes papery taste and preheats the dripper and server so the first contact with coffee is at full brewing temperature.
- Keep the spiral a few millimeters short of the paper wall; water that runs down the filter edge bypasses the coffee bed and dilutes the cup without contributing extraction.
- Target a pour rate of roughly 6–8 g per second for a single cup — too fast floods the bed and causes channeling, too slow stalls the drawdown and over-extracts the fines.
- Hold the kettle spout low, only 2–4 cm above the bed, for control; raising it higher is useful only to gently break up dry spots, not as a default position.
- Aim to keep the slurry level steady at about half the dripper's height; if it drains dry between pours the bed is channelling or the grind is too coarse.
- Use a scale with a built-in timer and target both a final water weight and a final time (for example, 270 g in by 2:45–3:00) so you can compare brews objectively when dialing in.
- Bloom thoroughly: pour about 2× the coffee weight, give the bed a gentle swirl, and wait the full 30–45 seconds for CO₂ to degas — a rushed bloom leaves trapped gas that repels water and causes uneven extraction.
- For lighter, denser roasts that resist extraction, slow the pour rate and consider switching to a pour-pause spiral with 10–20 second rests to extend contact time without driving the fines into the filter.
Good to know
- Compatible brewers
- Hario V60, Kalita Wave, Chemex, Melitta, and other cone or flat-bottom drippers
- Coffee-to-water ratio
- 1:15 to 1:17 (e.g., 18 g coffee to 270–300 g water)
- Water temperature
- 90–96 °C / 195–205 °F
- Grind size
- Medium-fine, similar to table salt; even particle distribution is critical
- Total brew time
- 2:30–3:30 for a single cup, depending on dose and grind
- Bloom pour
- Roughly 2–3× the coffee weight, rested 30–45 seconds before the main pour
- Kettle type
- Gooseneck spout recommended for flow control
- Difficulty
- Beginner to intermediate; consistent pour rate and timing are the main skills
Also called
Pour-Over Pouring · spiral pour · concentric pour
Dishes that rely on it

Related

Boil
Cook in vigorously bubbling liquid at full rolling heat

Simmer
Hold liquid at a gentle shimmer for tender, unhurried cooking

Poach
Cook gently in barely-trembling liquid for silky, tender results

Steam
Cook in rising vapor to keep color, nutrients, and shape intact

Blanch
Plunge briefly in boiling water, then shock cold to lock color

Braise
Sear, then cook slow in a little liquid until fall-apart tender

Stew
Simmer bite-sized pieces fully submerged into a rich, unified pot

Sous-Vide
Seal and cook in precise warm water for edge-to-edge doneness