Prep & Assembly
Building & Stacking Height
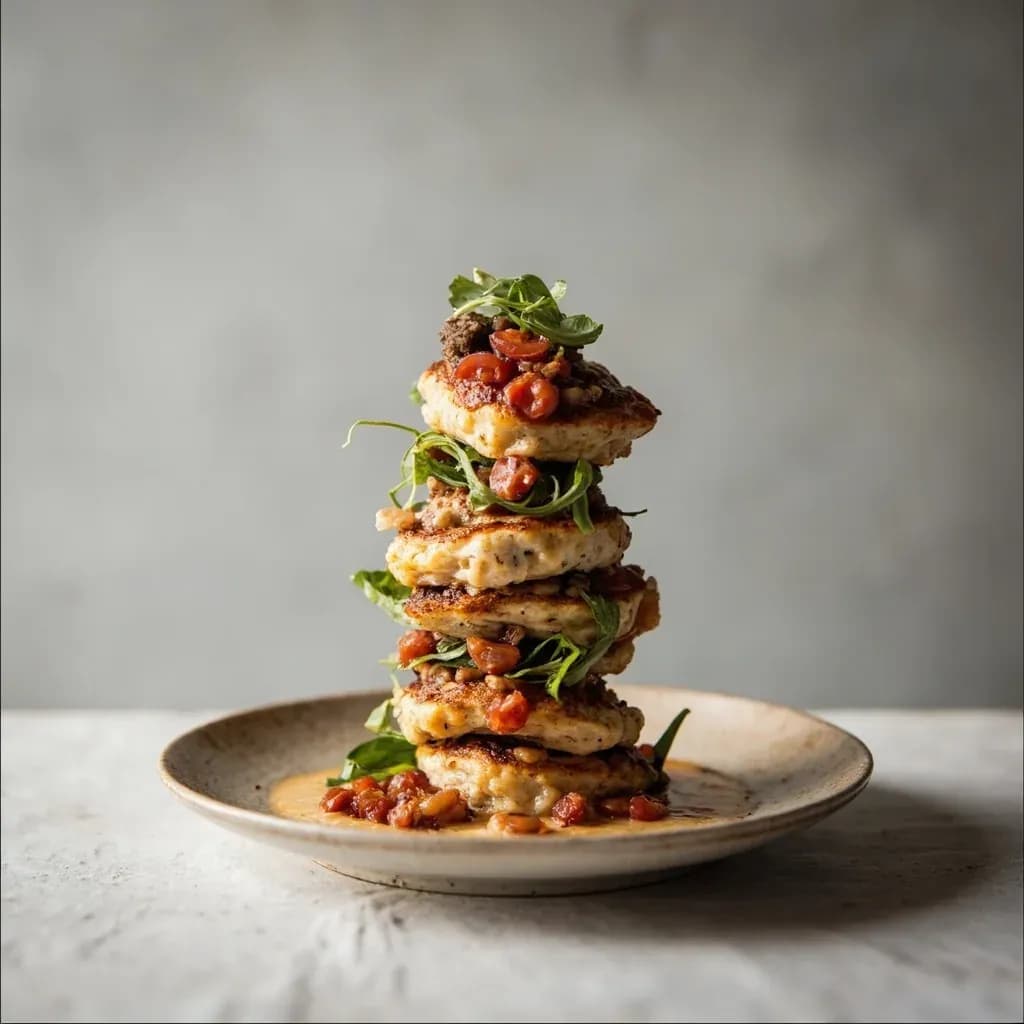
Plating components vertically to create height, structure, and visual drama on the plate.
Building and stacking height is a plating technique that layers and props components upward rather than spreading them flat, giving a dish architectural presence. Stable bases, rings, and supports keep the stack from collapsing while it is carried and served. Beyond looks, deliberate stacking can also separate textures and temperatures within a plate.
Building height into a plated dish is one of the oldest moves in cookery, lifted directly from pastry entremets and mille-feuilles and re-tooled for savory work during the nouvelle cuisine movement of the 1970s. The technique rests on a visual truth the diner processes before the first bite: vertical extension reads as importance, and a stack forces the eye to a single focal point that the fork must then negotiate. Done well, it lets a cook present multiple temperatures, textures, and sauces in one composition that reveals itself in sequence as the plate is eaten from the top down.
The mechanics are unforgiving. Gravity is constant, and moisture works against the structure from both directions — a wet plate wicks water up into the base, while steam and condensation from hot components travel downward through porous layers — so the discipline rewards cooks who think in terms of structural engineering: a heavy, dry foundation, concentric or stepped layers in descending density, and a delicate crown added at the last possible second. Heat behaves differently too — a tall stack cools at its center while the outer edges remain warm — which is why pastry chefs have long led this conversation and why modernist cooks reached for gelling agents, dehydrated powders, and brittle supports to keep things upright.
Contemporary use is more restrained than the 2005–2012 peak, when nearly every course on nearly every tasting menu aspired to be a tower. Today's cooks tend to deploy height as punctuation — one or two dramatic vertical pieces per menu — and judge the work not by how it photographs from above but by whether a diner can still taste every layer in two or three clean bites.
- Difficulty
- Medium
Types & varieties
Flat structural sheets (tuile, phyllo, potato rosti, eggplant mille-feuille) layered with mousses or purées between them; equally suited to savory and sweet.
Ring-molded base built up with a heavy foundation (risotto, polenta, crushed-ice–stabilized timbale) topped with a delicate protein or garnish.
A fragile arched or curved element (isomalt cage, tuile, parmesan crisp, black-sesame tuile) holds or crowns the composition.
A cocktail pick, sugar stick, or breadstick skewers stacked components into a single edible column, often served as a canapé or amuse-bouche.
Three quenelles of contrasting elements stacked diagonally, a signature move associated with Charlie Trotter.
Foams, gels, powders, and spherified elements layered with tweezers in the El Bulli / Alinea tradition.
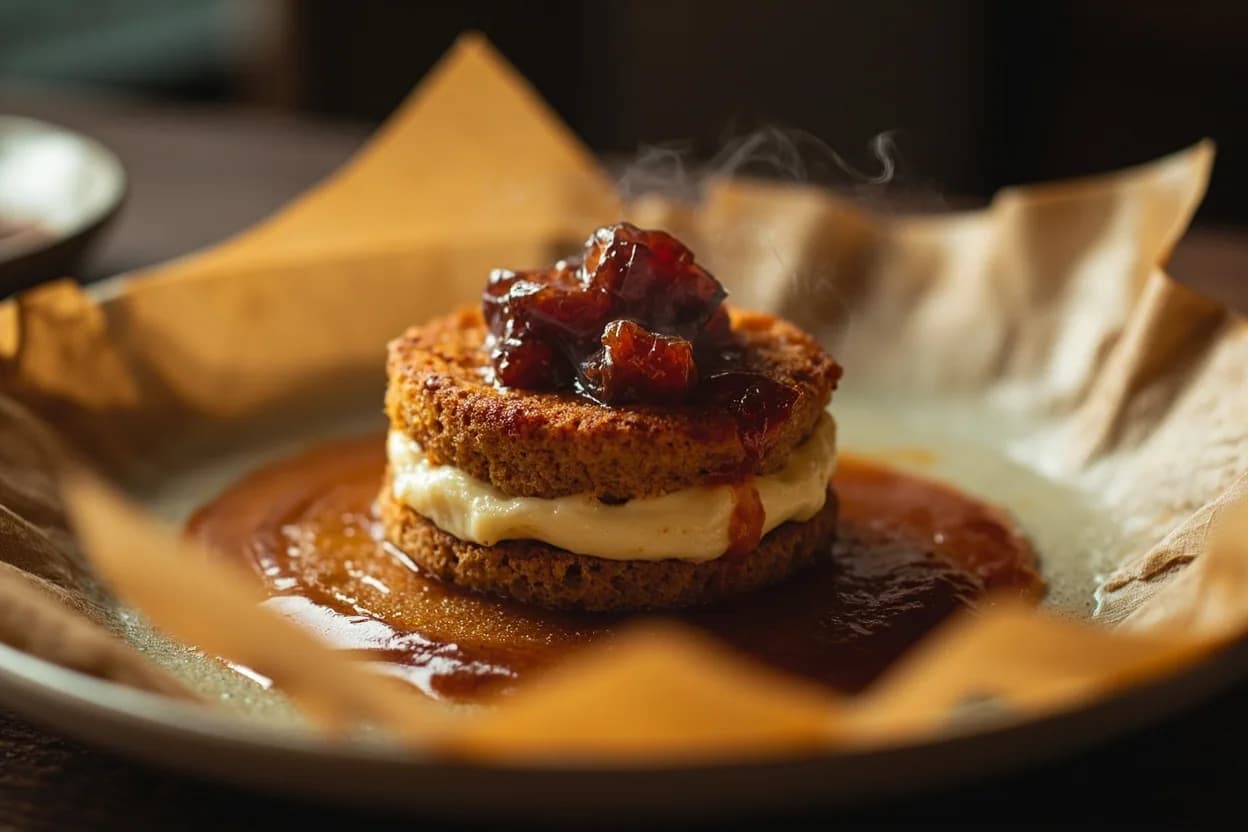
A cylindrical or geometric cake built of multiple thin mousse, biscuit, and insert layers — technically identical to savory stacking but baked, frozen, and glazed.
How to do it
- 1
Plan the architecture
Decide the focal protein or hero element, then choose 2–4 supporting components that contrast in color, texture, and temperature. Sketch a side profile in your head: what is the heaviest item, and what will sit at the very top? Set a realistic target height of 2–5 cm for hot savory plates, up to 8–10 cm for pastry.
- 2
Prepare all components in advance
Have every element cooked, seasoned, and held at correct temperature. Crisp supports (tuiles, crackers, phyllo, sugar work) must be fully cooled and dry. Purées and mousses should be warm but thick enough to hold weight. Sauces go into squeeze bottles or spoons, not ladles.
- 3
Choose and prep the plate
Wipe the plate bone-dry. Apply a sauce pool, smear, or series of dots first — these are the 'shadow' under the building. A wet plate will wick moisture into the base and cause collapse.
- 4
Place the foundation
Using an offset spatula, ring mold, or large spoon, drop the heaviest, most stable component (timbaled grain, crushed-ice–set timbale, dense purée, or cooked vegetable slice) onto the plate. Press lightly to flatten the contact surface — a flat base prevents wobble.
- 5
Build the middle layers
Pipe or spoon the next components in concentric or aligned circles, slightly smaller in diameter than the layer below for a stepped tower, or equal diameter for a flush stack. Twist the spoon or squeeze bottle to release cleanly and avoid smearing the layer beneath.
- 6
Set the hero element
Place the main protein (or feature garnish for a vegetable course) carefully on top, off-center for dynamic asymmetry, dead-center for classical symmetry. Use tweezers for small items; for larger items slide an offset spatula in from the side.
- 7
Crown with a structural accent
Add a delicate upright element — a tuile, microgreen tuft, herb sprig, edible flower, or sugar cage — only at the moment of service. This final element is the most fragile and should be carried separately on a small tray if you are plating many covers.
- 8
Final wipe and eye-level check
Wipe any splatter from the rim with a clean damp towel. Crouch to plate height and check the silhouette. Adjust if the composition leans, looks flat, or hides a hero component. Send immediately.
The Structural Toolkit
Every stack is a small building project, and the cook is both architect and contractor. The materials fall into three families, and most successful compositions draw on all three at once.
- Foundations: dense purées, ring-molded grains (risotto, polenta, couscous), composed vegetable terrines, potato or bread rounds, crushed-ice–set timbales. These must be heavy, cool enough to hold shape, and flat on the contact surface so the layer above sits level.
- Middle layers: piping-temperature purées, stabilized mousses, soft herbs bound with a little xanthan, slow-cooked legumes, ribbons of confit vegetable. Concentric or stepped in diameter; never larger than the layer below unless deliberately cantilevered.
- Crowns and braces: tuiles, phyllo crisps, rice-paper shapes, breadsticks, kataifi nests, sugar or isomalt work, microgreen tufts, single edible flowers or herbs. Added last, kept dry, and treated as the most fragile cargo on the plate.
Common uses
Tips & pitfalls
- Always build from the sturdiest, heaviest component at the bottom to the most delicate at the top — physics doesn't lie on the pass.
- Tall food is hard to eat with one fork; warn servers or build it so it can be disassembled in one clean downward press.
- Mind heat: a stacked component will cool in the center while the outside is hot; place hot items last or under a salamander just before service.
- Use a smear, pool, or dots on the plate as a 'trampoline' — wet plates cause crisp structural elements to collapse within a minute.
- Chill the base briefly so mousse-style layers set just enough to bear weight; over-chill and the diner will fight the dish to bite through it.
- Don't over-stack: more than 4–5 layers usually collapses and overwhelms the plate. Negative space around the stack is what makes height read.
- Plate components in the order they will be eaten — the most expensive ingredient should be the first thing the fork meets, not the last.
- For crisp supports (tuiles, crackers, nori), store them with silica gel or assemble at the last minute; humidity kills height fast.
- Lightly oil the inside of ring molds and release with a clean warm offset spatula for a sharp vertical edge that catches the light.
- Always look at the plate from diner eye-level, not from above — height you can't see from the chair isn't really height.
- Color the layers with contrasting hues so each stratum is visible from the side; a brown-on-brown stack reads as a single lump.
Good to know
- Also known as
- Vertical plating, architectural plating, stacked plating, tower plating
- Associated cuisines
- Nouvelle cuisine, modern fine dining, modernist and contemporary tasting menus
- Pioneering chefs
- Ferran Adrià (El Bulli), Heston Blumenthal (The Fat Duck), Grant Achatz (Alinea), René Redzepi (Noma), Charlie Trotter
- Emergence
- Nouvelle cuisine, France, 1970s; aggressive codification at El Bulli in the late 1990s and 2000s
- Typical target height
- 2–5 cm (about 1–2 in) for savory courses; 8–10 cm for composed desserts and pastry towers
- Key structural supports
- Tuiles, rice paper, phyllo, bread crisps, parmesan crisps, sugar or isomalt cages, nori, fried kataifi, microgreens, edible flowers
- Core tools
- Offset spatula, plating tweezers, ring molds, squeeze bottles, precision spoons, pastry rings, acetate strips
- Time and difficulty
- Intermediate to advanced; 45 seconds to 3 minutes per plate depending on the number of components
Also called
Plating Height · Vertical Plating
Dishes that rely on it
Related

Whisk
Beat ingredients smooth and aerated with a looping wire motion

Sift
Pass dry ingredients through mesh to aerate and remove lumps

Strain
Pour through mesh to separate solids from liquid for a smooth result

Filter
Pass liquid through fine material to clarify out the smallest particles

Rice
Press cooked potatoes through small holes for fluffy, lump-free texture

Mash
Crush soft cooked food into a rustic, creamy purée

Grind
Crush food into a coarse to fine texture, from spices to meat

Grate
Shred food into fine bits against a sharp-toothed surface