Heat & Fire
Layered Omelette Rolling (Tamagoyaki)
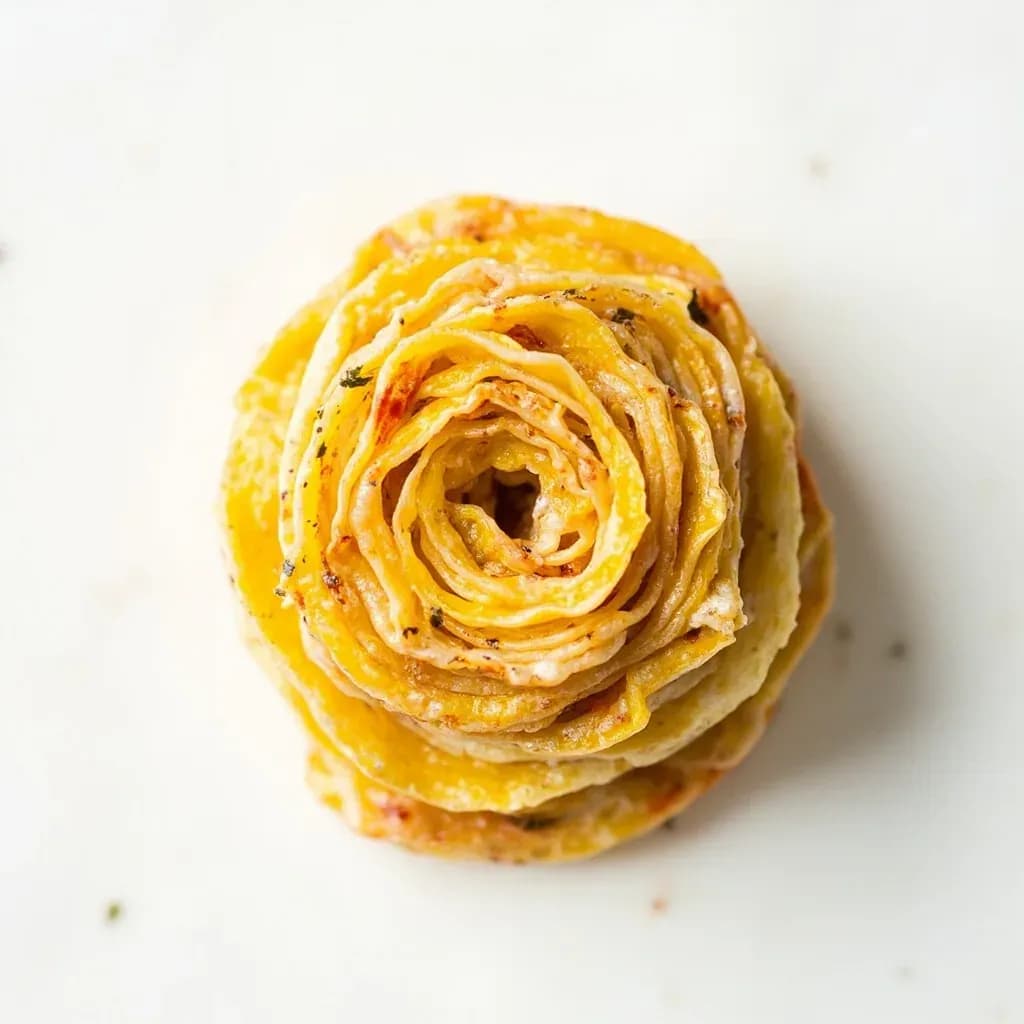
Cooking and rolling thin sheets of seasoned egg in a rectangular pan to build a tight layered omelette.
Tamagoyaki rolling pours thin layers of seasoned beaten egg into a rectangular Japanese pan, rolling each barely-set sheet toward you and pushing it back so the next layer can be poured underneath. Repeating this builds a dense, multi-layered log that is sweet-savory and tender. The result is sliced into neat blocks for bento, sushi or breakfast, and the technique rewards low, even heat and steady timing.
Tamagoyaki is the Japanese technique of cooking seasoned egg in a series of thin sheets, then rolling each one over the next to build a tight, multi-layered log that is sliced into segments. The work is done in a small rectangular pan called a makiyakinabe, and the result is more than a pretty shape — the layering creates a distinctive texture that is simultaneously tender and springy, with a faintly custardy core when made with dashi or a slightly caramelized sweetness when seasoned with soy and mirin. It is one of the standard tests of a Japanese home cook, and a daily sight in sushi bars, bento boxes, and breakfast trays.
What makes the technique tricky is not the ingredients (just eggs, seasoning, and a little oil) but the rhythm: each layer must be cooked just until set, rolled, oiled, and topped with a fresh pour that flows underneath the existing roll so the layers weld together rather than stack. Heat control is everything. Too hot and the egg browns before the layer sets; too cool and the layers won't fuse and the finished slice will fall apart. With a properly preheated pan and a steady hand, even a first attempt produces a respectable roll; with practice, the layers become paper-thin and uniform.
The two main seasoning paths — a soy-mirin-sugar profile for everyday home cooking, or a dashi-led version (dashimaki tamago) for sushi counters — yield noticeably different results. The sweetened style is firmer, glossier, and lightly caramelized. The dashi version is softer, almost quiche-like in its tenderness, because the stock thins the egg and slows coagulation. Pan size matters more than most beginners expect: a smaller pan makes a thicker, more dramatic log with fewer pours, while a larger pan produces a thinner, more delicate slice.
- Difficulty
- Hard
Types & varieties
The everyday home version, seasoned with soy sauce, mirin, and sugar; firm, glossy, and lightly caramelized
Made with dashi instead of soy-mirin; softer and almost custardy, the classic sushi-bar preparation
Thicker, plainer roll served as nigiri topping or sliced for maki; pale and slightly underdone at the center
Egg folded with seasoned kanpyō (dried gourd shavings); common in bento for texture and visual interest
Thin scallion strips layered between the egg sheets for a sharp, aromatic bite
Pink-tinted with sakura denbu or pickled plum (umeboshi), served at spring celebrations and hanami
Finely shredded green shiso leaves folded through the layers for a fragrant, herbaceous note
How to do it
- 1
Mix and season the eggs
Crack 3–4 large eggs into a bowl. For the everyday sweet-savory style, add 1–2 tsp soy sauce, 1–2 tsp mirin, and 1 tsp sugar. For dashimaki, replace the soy-mirin with 60–80 ml dashi, a pinch of salt, and a small splash of mirin. Beat gently with chopsticks until just combined — do not whip in air, which creates bubbles that mar the smooth surface. Strain the mixture through a fine-mesh sieve into a small pitcher or wide-mouthed cup for easy pouring.
- 2
Heat and oil the pan
Place the makiyakinabe over medium-low heat and wipe with a paper towel dipped in neutral oil, or sesame oil for a nutty note. Test the heat by flicking a drop of egg into the dry pan; it should sizzle softly and begin to set in 2–3 seconds. If it browns immediately, lift the pan off the burner for a moment.
- 3
Cook the first layer
Pour in enough egg to thinly coat the bottom of the pan — roughly a quarter of the mixture. Swirl to spread it evenly into the corners. Let cook until the surface is almost set but still slightly glossy on top, about 30–45 seconds.
- 4
Roll to the far edge
Using chopsticks or a makiyaki-bō, lift the near edge of the egg and roll it over to the far side of the pan in one smooth motion. Press gently with the chopsticks to even the shape, then nudge the roll against the far edge of the pan.
- 5
Oil and pour the second layer
Wipe the now-empty side of the pan with the oiled paper towel. Pour another thin layer of egg, tilting the pan so the liquid flows under the existing roll as well as across the empty surface. Lift the roll briefly so egg seeps underneath; this is what welds the next layer to the previous one.
- 6
Roll back over the new layer
When the second layer is just set on top, roll the existing log back over the new sheet, away from the far edge. Push it back to the starting edge. Re-oil the pan.
- 7
Repeat until all egg is used
Continue pouring thin layers, oiling, lifting to let egg flow under, and rolling. Usually 4–6 layers total. Lower the flame slightly as the pan warms through successive rolls to keep the color pale.
- 8
Rest and shape
After the final layer, roll to the starting side, then press the log firmly but gently along its length with chopsticks or the skewer to square the edges. Transfer to a bamboo mat or a piece of parchment and let rest 1–2 minutes off the heat so the residual warmth sets the center.
- 9
Slice and serve
Cut across the roll into 4–6 segments with a sharp knife wiped with a damp cloth between cuts. Serve warm or at room temperature, traditionally with grated daikon, a small dish of soy sauce, or alongside rice and miso soup.
Choosing a pan
The makiyakinabe is not interchangeable with a round skillet. Its rectangular shape is what gives the log its straight sides and even layers. Copper pans heat fastest and most evenly and are prized by professionals; cast iron holds heat well and is forgiving for beginners; aluminum is light and cheap but develops hot spots. For home use, a 15 × 18 cm pan is versatile — small enough to handle, large enough to produce a satisfying roll. Sushi-counter cooks often work in a 12 cm square pan for a thicker, more compact log.
- Copper makiyakinabe: fastest response, prized by sushi chefs
- Cast iron: retains heat, more forgiving, requires seasoning
- Aluminum: affordable but uneven; not ideal for thin layers
- A 15 × 18 cm pan is the standard home size
- Always wipe the pan clean and dry before storing to prevent rust on iron and tarnish on copper
Heat control and timing
The single biggest variable in tamagoyaki is heat. The target is medium-low — hot enough to set a layer in roughly 30–45 seconds, gentle enough that the surface stays pale rather than browned. A reliable test: flick a drop of beaten egg into the dry pan. It should sizzle softly and begin to set in 2–3 seconds. If it bubbles and browns immediately, lift the pan off the burner for a moment. As you work through successive layers, the pan will retain more heat from the repeated contact; lower the flame a touch after the third or fourth pour to keep the color even.
- Target: drop of egg sets in 2–3 seconds
- Lower the flame slightly after the third or fourth layer
- Pale surface = correct heat; golden = slightly too hot; brown = too hot
- A heavy pan holds more residual heat and demands a lower flame
- Err toward underdone — carryover heat finishes the final layer as it rests
Layering and rolling technique
Each layer should be thin enough that it sets in under a minute, but substantial enough to release cleanly from the pan. The crucial move is lifting the existing roll as you pour the next layer so the liquid egg flows underneath it — this is what fuses the layers into a single log instead of a stack of separate sheets. Roll gently but firmly; the finished log should feel snug, not compressed. Over-tightening squeezes out the custardy interior and produces a dense, rubbery slice.
- Pour about 1/4 of the mixture per layer
- Lift the roll when pouring the next layer so egg flows underneath
- Roll in one smooth motion; don't pause to adjust mid-roll
- Press the finished log with chopsticks to square the edges
- Rest 1–2 minutes off the heat before slicing
Common uses
Tips & pitfalls
- Heat the pan over medium-low and test with a drop of egg — it should set in 2–3 seconds; a hot pan is the most common cause of browned, tough layers.
- Wipe the pan with an oiled paper towel between every layer; this gives each sheet its pale, glossy surface and prevents sticking.
- Strain the beaten egg through a fine-mesh sieve for a smoother surface and a finer crumb in the finished slice.
- Lift the existing roll as you pour each new layer so the liquid flows underneath — stacking without welding produces a log that falls apart when cut.
- Roll gently but firmly; over-tightening squeezes out the custardy interior and makes the omelette dense and rubbery.
- Cut with a wet, sharp knife and wipe between slices to keep the layered face clean and intact.
- Use the wide end of chopsticks or a long bamboo skewer (makiyaki-bō) rather than a spatula — they fit the pan shape and give more precise control.
- Remove from heat while the final layer is still slightly glossy in the center; carryover heat will finish setting it as the roll rests.
- Err toward underdone rather than overdone; an overcooked tamagoyaki is dry, while a slightly underdone one will finish setting as it cools.
Good to know
- Origin
- Japan; technique refined during the Edo period (1603–1868), though earlier rolled egg dishes appear in court cuisine
- Japanese names
- Tamagoyaki (卵焼き / 玉子焼き); atsuyaki tamago (厚焼き卵) for the thicker sushi-counter style
- Characteristic pan
- Makiyakinabe, a rectangular tamagoyaki pan, typically ~15 × 18 cm for home use or ~12 cm square for sushi-bar work
- Standard yield
- One log from 3–4 large eggs; length is determined by pan size
- Typical cook time
- 8–12 minutes total over medium-low heat
- Difficulty
- Intermediate; mostly heat control and a steady rhythm
- Seasoning styles
- Sweet-savory (soy, mirin, sugar) or dashi-led (dashi, light soy, mirin, salt)
- Key equipment
- Makiyakinabe pan, chopsticks or a long bamboo skewer (makiyaki-bō), small bowl, fine-mesh strainer, oiled paper towel or brush
Also called
tamagoyaki · Japanese rolled omelette · dashimaki
Related

Sear
Blast the surface hot for a deep-browned, savory crust

Sauté
Cook quickly in a little fat over lively heat, tossing as you go

Stir-Fry
Toss bite-sized pieces over roaring heat for fast, smoky cooking

Pan-Fry
Crisp food in a shallow layer of hot fat, turning once or twice

Deep-Fry
Submerge in hot oil for an all-over crackling crust

Roast
Cook uncovered in dry oven heat for browned edges and tender centers

Bake
Cook with steady, surrounding oven heat — the soul of bread and pastry

Broil
Hit food from directly above with fierce overhead heat