Prep & Assembly
Transfer-Sheet Application
Pressing patterned cocoa-butter sheets onto tempered chocolate to print decorative designs.
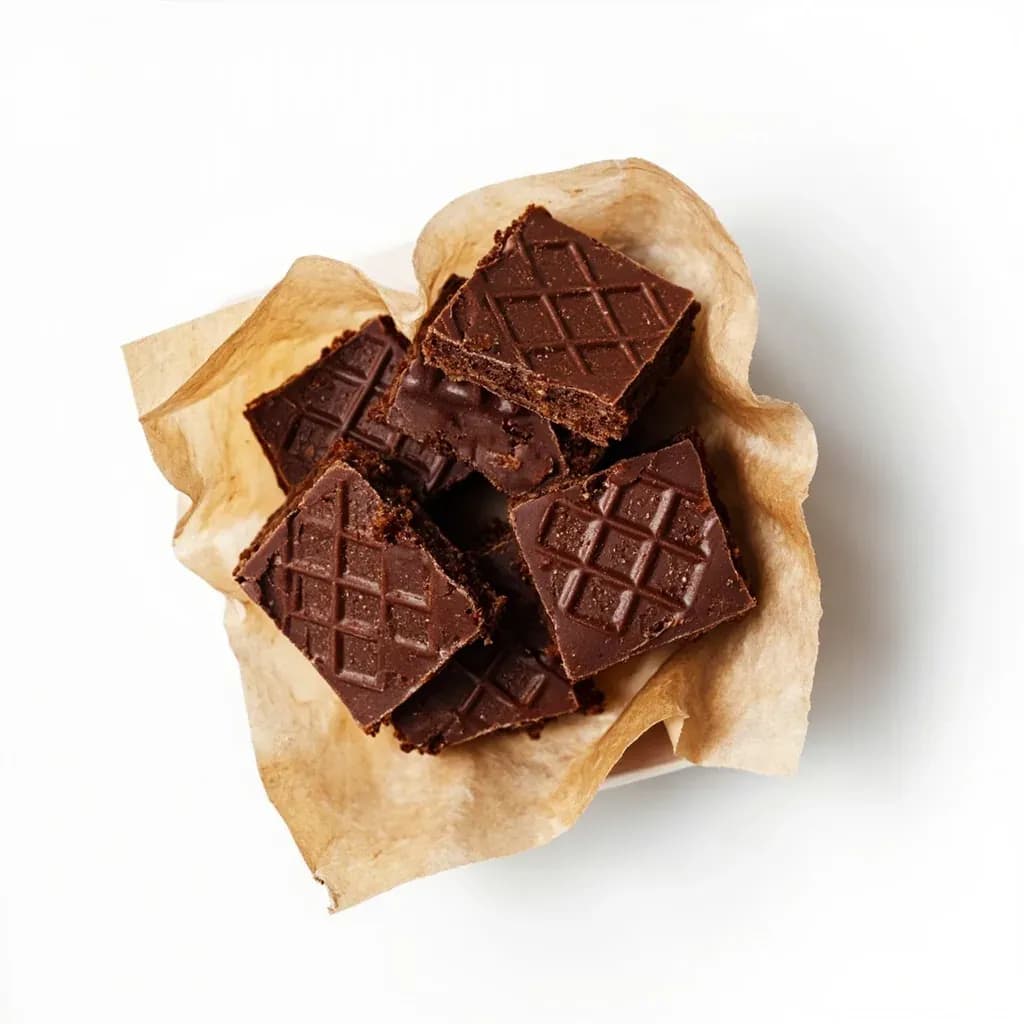
Transfer-sheet application lays a printed acetate sheet of colored cocoa butter against freshly tempered chocolate so the design sets onto the surface as it crystallizes. When the chocolate hardens and the sheet is peeled away, a sharp pattern or logo remains. It is a standard pastry technique for decorating bonbons, bars, and garnishes with professional-looking graphics.
Transfer-sheet application is a finishing technique in which a thin PET or acetate sheet, pre-printed with patterns in colored cocoa butter, is used as the casting surface for tempered chocolate. When warm, well-tempered chocolate is poured onto the printed face, the cocoa butter softens just enough to fuse with the chocolate mass; as the chocolate cools and contracts, the printed image is left cleanly behind on its surface. The technique produces flat, decorative chocolate — bar tops, bonbon lids, tablets, free-standing shards — that carry the precision of a fine art print without hand-painting, stenciling, or screen work.
Two moments decide the quality of the result: tempering and peeling. Tempering places the chocolate's fat in stable beta crystals so that it releases from the sheet with a glossy snap rather than clinging or streaking; peeling at a shallow angle, after the chocolate has just begun to contract away from the edges of the sheet, preserves the sharpness of every printed line. Miss either window and the design smears, drags, or stays stubbornly on the film.
Transfer-sheet work is an unusually forgiving entry point into decorative chocolate because it demands no mold, cap pan, or specialized equipment beyond a flat surface, a bench scraper, and the sheet itself. The same approach scales from a single artisan bar produced at the bench to high-volume enrobing lines fed from roll-stock transfers, and sits comfortably alongside hand-painting, airbrushing, and inclusion work as a finishing option.
- Difficulty
- Medium
Types & varieties
The standard format: PET film pre-printed with patterns in colored cocoa butter — the workhorse for bonbons, bars, and tablets.
Clear acetate with a textured or etched pattern but no color; chosen when a subtle, monochromatic, almost embossed effect is wanted.
Bespoke designs — logos, monograms, photographs, personalized artwork — printed in cocoa butter for branded or special-occasion work.
Manufacturer-produced patterns for holidays, weddings, florals, and geometric or abstract motifs.
Single-color prints are forgiving and most common; multi-color sheets reward precise temperature control and a confident pour.
Continuous printed film for high-volume production, used in tandem with enrobers or depositors.
How to do it
- 1
Prepare the workspace
Set a clean, level marble, acrylic, or laminated board at 68–72°F (20–22°C). Wipe the surface with a dry cloth — any moisture on the bench will telegraph through the sheet and into the chocolate.
- 2
Cut and position the transfer sheet
Trim the sheet to size with scissors, leaving a small margin on every side. Lay it pattern-side UP on the work surface and smooth it flat by hand; trapped air pockets and wrinkles transfer as flaws.
- 3
Temper the chocolate
Temper dark chocolate to 88–90°F (31–32°C), milk to 86–88°F (30–31°C), or white to 82–84°F (28–29°C). Confirm on the back of a palette knife — it should set within about 3 minutes with a glossy, even snap.
- 4
Pour the chocolate
Pour the tempered chocolate onto the center of the sheet in a single, confident motion. Use enough to cover the sheet with roughly a 3–4 mm layer once spread.
- 5
Spread to a uniform thickness
Using a long bench scraper or palette knife held at a low angle, spread the chocolate outward in smooth, even strokes to the edges of the sheet. A uniform thickness is what gives a clean, even release.
- 6
Release air bubbles
Lift the board 2–3 inches and tap it firmly on the work surface two or three times. Trapped air bubbles rise and pop, leaving a mirror-smooth surface ready for a flawless print transfer.
- 7
Allow to crystallize
Let the chocolate set undisturbed at room temperature until firm and just beginning to pull away from the edges of the sheet, usually 10–20 minutes. Refrigerate only if the room is genuinely warm; if you do, chill for no more than 5–8 minutes and return to room temperature before peeling.
- 8
Peel the transfer sheet
Starting at one corner, slowly peel the sheet back at a very shallow angle, almost flat against the chocolate. The colored cocoa-butter design stays with the chocolate. Pause if the chocolate tears or drags — it is not ready.
- 9
Cut or shape the finished chocolate
With the sheet removed, cut the chocolate with a warm, dry knife into squares, rectangles, discs, or custom shapes while it is firm but not yet fully brittle.
- 10
Store or use
Use the decorated chocolate within 1–2 weeks for optimal gloss and snap. Store in an airtight container at 60–68°F (15–20°C) away from light and strong odors.
Transfer sheet vs. acetate cap
The two terms are sometimes used loosely as if they were the same thing, and the working principle is shared — colored cocoa butter on a film that fuses with tempered chocolate — but the workflow and the finished piece are quite different. A transfer sheet is laid flat on the bench, chocolate is poured over it, and the result is a free-standing decorated chocolate (a bar, a tablet, a shard) once the sheet is peeled away. An acetate cap is a small, pre-cut disc or square placed pattern-side down inside a polycarbonate mold before chocolate is deposited; the shell forms around it, the cap is left inside, and the decorated face becomes the inside of a filled bonbon. Choose the sheet when you want a flat, exposed decoration; choose the cap when you want a hidden pattern revealed only when the bonbon is bitten into.
- Transfer sheet → flat chocolate, decoration visible on top, no mold required.
- Acetate cap → molded shell, decoration on the inside of a closed bonbon, requires a polycarbonate mold.
- Both rely on identical cocoa-butter chemistry and identical temperature windows; failure modes (smearing, poor release, streaking) are the same.
Reading a failed release
When the design refuses to leave the sheet, smears across the chocolate, or arrives patchy and incomplete, the cause is almost always one of four things. Diagnosing the right one saves a sheet and a batch of chocolate.
- Design stays on the sheet, chocolate looks dull → under-tempered chocolate; re-temper before the next pour.
- Design smears or blurs on the chocolate → chocolate was poured too hot, re-melting the cocoa butter; cool the chocolate back into its working range before the next pour.
- Pattern releases in patches, leaving a streaky chocolate → layer too thick, or peeling attempted before the chocolate had set; aim for 3–4 mm and wait for visible edge contraction.
- White haze on the finished surface (sugar bloom) → humidity above 60% or rushed refrigeration causing condensation; rework in a drier room and let the chocolate crystallize at ambient temperature.
Common uses
Tips & pitfalls
- Temper the chocolate correctly: under-tempered chocolate sticks to the sheet, over-tempered chocolate releases with a dull, streaky surface.
- Never pour above 90°F (32°C) for dark, 88°F (31°C) for milk, or 84°F (29°C) for white — excess heat re-melts the cocoa-butter design and blurs the print.
- Work in a cool, dry room — humidity above 60% invites sugar bloom and weakens adhesion between the cocoa-butter design and the chocolate.
- Always pour onto a flat, level surface; warped or wrinkled sheets will transfer their wrinkles into the finished chocolate.
- Spread the chocolate with a long bench scraper held at a low angle to lock in a uniform 3–4 mm layer.
- Tap the board firmly 2–3 times after spreading to pop trapped air bubbles that would otherwise pit the surface.
- Let the chocolate crystallize at room temperature; rushed refrigeration causes condensation and sugar bloom on the decorated face.
- Peel the sheet back slowly at a shallow, almost-flat angle once the chocolate has set and visibly contracted at the edges.
- Clean used sheets with cool (never hot) water and a soft cloth, and store them flat between sheets of parchment in a rigid box to prevent creasing.
Good to know
- Type
- Decorative finishing technique for tempered chocolate
- Primary material
- PET or acetate sheet pre-printed with colored cocoa butter (sometimes with added food color)
- Required chocolate state
- Fully tempered — dark 88–90°F (31–32°C), milk 86–88°F (30–31°C), white 82–84°F (28–29°C)
- Ideal ambient temperature
- 68–72°F (20–22°C) with relative humidity below 60%
- Sheet thickness
- Typically 75–100 micron PET or acetate
- Setting time
- 10–20 minutes at room temperature; 5–8 minutes if briefly chilled, then returned to room temperature
- Sheet reusability
- Generally 3–5 uses when cleaned with cool water and mild soap and stored flat
- Storage of unused sheets
- Flat in a cool, dark, dry place — never folded or exposed to heat, since cocoa-butter prints melt near body temperature
Also called
Chocolate Transfer Sheets · Cocoa-Butter Transfer
Related

Whisk
Beat ingredients smooth and aerated with a looping wire motion

Sift
Pass dry ingredients through mesh to aerate and remove lumps

Strain
Pour through mesh to separate solids from liquid for a smooth result

Filter
Pass liquid through fine material to clarify out the smallest particles

Rice
Press cooked potatoes through small holes for fluffy, lump-free texture

Mash
Crush soft cooked food into a rustic, creamy purée

Grind
Crush food into a coarse to fine texture, from spices to meat

Grate
Shred food into fine bits against a sharp-toothed surface