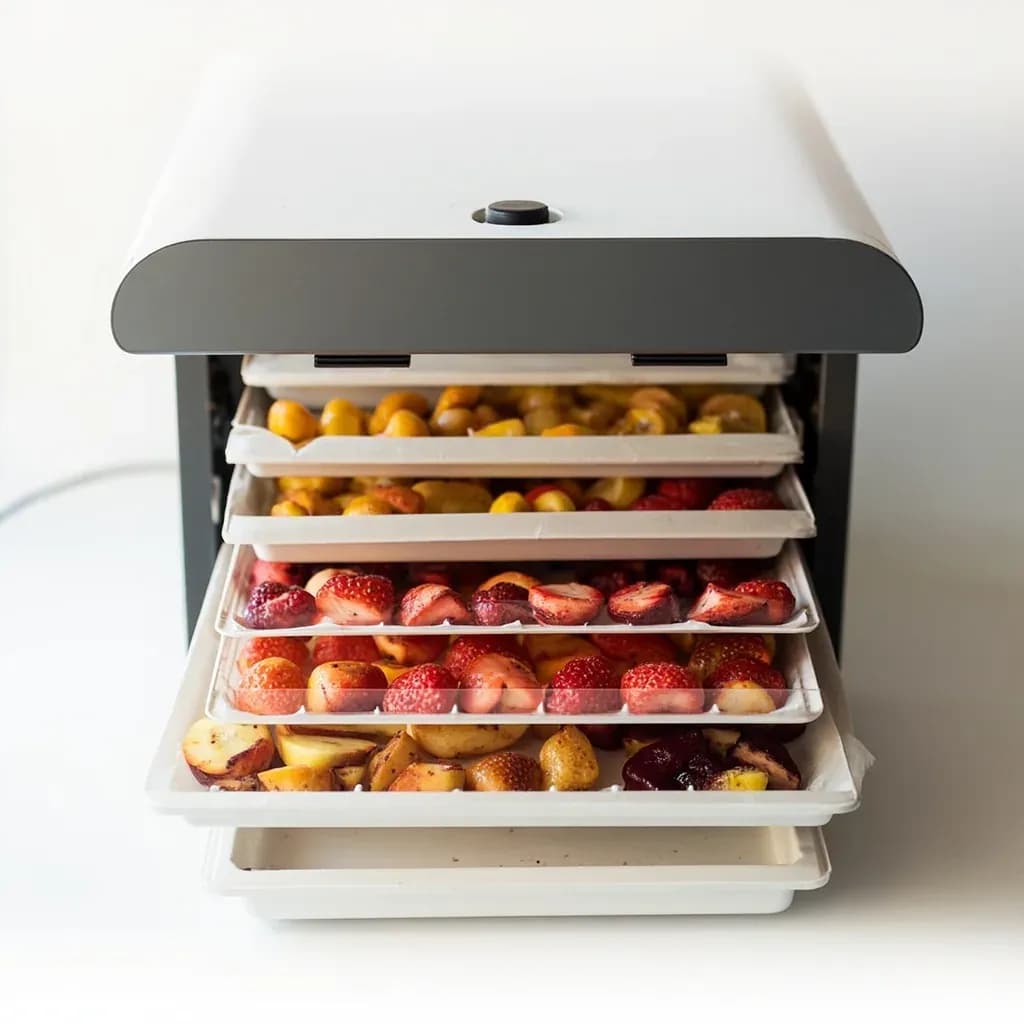
Appliances & Heat
Freeze Dryer (Lyophilizer)
A machine that freezes food then vacuum-sublimates the ice away, preserving flavor and structure.
A freeze dryer, or lyophilizer, deeply freezes food and then pulls a vacuum so the ice converts straight to vapor, removing water while leaving texture and flavor largely intact. Cooks use it for shelf-stable fruit, powders, intense flavor dusts, and long-term storage that rehydrates well. Because it dries at low temperature, it preserves nutrients and aromatics far better than heat drying.
A freeze dryer (lyophilizer) preserves food by freezing it solid and then pulling a deep vacuum so the frozen water sublimates directly from ice to vapor, with no liquid phase ever passing through. Because the food never sees meaningful heat, the cellular structure, color, volatile aromatics, and heat-sensitive nutrients (vitamin C, B vitamins, live enzymes) survive in a way that conventional dehydrating and canning cannot match. The output is bone-dry, light, porous, and hygroscopic: roughly 75–90% lighter than the original, with about 1–4% residual moisture, and it can sit in sealed mylar for 20+ years without refrigeration.
In a working kitchen, a freeze dryer is not a substitute for a dehydrator or a freezer; it is a specialty preservation tool that earns its space when the goal is the lightest possible pack weight, the longest possible shelf life, or the brightest possible flavor and color in a finished dry product. The catch is throughput: a single batch runs 20–40+ hours, and the machine itself costs several thousand dollars plus meaningful electricity. It shines for peak-season fruit, complete just-add-water meals, single-ingredient pet treats, herbs and edible flowers, and emergency-prep stores — categories where conventional drying would dull the flavor or where frozen storage is impractical.
The technique is older than the home appliance: lyophilization was developed and refined during World War II for blood plasma and penicillin, then carried into space-program rations, which is why the first consumer units read like shrunken lab equipment. Today, countertop batch dryers from Harvest Right (introduced to the U.S. home market in 2014) put the process within reach of a standard 110-volt kitchen outlet, though the underlying science — three phases of freezing, primary drying, and secondary drying under 50–200 mTorr of vacuum — is unchanged from the pharmaceutical version.
Alternatives
Types & varieties
Trays sit on temperature-controlled shelves inside a vacuum chamber; the standard design for both home and lab use.
A rotating drum tumbles the product; used for liquids, slurries, and small particulates in industrial food and pharma settings.
Liquid is atomized into a cold chamber, frozen mid-air, then sublimated; the process behind instant coffee and many enzyme preparations.
Vials or flasks attach to shared ports on a chamber; common in laboratories for biological samples rather than food.
Compact, single-batch machines (Harvest Right dominates the U.S. market); standard 110V outlet, 4–15 tray capacity, 4–15 lb fresh food per cycle.
Larger chambers with automated control and 220V power; used by ingredient suppliers, emergency-prep companies, and pet-food manufacturers.
Pre-Treatment: Set Up the Load to Sublime Cleanly
Freeze drying rewards preparation. The vacuum can only pull water out as vapor if the ice is exposed to the chamber and the food is cut thin enough for vapor to escape from the center. A few minutes of prep is the difference between a 24-hour cycle and a stalled 40-hour one.
- Slice dense produce and meat to roughly ¼ in (6 mm) or less; thicker pieces hold internal ice and stall sublimation.
- Pre-freeze wet or dense foods (ground meat, cooked rice, berries) solid on the trays before loading — this shortens primary drying dramatically and prevents slumping under vacuum.
- Blanch firmer vegetables (carrots, broccoli, peas) for 1–2 minutes to crack cell walls; this lets vapor escape faster and preserves brighter color.
- Pat surface moisture off washed food with a towel; free water lengthens the freezing phase and wastes energy.
- Lay pieces in a single, even layer with small gaps — overlapping pieces trap moisture and leave damp cores.
Cycle Management: Reading What the Machine Is Doing
A home freeze dryer runs mostly unattended, but the first few hours tell you whether the cycle is healthy. Watching the readouts prevents ruined batches and wasted electricity.
- Confirm the chamber pressure drops into the 50–200 mTorr range within an hour; if it does not, suspect a door-gasket or pump-oil problem.
- Watch the product temperature (Load Temp): it should sit well below 32°F (0°C) during primary drying. If it climbs toward freezing, sublimation has stalled and the load is too thick or wet.
- Expect visible activity and ice accumulation on the chamber walls during primary drying; this is normal and means the vacuum is working.
- Listen for the vacuum pump cycling on and off; frequent short cycles late in the run are the normal signature of secondary drying.
- Do not open the chamber mid-cycle. Breaking vacuum introduces humid room air and ruins the batch. Wait for full return to atmospheric pressure.
Post-Dry Storage: Keep Moisture Out, Not Just Oxygen Out
Freeze-dried food is hygroscopic — it will pull ambient humidity from the air within hours and slowly degrade. Packaging matters as much as the drying itself.
- Pack immediately after the cycle finishes, while the food is still warm and the chamber is dry.
- Use mylar bags with a fresh oxygen absorber and a heat sealer for 20+ year storage; vacuum-sealed heavy mylar is a good second choice.
- Avoid regular zip-top bags for long-term storage; they leak moisture and typically give only 1–2 years of shelf life.
- Store sealed bags in a cool, dark, dry place — heat and light degrade color and vitamin content even in sealed packaging.
- Label every bag with the contents and the drying date; freeze-dried look-alikes (corn, cheese, pasta shapes, marshmallows) are surprisingly easy to mix up months later.
Common uses
Tips & pitfalls
- Pre-freeze dense or wet foods (ground meat, cooked rice, mashed potatoes) solid on the tray before loading — it dramatically shortens primary drying.
- Cut food into even, thin slices no thicker than ¼ in; thicker pieces hold internal ice and stall the cycle.
- Avoid high-fat foods such as butter, full-fat dairy, avocado, and bacon — they go rancid faster once dried and rehydrate poorly. Lean proteins and fruits are the sweet spot.
- Never load pure liquids like honey, syrup, or jam; they will not sublimate. Spread them very thin on a silicone tray or whip them first to give the vacuum something to grip.
- Do not overfill the trays; air must move through the load, and crowded trays leave damp pockets in the center that never finish drying.
- Weigh the food before and after drying. Finished pieces should feel bone-dry, crumble easily, and snap rather than bend — bendy or leathery texture means more drying time is needed.
- Defrost and wipe the chamber, drain and replace the vacuum pump oil on schedule, and inspect the door gasket between heavy-use cycles; a leaking gasket is the most common cause of stalled runs.
- Let the chamber return fully to room pressure before opening; opening early introduces moisture and ruins an otherwise good batch.
Good to know
- Process name
- Lyophilization (freeze-drying)
- Core principle
- Sublimation — frozen water passes directly from solid to vapor under deep vacuum, skipping the liquid phase
- Typical final moisture
- 1–4% (compared with 10–20% for heat-dehydrated food)
- Nutrient retention
- Roughly 97% of nutrients and live enzymes preserved; color, shape, and flavor largely intact
- Shelf life of output
- 20–25+ years in airtight mylar with an oxygen absorber
- Weight reduction
- Food loses about 75–90% of its weight
- Cycle time
- 20–40+ hours per batch depending on load thickness and moisture content
- Cost range (new)
- Roughly $2,500–$5,000 for home units; $10,000+ for small commercial or lab units
Also called
Lyophilizer · Freeze-Drier
Related

Stovetop
The everyday burners where most cooking actually happens

Oven
Enclosed dry heat for roasting, baking, and braising

Grill
Live-fire or gas grates for char, smoke, and high heat

Smoker
Low, slow heat and wood smoke for barbecue and brisket

Air Fryer
Countertop convection that crisps with little or no oil

Slow Cooker
Set-and-forget low heat for stews, beans, and braises

Pressure Cooker
Sealed steam pressure that cooks tough food in a fraction of the time

Rice Cooker
Foolproof, perfectly steamed rice every single time