Appliances & Heat
Heat Gun
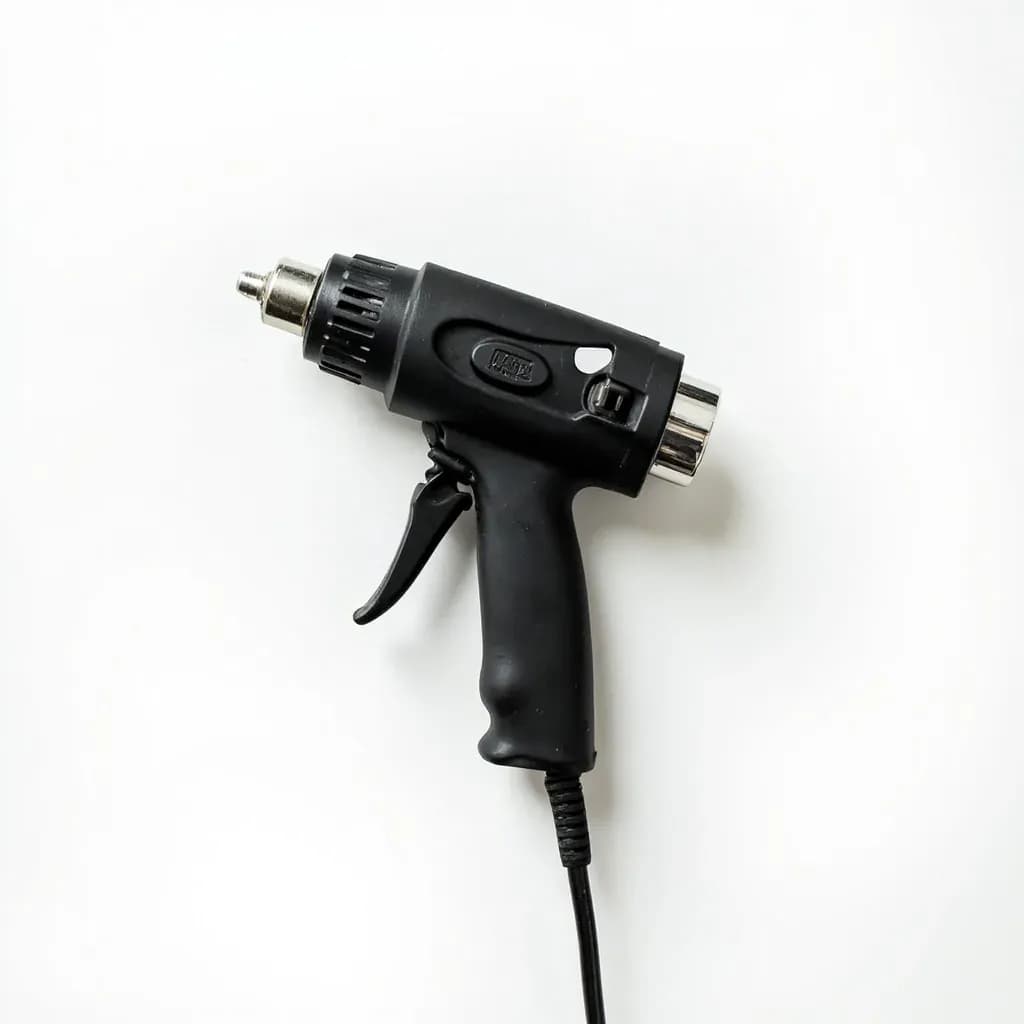
A handheld electric blower that delivers a focused stream of very hot air for finishing and crisping.
A heat gun pushes air heated to several hundred degrees through a narrow nozzle, giving the cook a precise jet of dry heat. In the kitchen it is used to caramelize sugar on desserts, blister the skin of peppers or fish, melt cheese, or set chocolate and glazes without applying flame. Many cooks prefer it to a torch when they want even heat with no combustion taste or scorching.
A heat gun looks like an industrial hair dryer, and the comparison is useful: where a hair dryer pushes ambient air, a heat gun pulls room air through a coiled resistance element and exhausts it from a small nozzle at temperatures high enough to brown a steak in seconds. The air arrives dry, clean, and very hot, with no flame, no combustion, and no fuel taste on the food. That makes the heat gun a finishing tool rather than a cooking one — it does not replace a pan, grill, or oven, but it adds color, crust, and texture to foods that are already cooked through or to delicate surfaces that would be damaged by direct contact heat.
Chefs adopted the tool from the hardware store during the modernist wave of the 2000s, when sous vide cooking produced immaculate interiors that called for a fast, controllable exterior sear. A heat gun can lay a mahogany crust on a piece of protein in fifteen to thirty seconds without raising the internal temperature by more than a degree or two, and it handles foods that are awkward in a pan — delicate fish, terrines still in their mold, sheet-pan custards, an entire pavlova — with the same speed. The trade-off is intensity: the gun demands attention, distance discipline, and a clear exhaust path, and most kitchen mishaps come from holding the nozzle still one beat too long. Used with restraint, it is one of the most useful finishing tools a serious cook can own.
Alternatives
Types & varieties
The most common kitchen-repurposed style: a low setting around 250–300°C and a high setting around 500–600°C. Inexpensive, robust, and adequate for nearly all searing and browning work.
LCD or dial control for precise target temperatures; preferred for delicate work like caramelizing sugar or browning meringue without scorching.
A concentric nozzle concentrates airflow into a narrow, intense jet; useful for spot-searing and detail work, but raises scorch and burn risk.
Bowls or cradles that bounce and concentrate the airstream onto a small area; used in sugar work and chocolate piping where even, indirect heat is needed.
Marketed for kitchen or BBQ finishing; functionally similar to entry-level industrial guns but often with a lower maximum temperature and a friendlier housing.
How it cooks, and why it is different from a torch
The heat gun's effect is primarily convection: a fan forces air across a glowing element and out through a narrow barrel. Food under that airstream loses surface moisture almost instantly, and once the surface is dry the temperature can climb past 150°C in a few seconds, which is the threshold for the Maillard reaction on proteins and the caramelization of sugars. Because there is no open flame, there is no combustion flavor and no soot deposited on the food; the gun leaves a clean, even color rather than the slightly bitter, smoky notes a torch can leave on delicate work. A blowtorch, by contrast, deposits a small amount of combustion gas and imparts the unmistakable flavor of burning butane — wonderful in moderation, wrong on a sugar crust or a piece of pristine fish. The two tools complement rather than replace each other: the torch for small, targeted work and added flame character, the gun for broad, even surfaces and clean heat.
- No flame means no fuel taste — the reason pastry chefs prefer it over a torch for sugar and meringue.
- Heat transfer is mostly convective, so distance and sweep speed control the result far more than time on target.
- Most of the browning happens in the last five to ten seconds; underestimating how fast it works is the most common beginner mistake.
Choosing a model
Most working chefs do not buy a kitchen-branded heat gun; they buy an industrial two-stage gun from a hardware store, which is cheaper, more powerful, and more durable. The variables worth weighing are temperature range, control granularity, weight, and noise.
- A two-stage gun with roughly 250°C and 550°C settings covers virtually every kitchen task; a third intermediate setting is a luxury, not a necessity.
- Digital temperature control is genuinely useful for sugar work, where a 20°C overshoot means a blackened crust instead of caramel.
- A long cord and a comfortable grip matter more than advertised wattage — you will be moving the gun constantly.
- Check the stand: a stable, heatproof resting cradle is essential, because the barrel stays scalding for several minutes after switch-off.
- Lightweight models (under 800 g) reduce wrist fatigue during repetitive finishing; heavy industrial guns tire the hand fast.
Setup and safety
A heat gun is one of the few kitchen tools that can scorch food, ignite paper, and burn skin in under a second, so the working area matters as much as the technique. A heatproof mat, a wire rack over a sheet pan, and a clear path for hot air to escape are the minimum. Ventilation is not optional: the gun aerosolizes tiny amounts of fat and sugar pyrolysis products, and a brand-new industrial gun outgasses a faint plastic smell on its first few uses that is best vented outdoors.
- Rest food on a wire rack over a sheet pan, or directly on a steel or ceramic surface; never on plastic, wood, or untreated parchment.
- Keep the gun's exhaust pointed away from flammable items — paper towels, dishcloths, wooden spoons — and never from your own body.
- Allow the gun to cool on its stand; the nozzle remains hot enough to burn long after switch-off.
Common uses
Tips & pitfalls
- Start on the lowest setting and only escalate if needed; most kitchen jobs are done between 200°C and 350°C, well below a gun's maximum.
- Keep the nozzle moving in a continuous sweep; holding it still will scorch or ignite food in under a second at high heat, and is the single most common cause of ruined dishes and small fires.
- Hold the gun 5–15 cm (2–6 in) from the surface — further away gives gentler, more even browning, closer in gives fast spot color.
- Pat proteins completely dry before finishing; surface moisture stalls the Maillard reaction and the gun just steams the food instead of browning it.
- Lightly oil or season the surface first so the gun has something to color — bare lean meat will not brown as dramatically as oiled meat, and a sprinkle of sugar on fruit accelerates caramelization.
- Let the gun cool on a heatproof stand; the barrel stays scalding for several minutes after switch-off and will melt anything it touches.
- Ventilate the kitchen: hot gun air releases pyrolysis products from sugars and proteins, and a new industrial gun can outgas a faint plastic smell on first use — run it outdoors for a minute before its first food use.
- Don't confuse a heat gun with a kitchen blowtorch — the gun delivers clean dry heat with no combustion byproducts, the torch adds flame flavor; the right choice depends on whether you want a clean crust or a smoky char.
Good to know
- Type
- Handheld electric blower producing a focused stream of very hot air
- Power
- Typically 1500–2000 W on a standard household circuit
- Air temperature
- Roughly 100–600°C (200–1100°F) on common two-stage models; some reach 750°C (1400°F)
- Airflow
- Variable, commonly 150–500 L/min, usually with at least two speed settings
- Weight
- 0.6–1.0 kg (1.3–2.2 lb) for typical consumer models
- Fuel
- Electric (corded)
- Origin
- Industrial tool developed for paint stripping, shrink wrap, and pipe thawing; adopted in restaurant kitchens from the 2000s with modernist and sous vide cooking
- Common brands
- Wagner, Steinel, Bosch, DeWalt, Makita for industrial models; a handful of BBQ and pastry makers offer culinary-branded versions
Also called
hot air gun · electric heat gun
Related

Stovetop
The everyday burners where most cooking actually happens

Oven
Enclosed dry heat for roasting, baking, and braising

Grill
Live-fire or gas grates for char, smoke, and high heat

Smoker
Low, slow heat and wood smoke for barbecue and brisket

Air Fryer
Countertop convection that crisps with little or no oil

Slow Cooker
Set-and-forget low heat for stews, beans, and braises

Pressure Cooker
Sealed steam pressure that cooks tough food in a fraction of the time

Rice Cooker
Foolproof, perfectly steamed rice every single time