Prep & Assembly
Ripeness Assessment
Judging when produce is at peak ripeness by feel, smell, color, and sound.
Ripeness assessment evaluates fruit and vegetables for peak flavor and texture using cues like give under gentle pressure, aroma at the stem, color shift, and weight. It guides when to harvest, buy, or cook, and pairs with controlled ripening (such as ethylene-rich bags) to bring underripe produce along. Getting it right is the difference between flat and fragrant ingredients.
Ripeness assessment is the cook's most fundamental sensory skill, deployed at the market, the garden gate, and the kitchen counter. It is not one test but a layered reading of an individual piece of produce against what that variety is supposed to look, feel, smell, and weigh when its sugars, acids, and aromatic esters are at their peak. Done well, it is the difference between a flat, under-flavored strawberry and a sun-deep one, a mealy pear and one that floods the plate with juice, an avocado that ripens on the exact night you planned to serve it.
The skill rests on a single biological distinction every cook should know. Climacteric fruit — bananas, avocados, pears, peaches, mangoes, melons, kiwis, figs, plums, persimmons, papayas, apricots, tomatoes, apples — continue to ripen after picking because they generate ethylene, the natural plant hormone that drives softening, color change, and the conversion of starches to sugars. Non-climacteric fruit — berries, cherries, citrus, grapes, pineapples, pomegranates, watermelons, cucumbers, bell peppers — generate almost no ethylene and do not improve after harvest; they were as ripe as they will ever be the day they were picked. Once you know which side of that line a piece of produce sits on, the rest of the assessment is mostly a matter of which sense to trust for that particular variety.
In practice the senses work in a deliberate sequence. Sight gives the first broad signal and rejects the obviously damaged; weight tells you about water content; the palm-of-hand pressure test reads firmness and yield; smell at the stem or blossom end confirms sugar and aroma development; and a handful of items — watermelons, pineapples, walnuts, corn — have specific sound, stem, or husk probes. The goal is never to use every test on every item, but to learn which one or two are decisive for the produce in your hand.
- Difficulty
- Easy
Types & varieties
Reading pigment change — chlorophyll loss, carotenoid or anthocyanin rise — plus surface sheen, scarring, or the natural 'bloom' on grapes and plums.
Firmness, give, yield, and skin stretch. The palm-of-hand press for delicate fruit, the gentle cradle-and-squeeze for firmer fruit.
Sniffing the stem end or blossom end for developed esters — the decisive test for melons, peaches, mangoes, pears, and ripe pineapple.
The thump on watermelons, the tap on cantaloupes and pineapples, and the rattle test on in-shell walnuts for dryness.
Heft relative to size; high water content reads as heavier. The single most reliable test for watermelon, cantaloupe, honeydew, pineapple, citrus, and stone fruit.
Specific probes: peeking under an avocado stem nub, pressing a pear at the neck, sniffing a melon's 'belly button,' or tugging a pineapple crown leaf.
Refractometer for °Brix (sugar), penetrometer for firmness, near-infrared spectroscopy in commercial packing houses, and the starch-iodine stain for apples and pears.
How to do it
- 1
Step 1 — Classify the produce
Identify whether the item is climacteric (will ripen off the plant: banana, avocado, pear, peach, tomato, mango, melon, kiwi, plum, fig, persimmon, papaya, apple) or non-climacteric (does not improve after picking: berry, cherry, citrus, grape, pineapple, pomegranate, watermelon, cucumber, bell pepper, lychee). This tells you whether you are selecting for immediate eating or for a 1–5 day ripening window.
- 2
Step 2 — Visual scan
Look first at color against the variety's expected ripe palette (banana = yellow with light brown flecks; mango = yellow-orange to red blush over yellow; tomato = deep uniform color, no green shoulders for most varieties). Then look at surface: intact skin, no shriveling, plump shape, fresh stem or calyx, and the presence of natural bloom on grapes and plums.
- 3
Step 3 — Weight check
Pick up two pieces of similar size — the heavier one has higher water content and is usually riper. This is the single most reliable test for watermelon, cantaloupe, honeydew, pineapple, citrus, pomegranate, and stone fruit.
- 4
Step 4 — Pressure test (palm, not fingertips)
Cradle the fruit in your palm and gently close your fingers. The skin should yield slightly and spring back. Too hard = underripe; no spring-back, finger leaves a dent = overripe. For very delicate fruit (peach, nectarine, fig), use only the pad of the thumb at the stem end. For pears, press at the neck just below the stem.
- 5
Step 5 — Aromatic test at the right end
Bring the stem end OR blossom end (opposite the stem) to the nose, whichever is the variety's aromatic pole. Melons, mangoes, peaches, and tomatoes give best at the stem end; pineapples at the base; pears at the neck. A ripe fruit smells like itself — sweet, floral, fruity. Nothing = not ripe; fermented or alcoholic = past peak.
- 6
Step 6 — Sound or stem-specific tests where applicable
Apply a sound test only on melons and pineapples: a deep hollow thump on a watermelon (combined with a field-spot check), a flat low note when tapped on a cantaloupe or pineapple. For avocados, flick off the stem cap and look at the color underneath. For figs, look for the neck to bend and a small skin tear at the stem. For corn, peel back a sliver of husk — kernels should be plump and milky when pierced.
- 7
Step 7 — Decide and stage
If it passes all the tests, it is eat-today. If one or two are borderline (color right, no smell yet), buy it and ripen on the counter in a paper bag for 1–4 days. Sort your purchases by ripeness stage on arrival home: 'eat now,' 'in 2–3 days,' and 'use within a week.'
- 8
Step 8 — Store at the correct stage
Move to the refrigerator ONLY when fully ripe and you want to hold it a few more days (strawberries, ripe peaches, ripe avocados). Most ripe fruit keeps 1–3 days longer cold. Keep ethylene-producing fruit separated from ethylene-sensitive produce in storage. Never chill unripe climacteric fruit.
Climacteric vs. non-climacteric: the rule that changes everything
Every ripeness decision begins with a single question: will this item continue to ripen after I take it home, or is it as good as it will ever be the moment it is picked? The answer reshapes how you shop, store, and time your cooking. Climacteric fruit generates ethylene internally and ripens on the counter, often improving dramatically over a few days. Non-climacteric fruit does not — it was ripe on the day it was harvested, and from that moment on it is only losing water, sugar, and aroma. The practical consequences: buy climacteric fruit slightly underripe and let it finish at home; buy non-climacteric fruit at peak, smell and taste one, and never expect it to recover from a too-early purchase. And never refrigerate an unripe climacteric fruit — the cold inactivates the ripening enzymes, and you will end up with a fruit that turns soft, never sweet, and refuses to color up.
- Climacteric (will finish at home): banana, avocado, pear, peach, nectarine, mango, melon, kiwi, fig, plum, persimmon, papaya, apricot, tomato, apple.
- Non-climacteric (buy ready to eat): all berries, cherry, citrus, grape, pineapple, pomegranate, watermelon, lychee, cucumber, bell pepper.
- Keep ethylene-sensitive items (lettuce, herbs, berries, broccoli, cut flowers) physically separate from ethylene-producers (apple, banana, avocado, peach, pear, tomato, kiwi) in storage.
Matching ripeness to the dish
A 'ripe' piece of produce is not always the right piece for the recipe. Firm, slightly underripe tomatoes slice cleanly for a salad; soft, fully ripe ones collapse into a quick sauce. Underripe papaya and mango hold their shape in a slaw; fully ripe ones blend into a purée. A barely-ripe pear is what you want for poaching in wine — it keeps its silhouette — while a tree-ripe pear is what you want to eat over the sink. Hard, starchy green plantains are the only kind that will fry into tostones and plantain chips; spotted yellow bananas are for banana bread; black-skinned bananas are for smoothies. Learning to choose by intended use, not just by ripeness, doubles the value of the same purchase and turns 'imperfect' produce into the correct ingredient.
Beyond the senses: commercial ripeness testing
At home the five senses are the whole toolkit. In packing houses and at auction, produce is graded by instruments that read what the hand cannot. A refractometer measures dissolved sugar as °Brix — a ripe muskmelon lands around 12–14° Brix, a ripe strawberry around 7–9°. A penetrometer pushes a standardized probe into the flesh and reports firmness in newtons. The starch-iodine test, the classic one for apples and pears, slices the fruit and paints the cut face with iodine-potassium iodide solution: unripe zones stain blue-black where starch remains, while ripe zones stay pale yellow or clear where starch has already converted to sugar (the Cornell starch-iodine chart for Bartlett pears is the textbook example). Commercial lines also use near-infrared spectroscopy to scan every piece for internal sugar and dry matter. The home cook needs none of this — but knowing it exists explains why a 'Brix-tested' melon from a farm stand often outperforms a supermarket thump-test selection, and why a pear that is 'ready to pick' from the tree is weeks away from being 'ripe to eat' on your counter.
Common uses
Tips & pitfalls
- Use the pad of your thumb or the flat of your palm, never fingertip tips — pressing stone fruit with fingertips is the single most common cause of bruising in the market bin.
- Smell is decisive for melons, peaches, nectarines, mangoes, and ripe pineapple: a ripe fruit smells like a ripe fruit, an underripe one smells like nothing, and a fermented or alcoholic aroma means it is past peak.
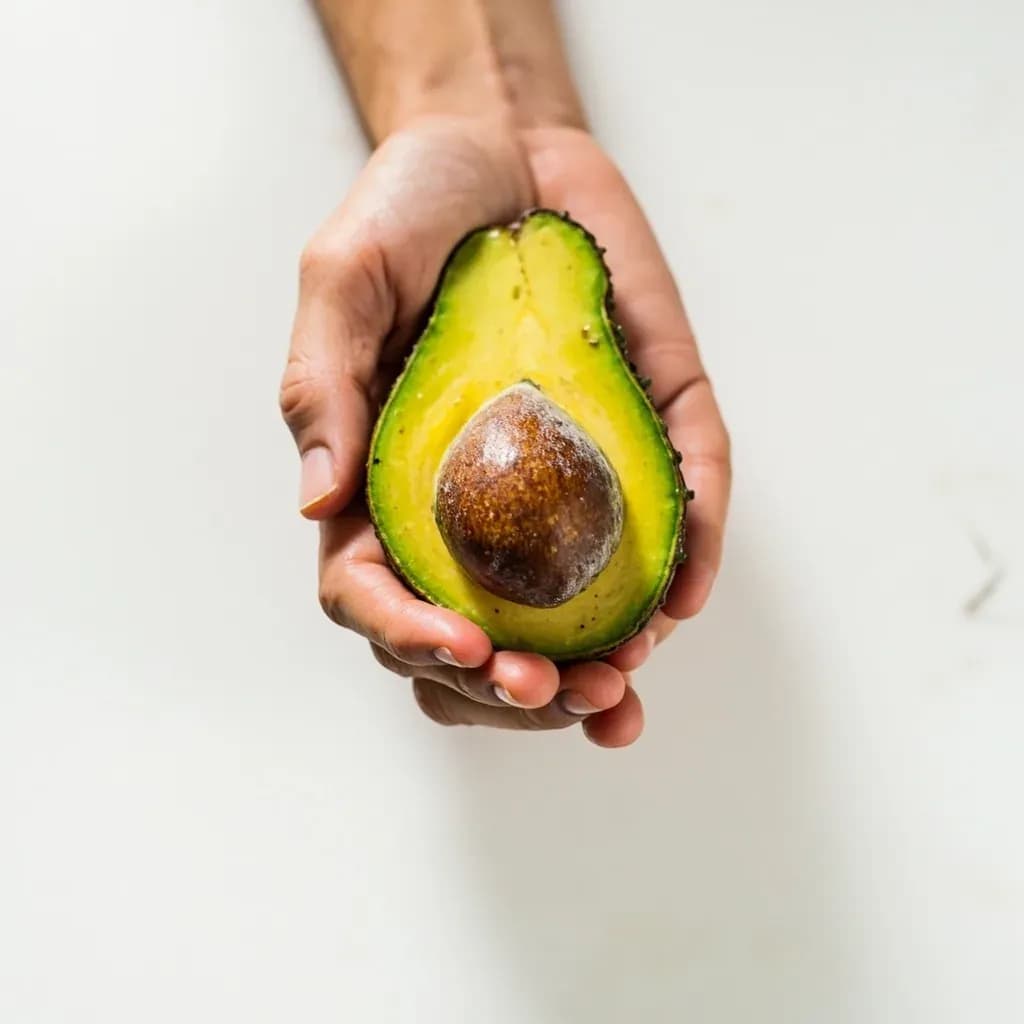
- For avocados, flick off the little brown stem nub: bright green underneath = eat now, yellow = wait a day, brown = use it or it is gone.
- Buy climacteric fruit slightly underripe (bananas, avocados, pears, mangoes, peaches, plums, tomatoes) and let them finish on the counter; buy non-climacteric fruit (berries, cherries, citrus, pineapple, pomegranate, watermelon) ready-to-eat, because they will not improve.
- Never refrigerate an unripe climacteric fruit — cold inactivates the ripening enzymes and you will get a mealy, never-sweetens piece of fruit.
- Speed up counter ripening with a paper bag loosely folded closed (it traps ethylene); add a banana or apple to the bag for an extra boost on stubborn avocados and pears.
- Common mistake: refrigerating tomatoes. Cold kills the aroma, turns the flesh mealy, and prevents the final color change. Keep them on the counter, stem-side down, out of direct sun.
- Common mistake: squeezing every piece of fruit at the bin. Stone fruit, avocados, and tomatoes bruise easily and pickers and grocers are not gentle — press one carefully, then commit, or buy slightly underripe and ripen at home.
Good to know
- Primary senses used
- Sight, touch, smell, and sound, with taste reserved for sampling one piece before committing to the batch
- Core biology
- Climacteric fruit ripen after picking (banana, avocado, pear, peach, mango, melon, tomato, kiwi, fig, apple); non-climacteric do not (berry, cherry, citrus, grape, pineapple, pomegranate, watermelon, cucumber, bell pepper)
- Key ripening hormone
- Ethylene (C2H4), a natural plant gas that drives softening, color change, and starch-to-sugar conversion
- Commercial ripening concentration
- Ripening rooms typically dose ~100–150 ppm ethylene to trigger bananas, tomatoes, and avocados on schedule
- Best cool storage for ripe tropicals
- 55–60 °F (13–16 °C); temperate fruit keep at 32–40 °F (0–4 °C)
- Time required
- Seconds to assess a single piece; a few minutes to sort a crate into eat-now and ripen-on-counter piles
- Equipment
- Hands, nose, and eyes are enough at home; commercial packers add refractometers (°Brix), penetrometers, and starch-iodine staining
Also called
Controlled Ripening
Dishes that rely on it
Related

Whisk
Beat ingredients smooth and aerated with a looping wire motion

Sift
Pass dry ingredients through mesh to aerate and remove lumps

Strain
Pour through mesh to separate solids from liquid for a smooth result

Filter
Pass liquid through fine material to clarify out the smallest particles

Rice
Press cooked potatoes through small holes for fluffy, lump-free texture

Mash
Crush soft cooked food into a rustic, creamy purée

Grind
Crush food into a coarse to fine texture, from spices to meat

Grate
Shred food into fine bits against a sharp-toothed surface