Prep & Assembly
Shaping Orecchiette
Dragging and inverting small dough discs into the cupped 'little ear' Puglian pasta.
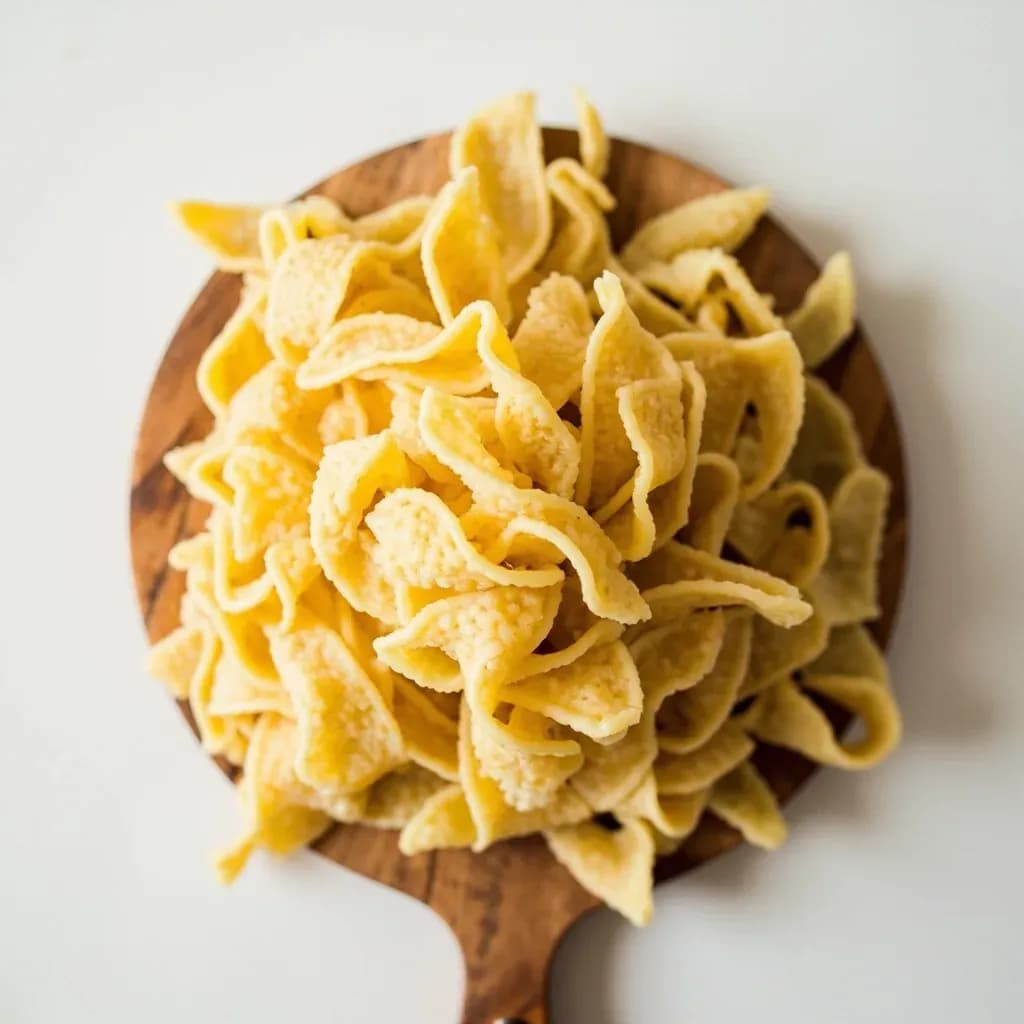
Shaping orecchiette is the Puglian hand skill of cutting a rope of semolina dough into small pieces, dragging each across the board with a knife or thumb to make a curl, then flipping it over a fingertip so it forms a concave little ear. The textured inner surface catches chunky sauces like cima di rapa. It takes rhythm and practice, and skilled nonnas shape hundreds a minute.
Shaping orecchiette is the gesture that turns a piece of semolina dough into the cupped 'little ear' that defines one of southern Italy's most distinctive pastas. Each piece is shaped by flattening a small dough disc against a grooved wooden board, then inverting it over the thumb so the center cups inward while the rim stays slightly thicker. That subtle architecture — ridges on the outside, a smooth concave interior, a thicker lip — is not decorative. The ridges grip a chunky sauce; the cup holds a thin broth or olive oil; the firm rim keeps the shape from collapsing in boiling water. Without that profile, you have flat, sad buttons.
The technique is rooted in Puglia, especially the Bari coast and the Itria Valley (Alberobello, Locorotondo, Martina Franca), where women still shape orecchiette by hand on wooden boards in the street. The dough itself is simple — semola rimacinata (re-milled durum semolina), water, a pinch of salt, no egg — but the behavior of the dough is unforgiving. It needs proper hydration, a real rest, and a firm, confident drag to imprint the ridges. The inversion over the thumb is the part most home cooks fumble: a slow, hesitant flip flattens the cup. A quick, decisive motion produces the ear.
There is no machine that produces a true orecchietta with the correct rim thickness, ridged back, and smooth cupped interior, which is why the skill is still taught by hand. The first dozen pieces almost always come out flat, torn, or oval. By the second or third hundred, the rhythm sets in and the shape becomes consistent. Plan to eat your earliest attempts — they taste exactly the same as the perfect ones, just look like amoebas.
- Difficulty
- Hard
Types & varieties
The classic round cupped shape, about 2 cm across, with a thinner center and thicker rim
Elongated, slightly pointed version from the Itria Valley; same dough, shaped by dragging a longer piece across the board so the cup tapers
Tiny, thick little ears made by pressing a small piece of dough with a fingertip; common in Bari and Brindisi
Smaller, more delicate ears from the Salento area
Salento cousin shape with a smaller, more rustic cup
How to do it
- 1
Mix the dough
Combine semola rimacinata with water and a pinch of salt at roughly 50–55% hydration. Mix to a shaggy dough, then knead 8–10 minutes by hand or 5–6 minutes in a stand mixer with the dough hook until smooth, firm, and only slightly tacky. The dough should not stick to clean hands.
- 2
Rest the dough
Shape into a ball, wrap tightly in plastic, and rest at room temperature for 30 minutes to 1 hour. This lets the semolina fully hydrate; skipping the rest produces a dough that cracks when you invert it.
- 3
Roll into ropes
Cut off a working portion and keep the rest covered with plastic so the surface does not dry. Roll the piece under your palms into a rope about 1–1.5 cm thick, even along its length.
- 4
Portion the pieces
Using a butter knife or bench scraper, cut the rope into pieces about 1 cm wide, roughly the size of a hazelnut. Toss the cut pieces in a tray of semolina so they don't stick together.
- 5
Form the disc
Press a single piece against a grooved wooden board (a butter paddle with fine lines works perfectly). With the flat side of a small knife held at a low angle, drag the piece firmly toward you so it flattens into a thin disc about 2 cm across and the board's grooves imprint fine ridges on the underside.
- 6
Invert over the thumb
Flip the disc so the ridged side faces out and drape it over your thumb. With one quick, decisive motion, press the center down with the tip of a butter knife so the disc cups and inverts around your thumb. The center should be thinner than the rim — that is what gives the piece its structure.
- 7
Flick and dry
Flick the finished orecchietta off your thumb onto a floured cloth, wooden board, or a traditional 'panara' drying frame. Keep the cupped shape and ridges visible. Cover shaped pieces loosely with a cloth as you work.
- 8
Dry before storing or cooking
For same-day cooking, rest them 10–15 minutes on the cloth so the surface firms up — this keeps them from dissolving in the water. For storage, dry at room temperature 12–24 hours until completely hard and brittle, turning once. A low oven at about 50 °C / 120 °F for 20–30 minutes speeds this up.
- 9
Cook
Drop into a large pot of well-salted boiling water. Cook 8–12 minutes for fully dried orecchiette, 3–5 minutes for fresh, until al dente with a slight bite at the rim. Toss gently when draining so the cups keep their shape.
The anatomy of a good orecchietta
Three features define a properly shaped piece, and getting all three right is what separates orecchiette from flat dough discs.
- Ridged outer surface: pressed against a grooved board, the fine lines grip sauce and give the pasta its characteristic texture.
- Smooth, concave interior: created by inverting the disc over the thumb, the smooth cup holds liquid — broth, olive oil, ricotta forte — and cradles chunky condiments.
- Thicker rim, thinner center: the rim gives the pasta structural integrity so the cup doesn't collapse or go mushy in the boil, while the thin center cooks through to a tender bite.
Why semola rimacinata, not flour
The flour choice is non-negotiable for traditional orecchiette. All-purpose or bread flour produces a softer, paler dough that drags into a smear rather than a crisp ridge, and the surface goes gummy in the water. Re-milled durum semolina (semola rimacinata) is finer than regular semolina but coarser than 00 flour, which is exactly the granularity needed to hold an imprint and to maintain that firm, almost waxy chew. It also carries the deep yellow color and nutty flavor that define the pasta.
The gesture, broken down
Most shaping failures are gesture failures, not dough failures. The drag must be firm and even, and the inversion must be quick. Hesitation is the enemy.
- Drag: press the knife flat against the dough piece and drag it toward you across the grooved board in one confident stroke. A tentative drag produces an uneven disc and weak ridges.
- Invert: flip the disc so the ridged side faces out, drape it over your thumb, and press the center down with the knife tip in a single motion. The disc should snap into a cup, not be coaxed.
- Release: flick the finished orecchietta off the thumb onto a floured cloth. Pulling it off stretches the rim and warps the shape.
Common uses
Tips & pitfalls
- Use semola rimacinata, not all-purpose or bread flour — durum gives the rough, sauce-gripping exterior and the proper yellow color; softer flours smear instead of ridge.
- Rest the dough wrapped in plastic for at least 30 minutes; under-rested dough cracks the moment you try to invert it.
- Cut the ropes into small, uniform pieces about 1 cm wide; consistent size means even cooking and a uniform cup across the batch.
- Press the disc thin at the center but leave a slightly thicker rim — the rim is what keeps the cup from collapsing in boiling water.
- The defining gesture is a firm, quick drag and a confident inversion. A slow, hesitant drag flattens the cup and a tentative flip tears the disc.
- If pieces stick to the board, dust lightly with semolina, never flour — flour softens the surface and makes orecchiette gummy in the pot.
- Shape over a wooden board with fine grooves (a butter paddle, gnocchi board, or traditional 'tavoletta' all work) — the ridges are what grip the sauce and define the pasta.
- Work in small batches and keep the unworked dough covered — the surface dries fast, and dry edges crack during shaping.
- Dry thoroughly before bagging; even a few percent of residual moisture causes mold. Fully dried orecchiette keep 6+ months in an airtight container.
- Don't overcook — the cup loses its shape and the ridges go mushy. Pull at al dente, with a slight bite at the rim.
Good to know
- Origin
- Puglia (Apulia), southern Italy; especially the Bari province and the Itria Valley (Alberobello, Locorotondo, Martina Franca)
- Name meaning
- Italian 'orecchia' (ear) + '-ette' (diminutive): 'little ears'
- Flour used
- Semola rimacinata (re-milled durum wheat semolina), water, and salt — no eggs in the traditional dough
- Hydration
- About 50–55% water to flour by weight; the dough should feel firm, smooth, and only slightly tacky
- Final size
- 1.5–2.5 cm across, with a thinner center and a slightly thicker rim
- Yield
- Roughly 250–300 pieces from 500 g of semolina
- Cook time
- 8–12 minutes for fully dried orecchiette; 3–5 minutes if cooked fresh
- Cultural note
- In Bari Vecchia, women traditionally shape orecchiette by hand on wooden boards in the street; the practice is recognized as regional food heritage
Also called
Forming Orecchiette · Little Ears Pasta
Related

Whisk
Beat ingredients smooth and aerated with a looping wire motion

Sift
Pass dry ingredients through mesh to aerate and remove lumps

Strain
Pour through mesh to separate solids from liquid for a smooth result

Filter
Pass liquid through fine material to clarify out the smallest particles

Rice
Press cooked potatoes through small holes for fluffy, lump-free texture

Mash
Crush soft cooked food into a rustic, creamy purée

Grind
Crush food into a coarse to fine texture, from spices to meat

Grate
Shred food into fine bits against a sharp-toothed surface