Prep & Assembly
Windowpane / Gluten Development Test
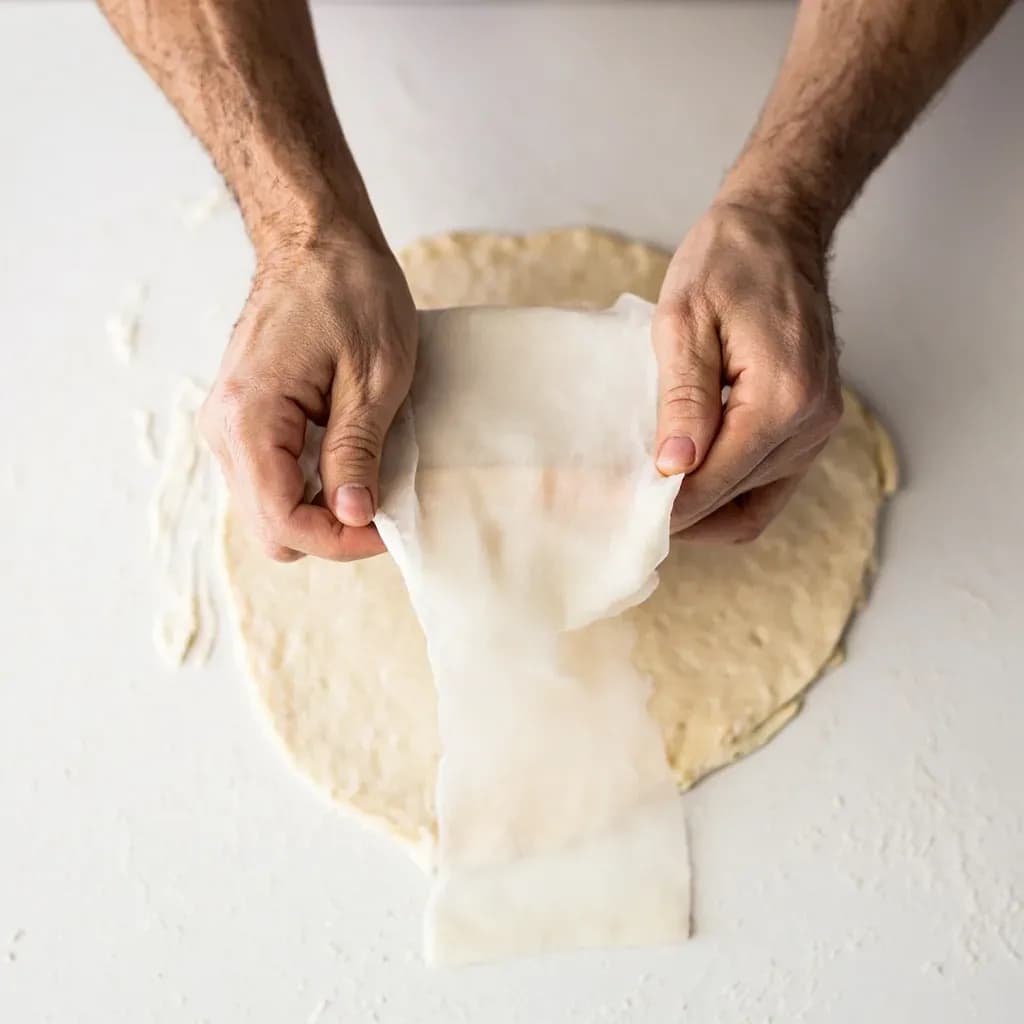
Stretching a piece of dough thin to check whether the gluten is fully developed.
The windowpane test gauges gluten development by gently stretching a small piece of kneaded dough until it forms a thin, translucent membrane without tearing. If light passes through cleanly, the gluten network is strong enough to trap gas for a good rise; if it tears, the dough needs more kneading. It is a quick, tool-free way to know when mixing is done.
The windowpane test — also called the gluten window or membrane test — is the most reliable at-home check for whether a dough has been kneaded enough. A small piece of dough is stretched by hand until it forms a thin, translucent membrane; if light or the outline of your fingers shows clearly through the center without tearing, the gluten network is fully developed and the dough is ready for its next stage. The test works because proper kneading aligns gluten proteins (glutenin and gliadin) into long, elastic sheets that trap the gas produced by yeast, giving the final bread its structure, chew, and oven spring.
It is especially valuable in enriched doughs — brioche, challah, panettone, babka, and the like — where butter, eggs, and sugar coat the flour proteins and slow gluten formation. In these doughs, the smooth, satiny feel that signals readiness in a lean baguette can be misleading, and the windowpane removes the guesswork. It is equally useful for fresh egg pasta, ramen, udon, bagels, and pizza doughs, where a strong gluten window translates directly into the desired chewy, structured crumb or noodle bite.
The test has limits. In very high-hydration artisan doughs (ciabatta at 80% hydration or higher) the dough is intentionally slack and extensible rather than elastic, so a pinched piece will always feel soft and stretchy; bakers judge those by the dough's hang and surface tension instead. The windowpane also does not replace the poke test, which checks fermentation rather than kneading. Used in the right place, however, it is the closest a home cook gets to the farinograph readings used in industrial bakeries.
- Difficulty
- Easy
Types & varieties
The classic test for yeasted breads and enriched doughs — pinch, stretch, look for translucency.
Used on egg-and-flour doughs; the sheet should stretch paper-thin so light passes through evenly without tearing.
Used in ramen and udon production (as well as other wheat noodles) to confirm the gluten network in the dough before resting and rolling.
A companion test used later, during bulk fermentation, to gauge whether the dough has risen sufficiently — it complements but does not replace the windowpane.
How to do it
- 1
Pinch off a small piece of dough
After kneading, tear off a piece roughly the size of a walnut or golf ball (about 20–30 g). Set the main dough aside under a damp towel or plastic so its surface does not dry out.
- 2
Shape it into a smooth ball
Cup the piece between lightly oiled or damp palms and roll gently to form a ball. A smooth, even surface lets you read the gluten network clearly when you stretch it.
- 3
Begin stretching with both thumbs
Hold the ball in front of you with both hands, thumbs together behind it and fingers spread over the front. Press your thumbs forward and apart slowly, flattening the dough into a rough disc.
- 4
Stretch outward, rotating as you go
Using the fingers of both hands, gently ease the dough outward from the center, rotating it as you stretch. Keep the motion even — you are coaxing the gluten to extend, not pulling it apart.
- 5
Work toward a thin, even membrane
Continue stretching and rotating, supporting the dough over the backs of your hands or fingers, until the center is paper-thin. The outer rim will be slightly thicker, which is normal.
- 6
Read the result against the light
Hold the thin section up toward a light source or your open palm. If you can see the color of your fingers or read light through the dough without it tearing, the gluten is well-developed and the dough is ready to proceed. If it tears in a ragged, short stretch, return the piece to the dough and continue kneading for 1–2 minutes before retesting.
- 7
Rejoin or set aside the test piece
Once satisfied, pinch the test piece back into the main dough mass so it does not disrupt fermentation. Proceed to bulk fermentation or shaping as the recipe directs.
Why it works
When flour is mixed and kneaded with water, two proteins — glutenin and gliadin — hydrate and link into long, elastic sheets. As those sheets align, the dough transforms from sticky and shaggy into smooth, springy, and extensible. A fully developed gluten network can be stretched very thin because the protein chains have slid into an orderly web; an under-developed one tears early because the chains are still fragmented, and an over-kneaded one snaps back because the network has tightened beyond what the dough can extend.
Reading the tear
How the dough fails tells you as much as how it succeeds. Two failure modes are easy to confuse, and they call for opposite corrections:
- Ragged, short, opaque tear — the dough gives up early and the surface looks lumpy. This is under-kneaded gluten. Continue kneading for 1–2 minutes and retest.
- Clean, single-line split with a sharp edge — the dough resists stretching and then breaks cleanly. This usually means the gluten is over-tightened, often from a too-stiff dough, over-kneading, or cold dough. Let it rest 5–10 minutes, or add a touch of water, then retest.
- Tears mostly at the thicker rim while the center holds — your technique, not the dough. Stretch a fresh piece using lighter, more even pressure from the start.
When not to rely on it
The windowpane is a test of elastic, well-developed gluten. Some doughs are not built for that. Very high-hydration open-crumb breads (ciabatta above about 80% hydration, some focaccia) are intentionally extensible rather than elastic; a pinched piece will always feel soft and stretchy, and the window will read slack. In those doughs, bakers judge by how the dough hangs from the hand, how it spreads on the counter, and how it dimples when poked. Likewise, no-knead and long-autolyse doughs develop gluten through time and folds rather than mechanical work, so a test piece pinched early will fail even when the bulk dough is fine. Use the test that matches the dough you are making.
Common uses
Tips & pitfalls
- Lightly oil or wet your hands before stretching so the dough doesn't grab your fingers and tear — and never dust the test piece with flour, which will obscure the true state of gluten.
- Stretch gently and rotate the piece outward rather than pulling it apart sharply; the gluten needs to be coaxed, not ripped.
- If the dough snaps back immediately, give it a 5–10 minute rest (a mini autolyse) and retest before concluding it is under-kneaded — a tight, cold, or under-hydrated dough often just needs time to relax.
- A perfectly developed dough will form a window thin enough to read newsprint through, with light coming through the center and a slightly thicker, even rim.
- Learn to read the tear: a clean, single-line split usually signals over-kneading or over-tightening, while a ragged, short, opaque tear signals under-kneading.
- If you are using a stand mixer, stop and test before the dough climbs the hook — visual cues at the bowl alone are not as reliable as the windowpane, especially for enriched doughs.
- Cold dough straight from the fridge will read tighter than room-temperature dough; always test at the temperature at which you will actually be working.
- Don't keep testing from the same dough — pinch the test piece off the outside, and tuck it back into the main mass when you are done so the fermentation stays on schedule.
Good to know
- Purpose
- Determines whether gluten in a dough has been sufficiently developed through kneading
- Also called
- Gluten window test, membrane test, windowpane test
- Best for
- Enriched yeasted doughs (brioche, challah, panettone), bagels, pizza, fresh egg pasta, ramen, and udon
- Less useful for
- Very high-hydration or no-knead doughs (e.g., 80%+ hydration ciabatta), where extensibility matters more than a tight gluten window
- Test piece size
- A small ball the size of a walnut or golf ball, about 20–30 g
- Sign of success
- Dough stretches into a thin, translucent membrane through which you can see the outline of your fingers or light, without tearing
- Sign of failure
- Tears before becoming translucent (under-developed, ragged and opaque) or breaks in a clean, sharp line (over-tightened or over-kneaded)
- Typical timing
- Performed after kneading and before bulk fermentation; the stretch itself takes 5–20 seconds
- Tools needed
- None — just clean, lightly oiled or damp hands to prevent sticking
- Related tests
- Poke test, finger dent test, and poke-and-listen (all used during proofing, not kneading)
Also called
Gluten Development Test · Windowpane · Membrane Test
Dishes that rely on it

Related

Whisk
Beat ingredients smooth and aerated with a looping wire motion

Sift
Pass dry ingredients through mesh to aerate and remove lumps

Strain
Pour through mesh to separate solids from liquid for a smooth result

Filter
Pass liquid through fine material to clarify out the smallest particles

Rice
Press cooked potatoes through small holes for fluffy, lump-free texture

Mash
Crush soft cooked food into a rustic, creamy purée

Grind
Crush food into a coarse to fine texture, from spices to meat

Grate
Shred food into fine bits against a sharp-toothed surface