Heat & Fire
Crispy-Skin Searing
Searing skin-on fish or poultry skin-side down to render fat and crisp the surface.
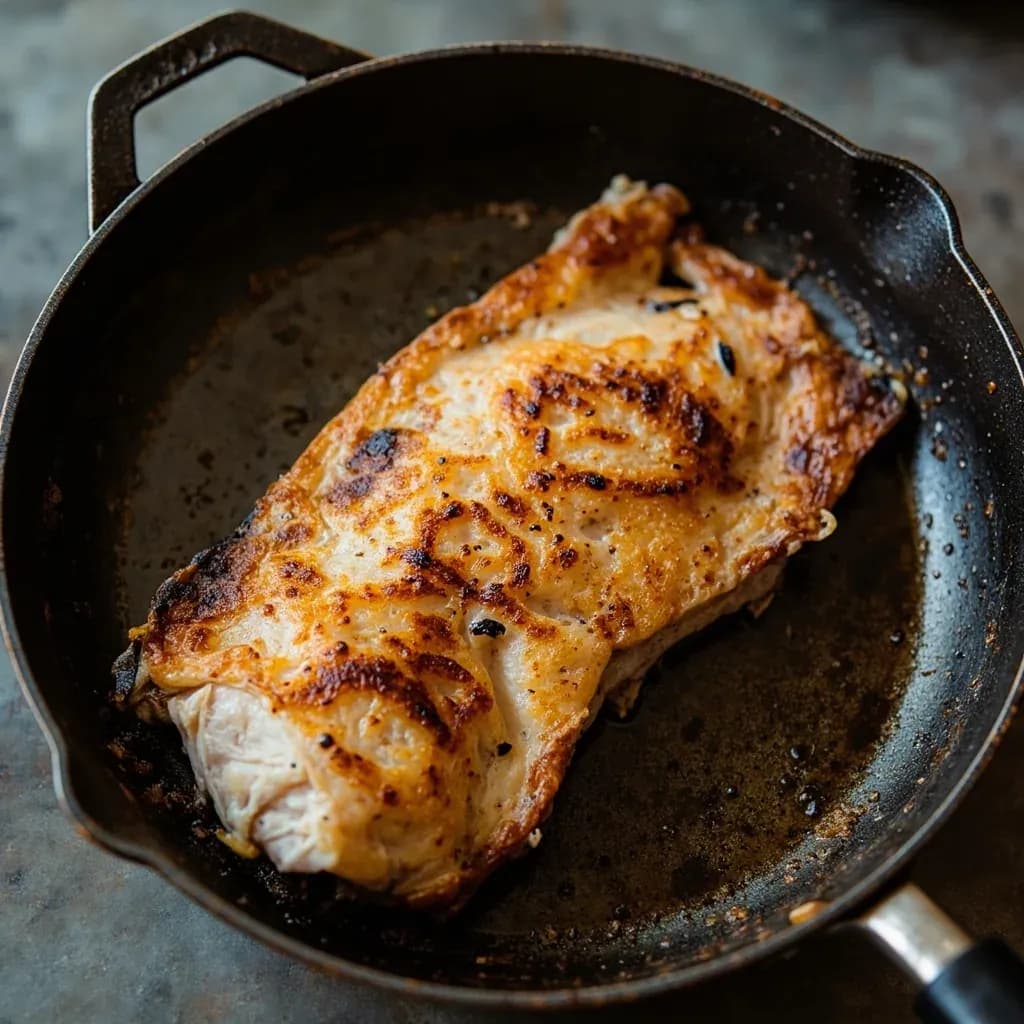
Crispy-skin searing presses dried, salted skin firmly against a hot, oiled pan so the fat renders and the skin shatters crisp without curling. Cooks keep gentle pressure and steady heat, cooking mostly on the skin side before a brief flip. The keys are a dry skin surface and not moving the protein until the skin releases naturally.
Crispy-skin searing is a dry-heat method built around a single principle: cook skin-on proteins predominantly from the skin side so that the layer of subcutaneous fat renders out while the surface itself dehydrates and browns into a brittle, golden crust. The flesh, shielded by the skin and the pool of rendered fat, finishes in residual or indirect heat — often barely kissing the hot side of the pan. The result is the contrast that defines the technique: crackling skin against tender, just-opaque flesh.
What separates it from a generic pan sear is the management of two simultaneous processes. The fat between skin and flesh has to melt and flow away before it can brown; the skin surface has to lose enough water to reach the temperatures where Maillard reactions take hold. Get the balance wrong in either direction and you get scorched leather over raw flesh, or flabby skin overcooked into cotton. Moderate heat, a dry surface, and patience are the three levers that keep the two processes in step.
Master it on a salmon fillet or a chicken thigh, and the same logic transfers cleanly to a whole branzino, a thick piece of black cod, a mackerel, or a duck breast — only the finishing move (a brief flip, a stint in the oven, a carryover rest) changes with thickness.
- Difficulty
- Medium
Types & varieties
Pan preheated with oil before fish goes in skin-side down; standard for salmon, branzino, snapper, and sea bass.
Duck breast placed in a cold, dry skillet skin-side down, then brought up to heat gradually so fat renders out before the surface scorches.
Fish placed in an unheated oiled pan, then heated slowly — used to reduce curling and keep delicate fillets in full contact with the metal.
A second pan or weighted spatula holds the protein flat against the skillet for the first minute, ensuring every part of the skin sees the heat.
Sear on the stovetop skin-side down, then transfer to a 400°F / 200°C oven to bring the flesh to temperature without overcooking it.
Skin-side down for most of the cook, then a 30–60 second flip to kiss the flesh side; common for thin fillets like trout or sole.
Skin lightly scored in a crosshatch (mackerel, duck, sometimes salmon) to help fat render and prevent buckling on thick, fatty skin.
How to do it
- 1
Dry and season the skin
Pat the skin thoroughly dry with paper towels. Season generously with salt on the skin side (and lightly on the flesh). If time allows, place uncovered on a rack in the refrigerator for 30 minutes to several hours to further dehydrate the surface. Pat dry again just before cooking.
- 2
Choose and preheat the pan
Select a heavy, flat skillet — stainless steel, carbon steel, or cast iron — sized so the protein fits without crowding. Add a thin film of neutral high-smoke-point oil. Heat over medium to medium-high until the oil shimmers and just begins to ripple. For duck breast, omit the oil and start in a cold dry pan.
- 3
Lay the protein skin-side down
Place the fillet or piece skin-side down in the pan away from you to avoid splatter. Gently press the surface with a spatula or set a second pan on top to keep it flat and ensure full contact with the skin.
- 4
Cook without moving
Leave the protein alone. Resist the urge to peek or shift it. Adjust the heat if the skin is browning too quickly — you want steady, even golden color, not black streaks. Cook roughly 70–80% of the total time on this side.
- 5
Check for natural release
After several minutes, nudge a corner with a thin spatula. If the skin resists and sticks, it isn't ready. When it slides freely and shows an even, deep golden crust, the sear is done.
- 6
Finish the flesh side
For thin fillets, flip for 30–60 seconds to just set the flesh side, then remove. For thick cuts, transfer the pan to a 400°F / 200°C oven (or flip briefly and reduce heat) until the flesh reaches the desired internal temperature.
- 7
Rest skin-side up
Transfer to a warm plate or board skin-side up and let rest 2–5 minutes. This keeps steam from the flesh condensing onto and softening the crisp crust.
- 8
Use the fond
Pour off excess fat if desired, then deglaze the pan with wine, stock, citrus juice, or a knob of butter to build a quick pan sauce while the protein rests.
Why moderate heat, not maximum heat
The instinct is to crank the burner, because high heat is what gives a steak its crust. Skin is a different problem. Beneath the skin sits a layer of fat that has to melt and run off before the surface can dry out and brown; on a screaming-hot pan, that fat carbonizes before it has a chance to leave, leaving you with a blackened, bitter crust over a layer of congealed fat and undercooked flesh. Medium to medium-high heat gives the fat time to render, the water time to evaporate, and the proteins time to brown through the Maillard range in a controlled, even way. If the skin is coloring faster than the fat is releasing, the heat is too high — pull it back.
- Fat rendering must finish before Maillard browning can dominate.
- Steam from trapped water keeps the skin below 212°F / 100°C — the surface has to dry before it can brown.
- Duck skin, with its thick fat cap, is the extreme case: it needs the slowest ramp of any protein in the kitchen.
Common uses
Tips & pitfalls
- Pat the skin completely dry, then salt it and leave uncovered in the refrigerator for at least 30 minutes (ideally a few hours) — dry skin is the single biggest factor in crispness, and it can't be faked at the stove.
- Score thick duck or mackerel skin lightly through the fat layer without cutting into the flesh, so fat renders and the skin lays flat instead of buckling.
- Start skin-side down and do not move the protein — premature lifting tears the skin and resets the browning clock.
- Press the protein flat for the first 30–60 seconds so the entire skin contacts the pan; this is what stops the edges from curling up and staying pale.
- Test release by gently nudging a corner with a spatula; if it resists, give it another minute. When ready, the skin will slide freely and reveal a deep golden crust.
- For thick cuts (duck breast, large salmon portions, skin-on chicken thighs), finish in a 400°F / 200°C oven to bring the flesh to temperature without burning the skin.
- Common mistake: covering the pan — trapped steam immediately softens the crust you just spent ten minutes building. Crisp skin is built in the open.
- Common mistake: a nonstick pan — it works, but you sacrifice the fond and the deeper browning that a stainless, carbon steel, or cast iron pan provides, and you lose the pan sauce that follows.
Good to know
- Technique family
- Dry-heat pan searing
- Primary proteins
- Skin-on fish fillets and whole fish; duck breast; chicken thighs, drumsticks, and legs
- Ideal pan
- Heavy, flat-bottomed skillet — stainless steel, carbon steel, or cast iron
- Heat level
- Medium to medium-high; hot enough to drive off water, gentle enough to render fat before burning
- Cooking fat
- Neutral high-smoke-point oil (grapeseed, canola, sunflower) for fish and poultry; none for duck — the rendered subcutaneous fat is the cooking medium
- Time on skin side
- Roughly 70–80% of total cook time; flesh side cooks in residual heat or a brief flip
- Key tool
- Thin offset or fish spatula for testing release and flipping
- Crisping mechanism
- Simultaneous fat rendering and Maillard browning on a dehydrated skin surface
- Difficulty
- Moderate — timing and patience matter more than skill
Also called
crisping skin · skin-side searing
Related

Sear
Blast the surface hot for a deep-browned, savory crust

Sauté
Cook quickly in a little fat over lively heat, tossing as you go

Stir-Fry
Toss bite-sized pieces over roaring heat for fast, smoky cooking

Pan-Fry
Crisp food in a shallow layer of hot fat, turning once or twice

Deep-Fry
Submerge in hot oil for an all-over crackling crust

Roast
Cook uncovered in dry oven heat for browned edges and tender centers

Bake
Cook with steady, surrounding oven heat — the soul of bread and pastry

Broil
Hit food from directly above with fierce overhead heat