Transform & Preserve
Koji Cultivation
Growing Aspergillus oryzae mold on steamed grain to build the base for miso, soy sauce and sake.
Koji cultivation inoculates steamed rice, barley or soybeans with Aspergillus oryzae spores and incubates them warm and humid for one to two days until the grain is wrapped in white mold. The mold's enzymes break starch into sugar and protein into amino acids, creating the deeply savory foundation for miso, soy sauce, sake and amazake. Temperature and airflow must be managed carefully to keep the mold growing without overheating.
Kōji cultivation is the practice of growing a domesticated filamentous mold — almost always Aspergillus oryzae — across steamed rice, barley, or soybeans until every kernel wears a fine white bloom of mycelium. Far from spoilage, this is a deliberate fermentation: the mold is excreting powerful enzymes right onto the surface of the grain. Amylases slice starch into fermentable sugars, proteases crack proteins into savory peptides and amino acids (the glutamate that gives miso and shoyu their depth), and lipases liberate fatty acids that round out aroma and mouthfeel. Cultivate the kōji well and you have a living, fragrant catalyst; cultivate it poorly and the enzymes never reach their potential, or worse, wild molds and bacteria colonize the warm starch instead.
This single step defines nearly every traditional Japanese grain ferment. Sake depends on the kōji's amylases to convert rice starch into sugar that yeast can drink at the same time it is being produced — the famous parallel fermentation. Miso, soy sauce, mirin, amazake, rice vinegar, and shochu each begin with a different ratio of kōji to grain and salt, but they share the same upstream: a tray of well-tended, enzyme-rich mold. Kōji use in Japan reaches back at least to the Yayoi period (roughly 300 BCE–300 CE), though the aseptic, spore-based inoculation system that home cooks rely on today is a Meiji-era innovation.
For a working cook, the practice is best understood as temperature- and cleanliness-driven: hold the grain near 30 °C (86 °F), keep humidity high, let the bed breathe, and intervene at set times to break up clumps and redistribute heat. The two qualities you are cultivating are enzyme activity and aroma — sweet-floral, faintly melon-like, with no sour or ammoniac edge. Get those right, and the rest of the ferment — whether a 300-gram jar of hatcho miso or a 10-kilogram batch of shoyu koji — practically runs itself.
- Difficulty
- Hard
Types & varieties
The workhorse — clean, slightly fruity aroma; the standard for sake, miso, shoyu, amazake, and mirin.
Originally a mutant selected for shochu; faster citric-acid production and whiter mycelium. Common in shochu and some modern miso.
Heavy citric-acid producer; essential for awamori (Okinawan spirit) and black-vinegar (kurozu) fermentation.
The most common substrate; base for sake, shio-kōji, miso, and amazake.
Used in barley miso and certain shoyu styles; the enzymes tend slightly more proteolytic.
Whole steamed soybeans inoculated directly; used in soybean-heavy miso and to extend rice or barley kōji.
Rice spread thin on wooden lids; drier, firmer kōji favored for ginjo-style sake.
Rice piled in insulated boxes; softer, more humid kōji favored for miso.
How to do it
- 1
Select and rinse the grain
Use a short- or medium-grain white rice for miso and amazake; polished sake-rice (such as Yamada Nishiki) for sake. Rinse until water runs clear, then soak 2–6 hours depending on variety until a kernel can be crushed between thumb and forefinger but the core still feels gritty.
- 2
Steam the grain
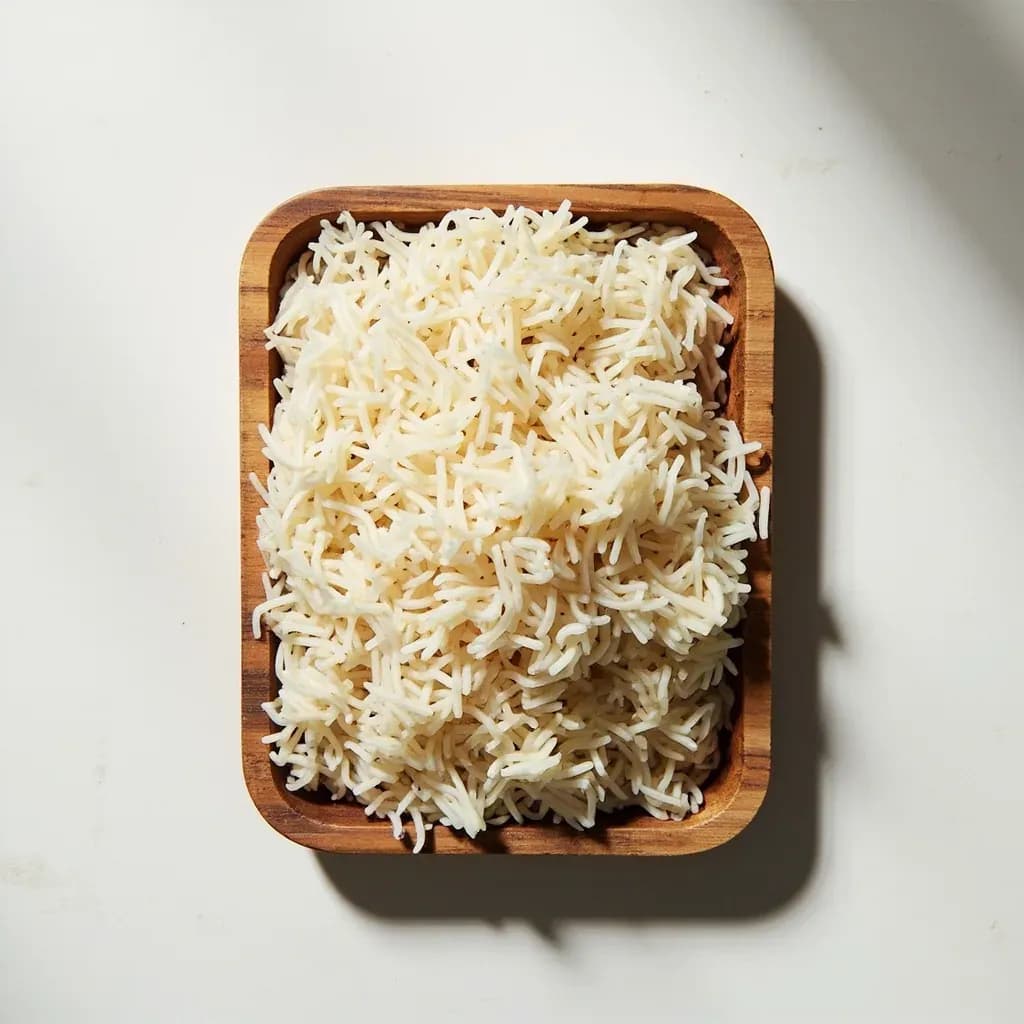
Drain thoroughly and steam over rapidly boiling water for 40–60 minutes, spreading loosely so steam penetrates every layer. Test by biting a kernel: outside should be soft, center still slightly chalky. Avoid pressure-cooker mush — kernels must remain separate.
- 3
Cool and break up clumps
Tip the steamed rice onto a clean, sterilized tray and gently break up clumps with wet hands (to keep rice from sticking). Cool to roughly 30 °C (86 °F) by fanning or letting it rest; this step alone can take 30–60 minutes.
- 4
Inoculate with tane-kōji
Sprinkle the seed spore powder evenly over the rice (about 1 g per kg of rice). Toss and fold the rice several times so every kernel is dusted. A fine tea strainer helps distribute evenly and avoids clumps.
- 5
Set the first incubation (kaon)
Heap the inoculated rice in a shallow, sterilized tray, pile into a low mound about 3–4 cm deep, cover with a damp cloth, and place in a 28–32 °C environment. Hold the temperature steady — this is the most critical 12 hours.
- 6
First mixing (moriwake)
At 18–22 hours the rice should feel warm to the touch with faint white fuzz and a sweet fragrance. Break up the mound, redistribute the rice evenly across the tray, and reform into a flat bed. Wipe condensation from the cloth.
- 7
Second mixing (naka-shibu)
At about 25–28 hours, do a lighter mixing — break clumps, turn the rice, and re-flatten. If the rice is drying out at the edges, mist very lightly with clean water. The bloom should now be visibly white across the entire bed.
- 8
Final mixing and maturation (shimai-shibu)
At roughly 32–38 hours, mix once more and spread the rice in a thinner layer. Lower the temperature to about 24–26 °C and let the kōji finish. Total time is usually 42–48 hours from inoculation.
- 9
Judge doneness
Kōji is ready when every kernel is coated in white mycelium, the grains are still distinct (not fused), the aroma is sweet-floral with no sour or ammoniac notes, and squeezing a small handful yields a soft, slightly crumbly mass that holds its shape.
- 10
Cool and store
Immediately after doneness, slide the kōji off the warm tray and spread it on a clean surface to cool — leaving it warm invites bacterial takeover. Once at room temperature, bag loosely and refrigerate for up to a week, or seal airtight and freeze for 6+ months.
Reading your kōji at each stage
A kōji bed tells you how it is doing through three channels: smell, appearance, and the warmth of the grain itself. Learning to read those signs is the real skill behind cultivation, because they tell you whether to mix, mist, or leave the bed alone.
- Hour 0–12: grain should feel slightly warm but not hot as it comes to incubation temperature. No visible growth yet — this is the spore-germination phase, and disturbing the bed now invites contamination.
- Hour 18–24 (first mix): look for the first white speckling, a slightly tacky feel, and a sweet, almost melon-like aroma. Clumps indicate the grain steamed too wet or the spores were unevenly distributed.
- Hour 25–30 (second mix): the bloom should be visibly white across the bed, with grains just beginning to knit together. A faint chestnut or steamed-rice sweetness is the right note.
- Hour 32–42 (final stretch): the grains should look fully white but still distinct, not fused into a mat. A sour, vinegary, ammoniac, or beer-like smell at any point means contamination — discard and start over with sterilized equipment.
Equipment for the home cultivator
You do not need a professional kōji-muro (temperature- and humidity-controlled incubation room) to make excellent kōji at home. A handful of inexpensive items, kept scrupulously clean, reproduce the conditions surprisingly well.
- A bamboo or wooden steamer (seiro) for even, fluffy rice; pressure cookers tend to over-soften the grain.
- A wide, shallow tray — wooden kōji-buta if you can find them, otherwise perforated hotel pans or unglazed ceramic dishes.
- A digital thermometer with a fast probe for checking grain and bed temperature every few hours.
- A warm, draft-free incubation chamber: a proofing box, an old cooler with a seedling heat mat and a pan of water, or a yogurt maker set to 30 °C. Aim for 28–32 °C and 70–90 % humidity.
- Clean cotton cloths (kōji-kinu) for draping the bed — never plastic, which traps CO₂ and suffocates the mycelium.
- A spray bottle of boiled-and-cooled water for light misting if the bed edges dry out during later mixes.
Common uses
Tips & pitfalls
- Steam the grain until individual kernels are tender on the outside but still firm in the core — too soft and the kernels collapse into a sticky mass that won't breathe; too firm and the mycelium can't penetrate.
- Cool the steamed grain to about 30 °C before sprinkling on tane-kōji; heat above 40 °C kills the spores.
- Dose tane-kōji lightly (about 1 g per kg of rice) and toss thoroughly so every kernel is lightly dusted — clumps lead to patchy growth and uneven enzyme production.
- After 18–20 hours, do the first mixing (moriwake): break up white clumps, redistribute, and flatten the bed to even out temperature and release CO₂.
- A sweet, melon- or chestnut-like aroma and uniform white bloom mean healthy kōji. A sour, vinegar, ammonia, or beer-like smell means contamination or overheating — discard and sterilize everything.
- Do not seal kōji in plastic; it needs to breathe. Cover trays with a damp cloth, not a lid.
- Sterilize trays, cloths, hands, and utensils with boiling water or a diluted shochu wipe before starting — wild molds (Mucor, Rhizopus, Neurospora) move fast on warm, starchy grain.
- Freshly finished kōji is best used the same day or refrigerated overnight; freezing in airtight bags locks in enzyme activity for several months.
Good to know
- Japanese name
- 麹 (kōji); cultivation is 麹づくり (kōji-zukuri)
- Organism
- Aspergillus oryzae (yellow kōji-kin); also A. sojae, A. tamarii, A. kawachii (white), A. luchuensis (black)
- Substrate
- Steamed rice (kome-kōji), steamed barley (mugi-kōji), or steamed soybeans (mame-kōji)
- Inoculant
- Tane-kōji (種麹) — dried spores grown on rice or barley, sold by specialty suppliers
- Optimal growth temperature
- 28–32 °C (82–90 °F), dropping to ~25 °C for the final stage
- Humidity range
- Roughly 70–90 % relative humidity during incubation
- Total incubation time
- 42–48 hours for rice kōji from inoculation to finish
- Enzymes produced
- Amylases (starch → sugar), proteases (protein → amino acids/peptides), lipases (fat → fatty acids)
- Yield
- Roughly 1:1 by volume — 1 cup of dry grain yields ~1 cup of fresh kōji
- Storage of fresh kōji
- Use within ~1 week refrigerated, or freeze in sealed bags for 6+ months
Also called
making koji · aspergillus inoculation
Related

Confit
Cook slowly submerged in fat for silky tenderness and keeping

Cure
Draw out moisture with salt and time to preserve and concentrate

Pickle
Steep in acidic brine for bright, tangy, crunchy preservation

Ferment
Let friendly microbes transform food into tangy, complex flavor

Marinate
Soak in a seasoned mix to flavor and tenderize before cooking

Brine
Soak in salt water so meat stays juicy and seasoned throughout

Dehydrate
Slowly dry out moisture to concentrate flavor and extend shelf life

Cold-Smoke
Perfume cured food with smoke without cooking it through