Prep & Assembly
Layering Biryani
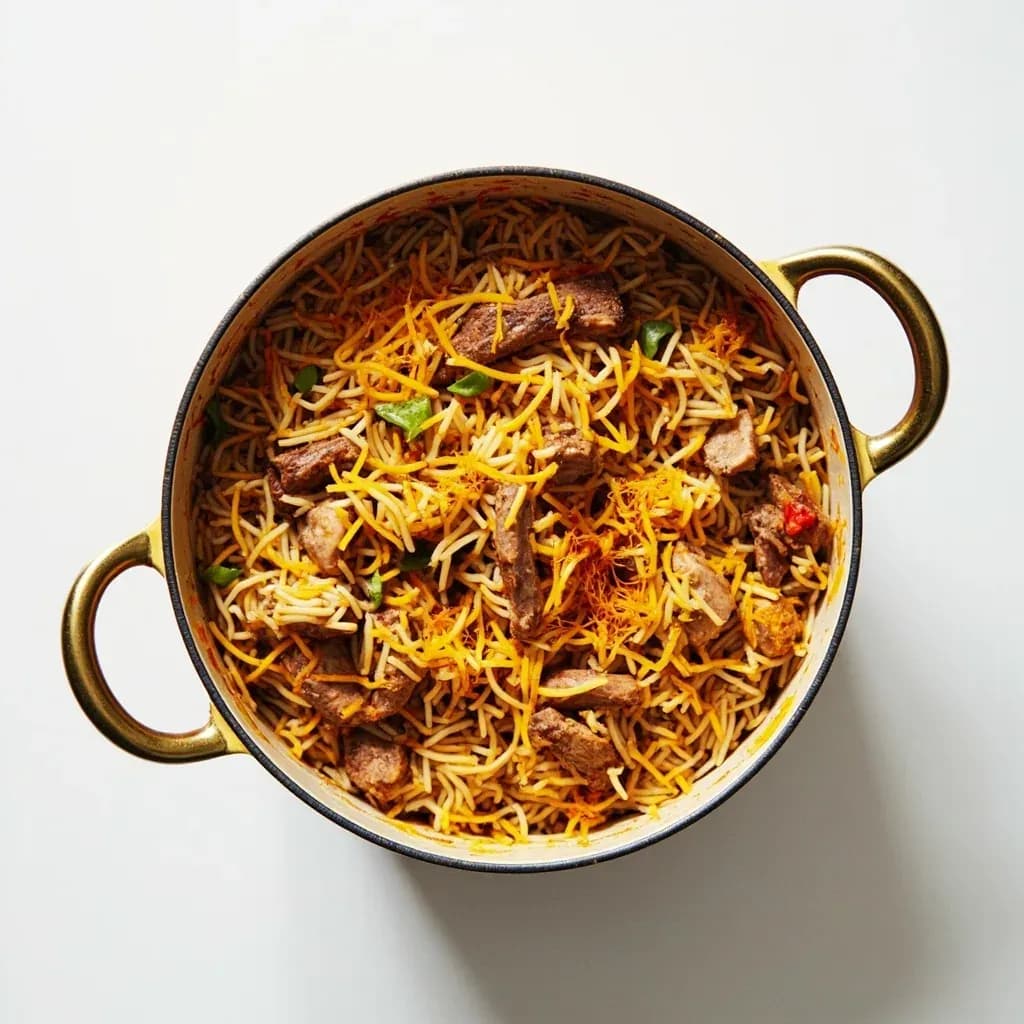
Alternating partly cooked rice and spiced meat for a layered dum biryani.
Layering biryani assembles parboiled aromatic rice and marinated, partly cooked meat or vegetables in alternating layers in a heavy pot, finished with saffron, fried onions, and herbs. The pot is sealed and slow-cooked on dum so the flavors steam together while the layers stay distinct. Proper layering keeps the rice fluffy and prevents a mushy, over-mixed result.
Layering biryani is the architectural step that turns three separate components — spiced meat (or vegetable), par-cooked basmati, and aromatics — into a single, cohesive dish finished in trapped steam, a method known as dum. The cook builds alternating strata inside a heavy, lidded pot, seals the rim, and lets gentle heat drive condensation back down through the stack so the rice absorbs the cooking juices, fat, saffron, and essential oils of the upper layers. Unlike a pilaf, where rice is stirred into the cooking liquid, a layered biryani is meant to be served with the strata partly intact: a spoonful should show distinct bands of white rice, orange saffron streaks, and dark spiced meat.
The technique is forgiving in principle but punishing in detail. Success hinges almost entirely on the doneness of the rice at the moment it goes into the pot — par-cooked to roughly 70–75% so the grains still have a white core and will finish in the steam without turning to mush. The seal of the pot is the second critical variable; any leak dries the top layer and scorches the base. Everything else — which spices, whether the meat is raw or pre-cooked, the variety of rice, the choice of fat — is regional variation on a single, elegant container technique.
What makes layering distinct from ordinary rice-and-curry assembly is the direction of flavor travel. In a stew, flavor moves upward through liquid convection. In a dum biryani, it moves downward as steam condenses on the lid and rains back through the rice, carrying saffron, ghee, rose or kewra water, and the rendered aromatics of the top layer into the grains below. This is why a properly made biryani tastes perfumed from top to bottom even though only the upper crust was seasoned at the start.
- Difficulty
- Medium
Types & varieties
Meat is fully cooked in a spiced gravy first, then layered with par-cooked rice and dum-finished. Softer, mellower spice profile, more saffron and kewra.
Raw marinated meat is layered directly with par-cooked rice and aromatics, then dum-cooked so the meat releases its own juices. Bolder, sharper heat.
Adds potatoes and sometimes boiled eggs; lighter spice, yogurt-based marinade, often finished with saffron and rose water.
Short kaima rice, more coconut, smaller layers; traditionally cooked in an earthen or copper vessel, sometimes with meat and rice stirred together more than strictly layered.
Potatoes, tomatoes, and a tangier, slightly sweet masala; layering resembles the Lucknowi method but the base spice mix is sharper.
Hyderabadi-coastal hybrid; often includes fried potatoes, kewra, and a more pronounced fried-onion stratum.
How to do it
- 1
Prepare the base masala and meat
For Hyderabadi kachhi style, marinate raw meat with yogurt, ginger-garlic paste, chili, turmeric, and biryani masala for at least 1–2 hours. For Lucknowi pakki style, brown the marinated meat with fried onions, whole spices (cinnamon, cloves, green and black cardamom, bay, stone flower) and a splash of water, then simmer until the meat is about 80% cooked and the gravy is thick enough to coat a spoon. Reserve off the heat.
- 2
Par-cook the rice
Bring a large pot of generously salted water to a rolling boil with whole spices (bay, cinnamon, cardamom, cloves, star anise). Drain the soaked aged basmati into the water and boil 6–7 minutes, until the grains are 70–75% done with a visible white core. Drain immediately in a colander and rinse briefly with cool water to halt the cooking.
- 3
Cool and season the rice
Spread the drained rice on a wide tray. Drizzle with a few tablespoons of ghee or melted butter, sprinkle with a pinch of salt, and gently fluff with a fork or chopsticks to separate the grains and release steam. Set aside.
- 4
Prepare the finishing aromatics
Bloom a generous pinch of saffron in 60–90 ml of warm whole milk for 10–15 minutes. Roughly chop fresh mint and coriander. Have fried onions (birista), a small bowl of ghee, and a few drops of kewra or rose water ready in separate bowls within arm's reach.
- 5
Grease and begin layering
Smear the inside of a heavy handi or Dutch oven with ghee. Build in this order: a thin base of potato slices or a layer of meat, then a layer of rice, then a scatter of fried onions, mint, coriander, and a spoonful of saffron milk and ghee. Repeat, ending with rice on top. Three to five alternating layers is typical; the top must always be rice.
- 6
Crown and seal
Finish the top rice layer with the remaining saffron milk, a final drizzle of ghee, a handful of fried onions, and a few mint leaves. Press a continuous rope of atta dough (or a thick flour-and-water paste) around the rim of the pot and clamp the lid on firmly. Wrap the lid joint in a kitchen towel tied with string as a secondary seal.
- 7
Dum cook on very low heat
Place the sealed pot on a tawa or griddle over the lowest possible flame, or in a 150°C / 300°F oven, for 25–35 minutes if the meat is pre-cooked, 40–50 minutes if it went in raw. Do not lift the lid during cooking.
- 8
Rest, open, and serve
Remove from heat and let the sealed pot rest 10–15 minutes. Break the dough seal, lift the lid, and check that the grains are separate and the kitchen smells of saffron and roast onion. Serve from the pot, scooping gently from the bottom up to preserve the strata, onto a wide platter.
The logic of dum
Dum is not a temperature but a sealed environment. Once the lid is locked on and the heat is turned to its minimum, the small amount of liquid trapped in the pot (from the meat juices, the moisture clinging to the rice, the saffron milk) boils, saturates the airspace, then condenses on the cooler lid and drips back down. The rice finishes in this self-basting vapor rather than in direct contact with the cooking liquid. This is why the pot must be heavy (to hold heat gently), the seal tight (so vapor cannot escape), and the heat low (so the liquid does not run out before the rice is done). A tawa or griddle under the pot diffuses what little flame reaches the base, mimicking the embers of a traditional clay oven.
Rice doneness: the single critical variable
Almost every failed biryani can be traced to the rice being either too raw or too done at the moment of layering. The window is narrow: a grain should bend without snapping, show a clear white core, and feel chalky but not gritty when bitten. Once layered, the rice will absorb another 25–30% of its weight in moisture from the steam and the meat gravy, and the grains need that internal dryness to expand without bursting. Spread the drained rice on a wide tray and toss with ghee or butter and a fork to halt carryover cooking and keep grains separate; clumped, overcooked rice will not form clean layers no matter how carefully it is stacked.
Layer order and the buffer layer
A traditional sequence is meat (or potato) on the bottom, rice, fried onions and herbs, ghee and saffron, repeating, and ending with rice crowned by a final drizzle of saffron milk and ghee. The bottom layer is a buffer: potato slices or a generous bed of meat protects the rice from the direct heat of the pot base. The top layer is a crown: it receives the most condensed steam and the most fat, so it both flavors downward and protects the strata beneath from drying. Three to five alternating layers is typical for a 2–3 litre handi; more layers than that and the deeper strata will not cook through evenly.
Common uses
Tips & pitfalls
- Soak aged basmati 30–45 minutes and par-boil only to the point where a grain bends cleanly but still shows a white core — it will finish in the dum.
- Salt the rice water generously, roughly 1.5–2% salinity or about 1 tablespoon per litre, since the rice absorbs very little seasoning after layering.
- Drain rice immediately and spread on a tray; toss gently with a fork to halt cooking and release steam — clumped overcooked rice will not layer cleanly.
- Fry onions (birista) to a deep golden brown and reserve a fistful for the top layer; the crunch and color are part of what defines a biryani.
- Bloom saffron in warm milk — not boiled — about 10–15 minutes before layering so the color and aroma are at full strength when it drizzles over the rice.
- Always grease the inside of the pot with ghee or oil before the first rice layer to prevent sticking and scorching.
- Layer order matters: a base of potato or meat as a buffer, then rice, then meat, then rice, ending with rice on top so it absorbs the saffron milk and ghee drizzle.
- Seal the pot thoroughly with a continuous rope of atta dough, or wrap the lid joint in a thick cotton cloth tied with string; any steam leak dries the top layer and burns the bottom.
- Do not open the pot during cooking and resist peeking for at least 10 minutes after; each opening loses steam and disrupts the dum.
- Rest the sealed pot 10–15 minutes off heat before opening so the grains firm up and the layers hold their shape when scooped.
- Mix only at the table, gently from the bottom up, so diners see the distinct strata just before eating.
Good to know
- Origin
- Indian subcontinent; the dum layering technique is most strongly associated with Awadhi (Lucknow) cuisine, with parallel traditions in Hyderabad and the Malabar coast.
- Also known as
- Dum biryani layering, the handi layering method, par-cooked rice layering for biryani.
- Core principle
- Alternating layers of par-cooked rice and spiced meat (or vegetable) curry, sealed and slow-finished in trapped steam (dum).
- Rice used
- Long-grain aged basmati in North Indian styles; kaima or jeerakashala (short, fragrant) rice in Malabar and Thalasseri styles.
- Rice doneness at layering
- About 70–75% cooked (roughly 6–7 minutes in boiling salted water) with a visible white core, so the grains finish in the steam without collapsing.
- Pot
- Heavy-bottomed handi, degchi, or Dutch oven; the thick base prevents scorching and holds steam evenly.
- Seal
- Traditional: a rope of wheat dough (atta) pressed between pot rim and lid. Modern substitute: a tight lid with a thick cotton towel tied over the joint.
- Cook time after sealing
- 25–35 minutes for pre-cooked meat, 40–50 minutes for raw-marinated meat, on the lowest possible heat or a tawa (griddle).
Also called
Layering Biryani · Dum Layering
Related

Whisk
Beat ingredients smooth and aerated with a looping wire motion

Sift
Pass dry ingredients through mesh to aerate and remove lumps

Strain
Pour through mesh to separate solids from liquid for a smooth result

Filter
Pass liquid through fine material to clarify out the smallest particles

Rice
Press cooked potatoes through small holes for fluffy, lump-free texture

Mash
Crush soft cooked food into a rustic, creamy purée

Grind
Crush food into a coarse to fine texture, from spices to meat

Grate
Shred food into fine bits against a sharp-toothed surface