Prep & Assembly
Sausage Linking & Twisting
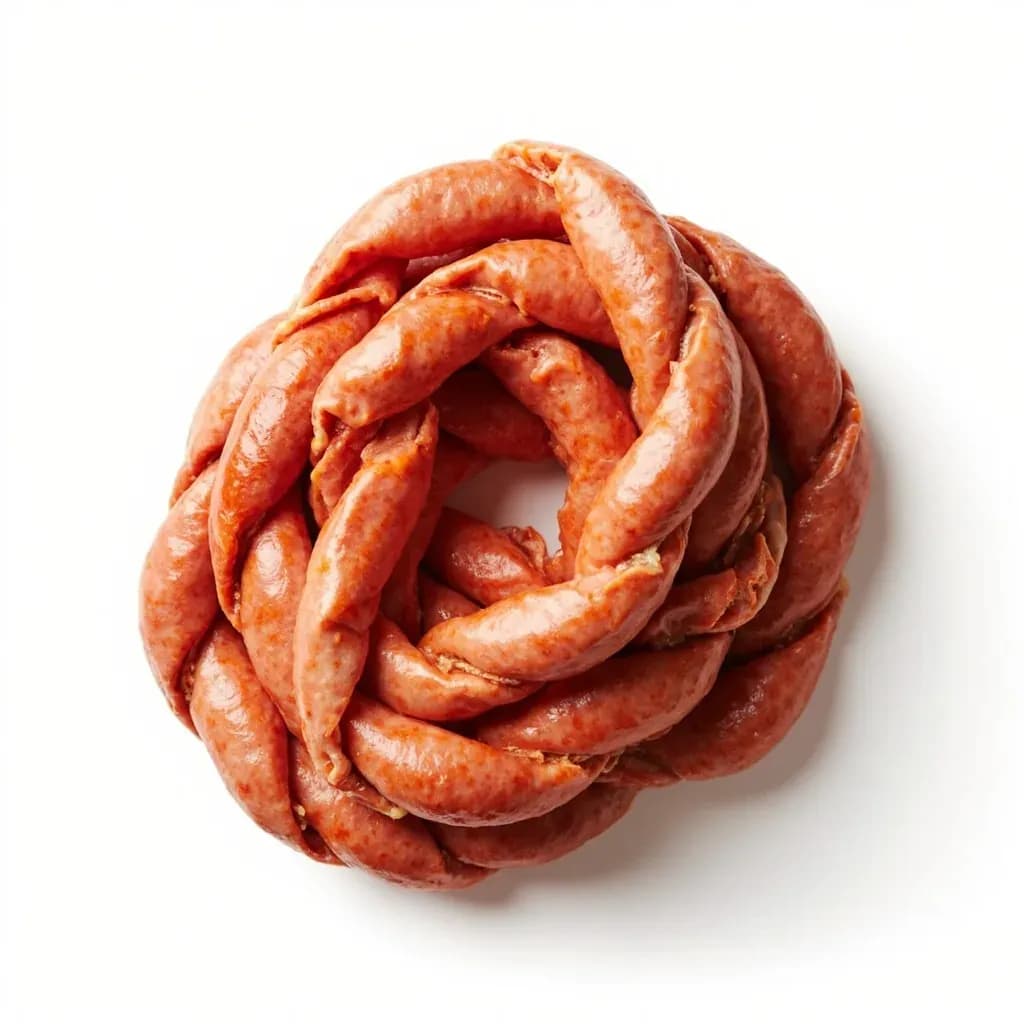
Twisting a filled sausage casing at intervals to form individual, evenly sized links.
Sausage linking divides a long stuffed casing into individual sausages by pinching and twisting at regular intervals, alternating twist direction so the links stay closed. Even spacing and consistent pressure give uniform links that cook at the same rate. The technique often finishes with the links pricked to release air pockets before cooking or hanging.
Sausage linking is the hand (or machine) step that turns a continuous stuffed rope into the individual portions a cook recognizes as links. Twisting at measured intervals pinches the casing into a tight spiral that holds the meat in its section, setting up clean separation, even cooking, and tidy presentation. Without a proper twist, a stuffed casing is just a long tube — convenient for drying or grilling whole, but impractical for portioning, retail, or plating.
The twist itself is a simple mechanical idea: empty a short section of casing between two pockets of meat, then rotate the section so the casing wraps into a tight spiral. The catch is that the meat expands as it heats, and a single-direction twist will unwind under that pressure. The figure-8 (alternating) twist solves this by locking adjacent links against each other, which is why it is the de facto standard in Western butchery and in industrial twist-link machines.
Success depends on three conditions in place before the first pinch: a properly ground and seasoned cold emulsion (around 32–38°F / 0–3°C), casings that have been soaked until pliable and slippery, and a stuffed rope that is firm but not stretched to balloon tightness. Get those right and linking is genuinely beginner work — a rhythm of roughly 10–15 seconds per link settles in after a rope or two of practice.
- Difficulty
- Medium
Types & varieties
Every link twisted in the same direction. Tends to unwind as the meat expands, so it is reserved for very firm emulsions or for ropes that will be coiled and tied with twine.
Twist direction reversed every other link so adjacent links lock against each other. The standard for fresh pork breakfast, Italian, and bratwurst — rarely unravels.
Pinch the casing at the marked interval with thumb and forefinger, then roll the pinched section 3–5 turns. The everyday butcher's method.
Many short links joined in a continuous series, each pinched off the last. Used for cocktail sausages, breakfast links, and pigs-in-blankets.
The rope is doubled back on itself before twisting to create a closed loop, giving a natural hanging point for air-dried and cured sausages (salami, soppressata, saucisson sec).
How to do it
- 1
Chill the stuffed rope
Lay the freshly stuffed sausage rope in a loose coil on a parchment-lined sheet pan and refrigerate for 15–30 minutes. Cold fat firms up so the twists will hold; warm, soft fat slides out of the twist the moment the meat expands during cooking.
- 2
Prick air pockets
Run your fingers slowly along the rope. Prick any visible bubbles with a clean sausage needle or fine pin, then press the casing against the meat at that spot to expel the air before piercing. A single missed bubble can rupture the casing at the twist point when the sausage hits the pan.
- 3
Mark the link length
Decide on link length — 4 in (10 cm) is standard for breakfast and Italian sausages, 1.5–2 in (4–5 cm) for cocktail links, up to 6 in (15 cm) for large bratwurst. Use a measured tape strip, a strip of tape on the counter, or the butcher's 'three fingers' reference. Consistency matters more than the exact number: uniform links cook at the same rate and look professional on the tray.
- 4
Pinch the first mark
At the first measured mark, pinch the casing firmly between thumb and forefinger of both hands, compressing the meat out of that section so the empty casing can wrap tight. The pinched section should look like a flattened 'waist' roughly 1/2 in (1.25 cm) wide.
- 5
Execute the first twist
While holding the pinch, roll both hands in the same direction 3–5 full turns. The casing should spiral tightly at the pinch with no gaps or slack. If it looks loose, give it another half turn — a tight twist now is far easier than a re-twist later.
- 6
Move to the next mark and reverse direction
Skip one link length down the rope, pinch again, and this time twist in the OPPOSITE direction 3–5 turns. The alternating direction creates the figure-8 lock and keeps adjacent links from unraveling. Count your turns out loud until the rhythm is automatic.
- 7
Set each twist
After every twist, squeeze the twisted pinch point once more between thumb and forefinger to compress the casing and 'set' the seal before moving on. This single extra squeeze is the difference between links that hold their shape on the tray and links that unwind in the fridge.
- 8
Continue to the end of the rope
Repeat pinch–reverse-twist–set down the entire length. Keep the rope resting on the cold pan between twists so the meat stays firm. If a casing tears, snip back to the nearest unmarked section and start a fresh twist rather than trying to re-twist the tear.
- 9
Tie off the final end
Leave 2–3 in (5–7 cm) of empty casing at the end and tie it off with butcher's twine, a casing knot, or by snipping and crimping with a hog ring or clip. For cured or hung sausages, leave a closed loop instead of a tie so the sausage can be threaded onto a rod or stick.
- 10
Rest before cooking or hanging
Return the linked rope to the fridge for at least 30 minutes, or up to overnight uncovered. The rest firms the meat, lets the casing dry slightly so the twist grips, and is essential before cooking, smoking, or moving on to fermentation and drying.
The physics of the figure-8 lock
A single-direction twist is essentially a spring wound one way; when the meat inside expands during cooking it pushes that spring back open, and the link unravels on the tray. The figure-8 twist solves the problem by reversing direction at every link, so each link is wound against its neighbor. As one link tries to unwind, its neighbor is wound the opposite way and resists. This is the same logic industrial twist-link machines replicate at speed with rotating horns that flip direction automatically. It is also why the alternating method has survived as the standard in French, German, and Italian charcuterie for centuries.
- Warm fat (above 38°F / 3°C) smears inside the casing and the twist slips on the tray
- Trapped air pockets expand and burst the casing at the weakest twist
- A 1- or 2-turn twist loosens as the meat bloats — always go to 3–5 full turns
- A torn casing cannot be re-twisted: snip back and start a fresh twist at the next mark
- Over-stuffing the rope to balloon-tightness forces the casing to rupture at the first twist
Common uses
Tips & pitfalls
- Always prick visible air pockets before twisting — a single missed bubble expands during cooking and bursts the casing at the weakest twist point.
- Twist 3–5 full turns per link; one or two turns will loosen as the meat warms and bloats in the pan.
- Keep meat, casings, and hands cold and slightly wet — warm casing is sticky and fat smears, which makes the twist slip.
- In a figure-8 sequence, the second twist must reverse direction or the first twist will unwind as the meat heats. Count your turns out loud until the rhythm is second nature.
- After each twist, squeeze the pinch point once more between thumb and forefinger to 'set' the seal before moving on. Skipping this is the single most common reason links unwind on the tray.
- Rest linked sausages on a parchment-lined sheet pan in the fridge for 30–60 minutes (or overnight uncovered) before cooking; the chill firms the meat and a dry casing helps the twist hold.
- Do not overstuff the casing to balloon-tightness; over-stuffing causes rupture at the first twist during the cooking 'bloom'.
- If a twist is too loose, do not try to re-twist — the casing will tear. Snip the casing at the loose twist, pull it back, and start a fresh twist at the next mark.
Good to know
- Origin
- Pre-modern European charcuterie (German, Italian, French) and butchery traditions worldwide; formalized into a repeatable step well before industrial sausage making
- Typical link length
- 4 in (10 cm) for breakfast/Italian sausage; 1.5–2 in (4–5 cm) for cocktail links; up to 6 in (15 cm) for large bratwurst
- Casing compatibility
- Natural hog, sheep, and beef middles; fresh collagen; cellulose (peeled off after cooking)
- Meat temperature
- Hold meat and stuffed rope at 32–38°F (0–3°C) before and during linking
- Twists per link
- 3–5 full turns; fewer turns loosen as the meat bloats during cooking
- Time per link
- Roughly 10–15 seconds by hand once a rhythm is set
- French term
- Torsadage (sometimes tortillage); German butchery texts use Abdrehen
- Difficulty
- Beginner; consistent results after one or two practice ropes
Also called
Linking Sausage · Twisting Links · Sausage Twisting
Dishes that rely on it
Related

Whisk
Beat ingredients smooth and aerated with a looping wire motion

Sift
Pass dry ingredients through mesh to aerate and remove lumps

Strain
Pour through mesh to separate solids from liquid for a smooth result

Filter
Pass liquid through fine material to clarify out the smallest particles

Rice
Press cooked potatoes through small holes for fluffy, lump-free texture

Mash
Crush soft cooked food into a rustic, creamy purée

Grind
Crush food into a coarse to fine texture, from spices to meat

Grate
Shred food into fine bits against a sharp-toothed surface