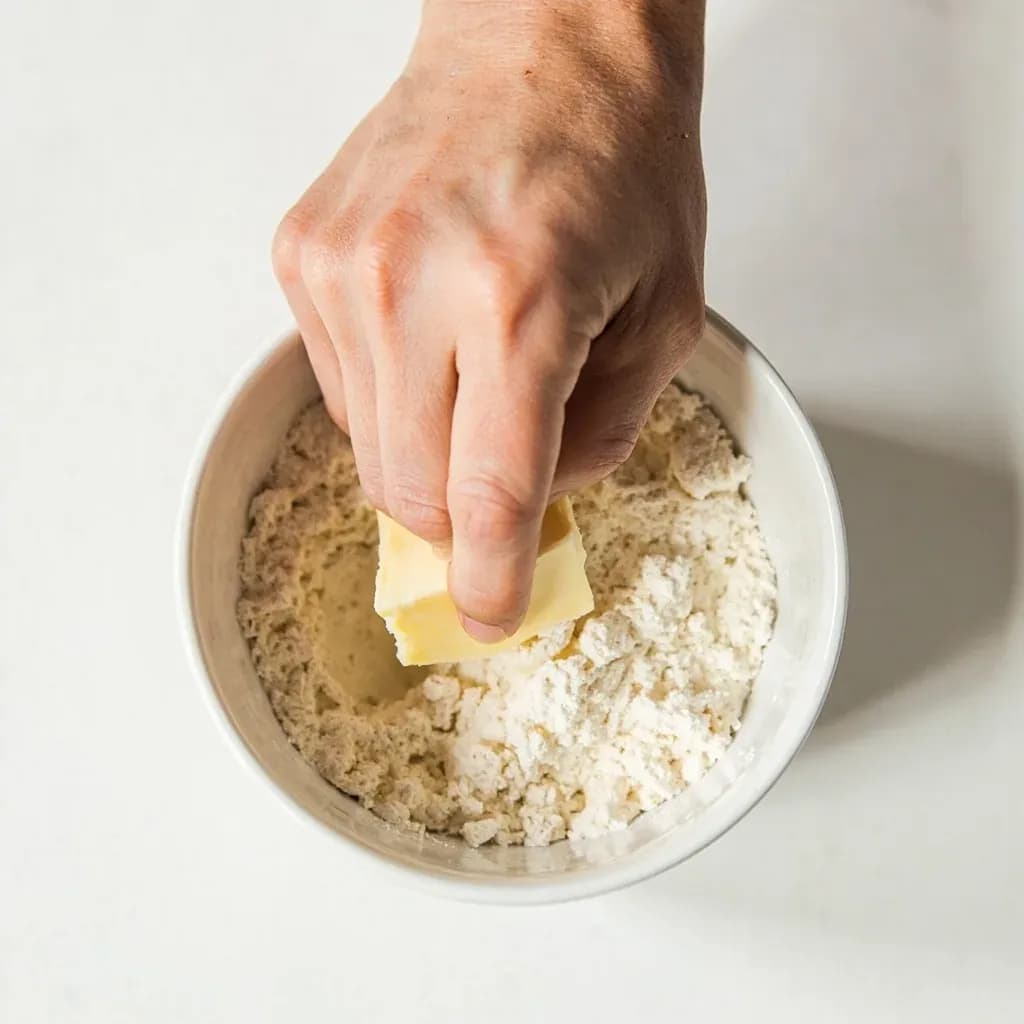
Prep & Assembly
Rubbing In
Working cold fat into flour with the fingertips to make a crumbly base for pastry and scones.
Rubbing in disperses cold butter or other fat through flour by rubbing pieces between the fingertips until the mixture resembles coarse breadcrumbs. The fat coats the flour and stays in small lumps, which create a short, tender, flaky texture in shortcrust pastry, scones, and crumble toppings. Keeping everything cold and working quickly prevents the fat from melting and producing a tough result.
Rubbing in is the foundational prep step behind nearly every short, low-gluten dough in the British and Northern European tradition. The cook works cold, solid fat into flour using the fingertips until the mixture takes on the texture of fine, even fresh breadcrumbs. The goal is mechanical, not decorative: each flake of fat ends up smeared thinly across countless flour particles, physically blocking them from forming long, elastic gluten strands when liquid arrives in the next stage.
This matters because fat is the single biggest lever a baker has for tenderness. Coated in fat, flour grains slip past one another rather than locking into a network with water, which is why a well-rubbed-in pastry crumbles short and clean rather than shrinking tough and chewy in the oven. The technique is forgiving — beginners can succeed quickly — but it is acutely sensitive to two enemies: warmth, which melts the fat into the flour and ruins the desired effect, and overworking, which beats the fat so fine it disappears entirely.
The end texture you stop at depends on the dough. Shortcrust wants a uniform, fine crumb for a tender, even pastry. Scones and rough-puff want some pea-sized pieces of fat left intact, because those pockets melt during baking and push the dough into flaky, irregular layers. Either way, the fat must stay solid right up to the moment it meets the oven heat.
- Difficulty
- Easy
Types & varieties
Worked until the mixture resembles fine, even fresh breadcrumbs; produces a tender, uniform crumb for classic shortcrust.
Stopped when pea-sized pieces of fat remain; gives flakier, layered results in scones, rough-puff, and biscuits.
Done with a metal or wire pastry blender/cutter instead of fingers; faster and keeps hands cool, but easy to overwork.
Short pulses of cubed cold fat into flour; very quick and keeps the mix cold, but easy to over-process the fat into the flour.
Two knives used in a scissoring, cross-cutting motion; useful in a small bowl or when avoiding hand contact.
Frozen fat grated on a coarse box grater straight into the flour, then tossed lightly; minimizes warming and gives very even distribution.
How to do it
- 1
Chill the fat and bowl
Cube cold butter, lard, or shortening into roughly 1 cm (½ inch) pieces and return them to the fridge. Optionally chill a large mixing bowl for 10 minutes so everything starts cold.
- 2
Combine the dry ingredients
Weigh or sift the flour — along with any salt, sugar, baking powder, or raising agent the recipe calls for — into the chilled bowl and stir briefly to distribute.
- 3
Add the fat
Tip the cold fat cubes into the flour and toss them lightly so each piece is coated; this slows them from clumping and buys you time before they warm.
- 4
Rub in with the fingertips
Using only your fingertips and thumbs, pinch small amounts of fat and flour together and rub them between thumb and fingers. Lift the mixture and let it fall back into the bowl so cool air circulates and the fat stays cold.
- 5
Check the crumb
After 2–3 minutes the mixture should look like fine, even fresh breadcrumbs (for shortcrust) or, for flakier doughs, like coarse breadcrumbs with a few pea-sized pieces of fat still visible.
- 6
Pause and chill if needed
If the mix feels soft or greasy, or the room is warm, stop and chill the bowl for 10–15 minutes before continuing or before adding any liquid.
- 7
Add liquid (next stage)
Make a well, add chilled water or other liquid, and bring the dough together with a round-bladed knife or fork — not the hands — only until it just comes together.
Reading the crumb
Knowing when to stop is the single most useful skill in rubbing in. Pick up a small handful and let it fall back into the bowl: the mixture should flow like damp sand through your fingers, not clump into a paste or hold a shape. For shortcrust, individual fat pieces should no longer be visible — the crumb should look uniform. For scones and rough-puff, you want to see distinct pale flakes of fat the size of small peas scattered through the flour; these are the pockets that will steam open in the oven and create lift. If the mixture starts to look creamy, yellowish, or streaks the bowl, the fat has begun to melt and you should stop and chill the bowl before continuing.
- Fine, even, pale — fat still solid, mixture resembles fresh breadcrumbs.
- Coarse with visible pea-sized flakes — some fat intact, ideal for scones and rough-puff.
- Yellowish, clumping, or streaking the bowl — fat melting; chill immediately.
Rubbing in versus creaming
The two methods look superficially similar but work in opposite ways. Rubbing in keeps fat cold and solid so it coats flour particles before any liquid is added, producing a low-gluten dough. Creaming beats soft, often room-temperature fat with sugar to trap air, then adds eggs and flour to build structure around those bubbles. A dough made by rubbing in cannot be converted to a creaming recipe (or vice versa) without changing its character entirely: shortcrust will never rise like a Victoria sponge, and a creamed cake will not break short and crumbly like shortbread.
Common uses
Tips & pitfalls
- Keep the fat, bowl, and even the flour cold; chill the mixing bowl in the freezer for 10 minutes if your kitchen is warm.
- Use only your fingertips and thumbs — palms transmit body heat and will start to melt the fat before it has done its work.
- Work with a light, lifting motion: scoop the mixture up and let it fall through your fingers so cool air passes through it.
- Stop at the desired crumb size — fine breadcrumbs for shortcrust, pea-sized flakes left intact for scones and rough-puff.
- Cube the butter (about 1 cm / ½ inch) before starting so it rubs in quickly before it has a chance to warm.
- Add liquid with a knife or fork on a cool surface if you can, rather than in the bowl; less handling means a tenderer result.
- Avoid overworking once liquid is added — that re-develops the gluten the rubbing-in stage was specifically designed to suppress.
- Common mistakes: using soft or warm fat, working with the whole hand, rubbing until the mix is a uniform paste, and adding ice-cold water all at once after over-rubbing.
Good to know
- Also known as
- Cutting in (US)
- Primary purpose
- Coat flour particles in solid fat to limit gluten formation and produce a tender, 'short' crumb
- Fat temperature
- Cold, ideally 4–7 °C (39–45 °F); typically cubed about 1 cm (½ inch)
- Tools
- Fingertips and thumbs; pastry blender, two knives, food processor, or box grater as alternatives
- End texture
- Fine, even fresh breadcrumbs for shortcrust; pea-sized pieces remaining for flakier doughs
- Ratio
- Roughly 1 part fat to 2 parts flour by weight for standard shortcrust; richer doughs use more
- Time
- About 2–4 minutes by hand for 200–300 g of flour
- Origin
- Long-standing British and Northern European technique central to shortcrust, scones, and shortbread
Also called
Rubbing In (Pastry/Scones) · Cutting In
Related

Whisk
Beat ingredients smooth and aerated with a looping wire motion

Sift
Pass dry ingredients through mesh to aerate and remove lumps

Strain
Pour through mesh to separate solids from liquid for a smooth result

Filter
Pass liquid through fine material to clarify out the smallest particles

Rice
Press cooked potatoes through small holes for fluffy, lump-free texture

Mash
Crush soft cooked food into a rustic, creamy purée

Grind
Crush food into a coarse to fine texture, from spices to meat

Grate
Shred food into fine bits against a sharp-toothed surface