Water & Steam
Sap Boiling (Maple Reduction)
Boiling down watery tree sap over many hours to concentrate it into thick maple syrup.
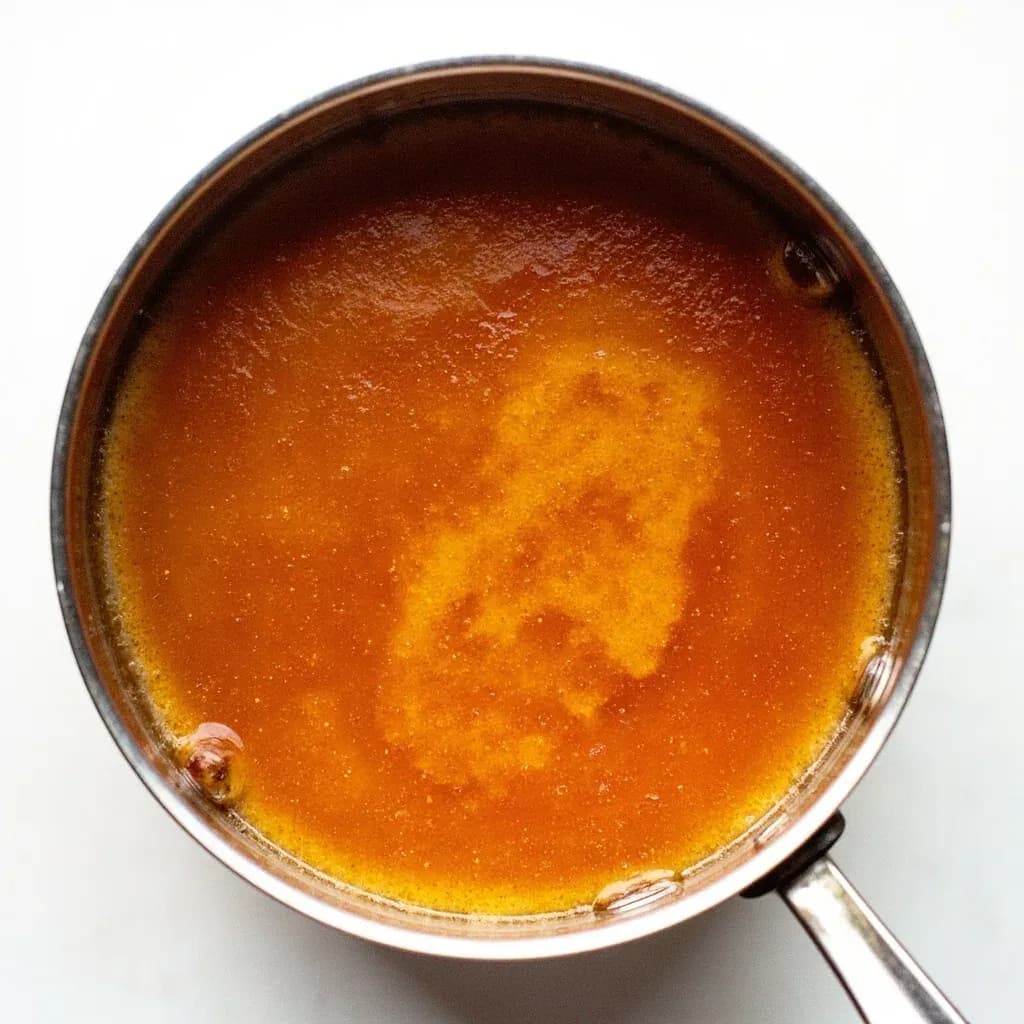
Sap boiling reduces raw maple sap, which is about 98 percent water, by driving off moisture over a long, steady boil until it concentrates into syrup at roughly 219F. It traditionally happens in shallow evaporator pans during the spring tapping season, and about 40 gallons of sap yield a single gallon of syrup. The final density is judged by temperature or a hydrometer because over-boiling crystallizes the sugar.
Sap boiling is the slow, patient reduction of nearly flavorless tree sap — typically 1.5–3% sucrose and 97–98.5% water — into the dense, amber syrup most cooks know. The work is mostly evaporation: you must drive off roughly 39 gallons of water to leave the 1 gallon of syrup, a 40:1 ratio that explains why a backyard batch of a few gallons of sap demands eight to twelve hours of active boiling, and why commercial operations now pre-concentrate with reverse osmosis. What begins as a slightly sweet, almost mineral water ends at about 66–67% sugar (roughly 11 pounds per gallon), a concentration at which the liquid resists spoilage, caramelizes on contact with a hot pan, and carries the caramel-butterscotch-maple flavor that defines the finished product. The technique is the heart of North American sugaring and, beyond syrup, is the gateway to maple sugar, maple cream, soft-sugar candy, and the traditional pour of jackwax (maple taffy) on snow.
The work is governed by a few hard numbers. Sap flows only in the narrow window when days warm above freezing and nights refreeze the tree — late winter to early spring across the maple belt. Each tap yields a trickle, not a stream, so even a modest home setup collecting 10–20 gallons of sap is a real commitment of fuel, time, and watchfulness. The reward is one of the few truly single-ingredient sweeteners in the pantry: nothing added, nothing removed but water, the tree's own sucrose inverted and concentrated by heat into something far more complex than the sum of its parts. The process itself is ancient — Indigenous communities of the Northeast, including the Anishinaabe, Haudenosaunee, and Abenaki, practiced it for centuries using hollowed logs and heated stones — and the modern sheet-metal evaporator is essentially a scaled-up descendant of those stone-lined pits.
- Difficulty
- Medium
Types & varieties
Lightest, mildest syrup; made from earliest-run sap, often prized drizzled over pancakes, yogurt, or ice cream where a clean maple note is wanted
Mid-season classic; balanced maple flavor and the everyday standard for table use and baking
Late-season syrup with deeper caramel notes; preferred for glazes, barbecue sauces, and any cooking where the syrup is heated further
Latest-run syrup with pronounced molasses-like intensity; favored by chefs for savory applications, stews, and finishing smoked meats
Not a true grade but a well-known failure mode: thick, dark, off-flavored syrup made from sap held too long before boiling, or boiled past the finish, with a sour or yeasty taste. Do not bottle it; compost or discard.
How to do it
- 1
Gather and store sap
Collect sap into clean food-grade buckets or a covered tank as it drips from the spiles. Strain out bark and debris through a coarse cloth. Refrigerate below 38°F within hours of collection; fresh sap spoils quickly and turns cloudy or sour, and any delay at this stage carries straight through to the flavor of the finished syrup.
- 2
Set up a boiling station
Use an outdoor gas burner, a wood fire under a flat evaporator pan, or a turkey fryer pot — outdoors, with good ventilation and downwind from the house. Indoor boiling coats ceilings in sticky sugar film and floods the room with steam. Keep a spray bottle of water and a metal lid nearby in case of flare-ups, and never leave the boil unattended once the sap begins to thicken.
- 3
Begin a hot, steady boil
Fill the pan no more than two-thirds full with cold sap and bring it to a rolling boil. Add more sap gradually as the level drops, never letting the pan go dry. Maintain a vigorous boil; a gentle simmer wastes fuel and hours.
- 4
Skim and watch for the apron
Skim off gray foam with a flat-edge skimmer every 20–30 minutes and reserve it — it is pure syrup and can be folded back in at filtering time. As the sap darkens and reduces, look for 'aproning': a thicker, slower-dispersing curl of steam at the pan's edge, signaling you are approaching the finish.
- 5
Move to a controlled finishing pot
Once volume is down to roughly 1/40th of the original (sap level only inches deep, deep amber color), transfer the liquid to a smaller, heavy-bottomed pot on an indoor burner where temperature can be monitored precisely. Sap at this stage is still too thin and the fire too variable to gauge accurately over a wood-fired outdoor rig.
- 6
Bring to finishing temperature
Heat to 7°F above the local boiling point of water. Use a calibrated candy or syrup thermometer; a hydrometer or refractometer also works but should be read on cooled syrup (around 60°F) or with a temperature correction applied to a hot sample. Pull the pot off the heat at about 2°F short — carryover will finish it.
- 7
Rest and filter
Let the finished syrup sit for 10–15 minutes off the heat so sugar sand settles to the bottom. Pour through a pre-warmed wool or synthetic cone filter into sterilized glass jars or bottles. Seal and invert briefly to sanitize the lid, then cool upright.
- 8
Store and grade
Refrigerate after opening; sealed and refrigerated syrup keeps indefinitely, and hot-packed glass at 180°F extends shelf life to a year or more. Color and flavor will deepen with age in sealed containers, and the syrup's grade is determined by light transmittance, not by the calendar.
Reading the Finish
The last hour of a boil is the only one that can ruin the batch, so the entire eight-to-twelve-hour process is essentially a slow walk toward a precise endpoint. Three cues, used together, tell you when you are close.
- Aproning: as the sap darkens and thickens, the curl of steam at the pan's edge slows and thickens into a glossy, heavy band. This is the first visual sign you are entering the finish window.
- Thermometer: a calibrated candy or syrup thermometer is the most accessible and reliable instrument for the final approach. Boil plain water in the same pot, at the same elevation, the day of your finish, and record that number — your 7°F offset is meaningless without it.
- Carryover: pull the pot off the heat at about 2°F below your target. The thermal mass of the syrup and pot will continue to climb for a minute or two; finishing on the burner overshoots easily into scorched or buddy territory.
- Hydrometer or refractometer: either confirms the finish, but both should be used on syrup cooled to roughly 60°F (or with a temperature correction applied to a hot sample) for an accurate reading. A measurement between 66 and 67 Brix is correct; below 66 the syrup will spoil, above 68 it will crystallize in the jar.
Sugar Sand and Filtering
As syrup approaches the finish, a pale gray sediment — called sugar sand or niter — precipitates out of the liquid. It is harmless (mostly calcium and other minerals concentrated along with the sugar) but gritty in the mouth, so the standard practice is to let the finished syrup rest briefly so the sand settles, then pour it off through a cone filter.
- Filter hot, around 180°F. Cold syrup is more viscous, clouds up, and clogs wool or synthetic filter cones in minutes.
- Pre-warm the filter and receiving jars with hot water so the temperature drop is small; a cold jar can flash a crust of sugar on the glass.
- Do not press or squeeze the filter to speed things up — push-through sediment defeats the purpose. Let gravity do the work.
- The foam skimmed throughout the boil is not waste. Fold it back in at filtering time; it is concentrated syrup and contributes flavor and color.
A Short History of the Equipment
The defining feature of sap boiling is that you are removing water, not cooking flavor, so anything that increases surface area and heat transfer makes the job easier. The vessel has evolved accordingly.
- Stone and hollow-log pits: the Indigenous method, with stones heated in a fire and rolled into a trough of sap; effective, but slow and fuel-hungry.
- Cast-iron kettles: the colonial standard, hung over an open fire; a deep, narrow vessel that improved durability but still boiled one kettle at a time.
- Sheet-metal evaporators (19th century onward): shallow, wide pans with corrugations or baffles to increase surface area and channel the sap in a long path; the basic shape of every modern sugarhouse pan.
- Reverse osmosis (late 20th century): commercial operations now push sap through membranes that remove 60–80% of the water before a drop reaches the evaporator, cutting fuel use by more than half. Home producers do not have this option, which is why a backyard boil remains an all-day affair.
Common uses
Tips & pitfalls
- Test your local boiling point of water first; the 7-degree rule is meaningless if you don't know your baseline, and the offset shifts about 1°F per 500 ft of elevation.
- Use a wide, shallow pan rather than a tall pot — the goal is maximum surface area for evaporation, not depth, which is why sheet-metal evaporators are shaped the way they are.
- Never leave the boil unattended once sap reaches the final hour; a pan can scorch, boil over, or even catch fire as the sugars concentrate and the liquid level drops fast.
- Stop the boil 2°F short of your target; carryover heat from the pot and syrup will push the temperature up the last couple of degrees off the flame, and overshooting is the most common path to buddy syrup.
- Filter hot (around 180°F) through wool or synthetic cone filters; filtering cold clouds the syrup and clogs the filter in minutes.
- Discard the first gallon of sap from each tap if you tap during a freeze-thaw that follows a warm spell — it tends to be sour and will taint the whole batch.
- If you cannot finish a boil in one session, refrigerate the partially reduced sap and resume the next day; do not let it sit at room temperature overnight, where it will sour or grow mold.
- Boil outdoors. Indoor boiling of any real volume of sap will coat every horizontal surface in a sticky sugar film and raise humidity to the point of ceiling damage.
Good to know
- Sugar content of fresh sap
- 1.5–3% sucrose, with the balance (97–98.5%) being water; content varies by tree, weather, and time of season
- Sap-to-syrup ratio
- About 40:1 by volume (roughly 10 gallons of sap per quart of syrup); closer to 30:1 in a strong year, 50:1 or worse in a poor one
- Target concentration of finished syrup
- 66–67% Brix, or about 11 lb of sugar per gallon
- Finishing temperature
- 7°F above the local boiling point of water (≈219°F / 103.9°C at sea level); the offset shifts about 1°F per 500 ft of elevation
- Sap season
- Late winter to early spring; flow occurs when daytime highs rise above freezing (≈40°F) and nighttime lows drop below (≈20°F)
- Processing time
- 8–12 hours of active boiling for a small home batch of a few gallons of sap; commercial evaporators run continuously through the season
- Storage of fresh sap
- Boil within 2–3 days of collection, or refrigerate below 38°F for up to a week; it spoils quickly at room temperature and turns cloudy or sour
- Color grading (post-2015 North American standard)
- Golden (Delicate), Amber (Rich), Dark (Robust), Very Dark (Strong); color deepens as the season progresses and is measured by light transmittance, not by date
Also called
Maple Reduction · Sugaring Off
Related

Boil
Cook in vigorously bubbling liquid at full rolling heat

Simmer
Hold liquid at a gentle shimmer for tender, unhurried cooking

Poach
Cook gently in barely-trembling liquid for silky, tender results

Steam
Cook in rising vapor to keep color, nutrients, and shape intact

Blanch
Plunge briefly in boiling water, then shock cold to lock color

Braise
Sear, then cook slow in a little liquid until fall-apart tender

Stew
Simmer bite-sized pieces fully submerged into a rich, unified pot

Sous-Vide
Seal and cook in precise warm water for edge-to-edge doneness