Prep & Assembly
Boule Shaping
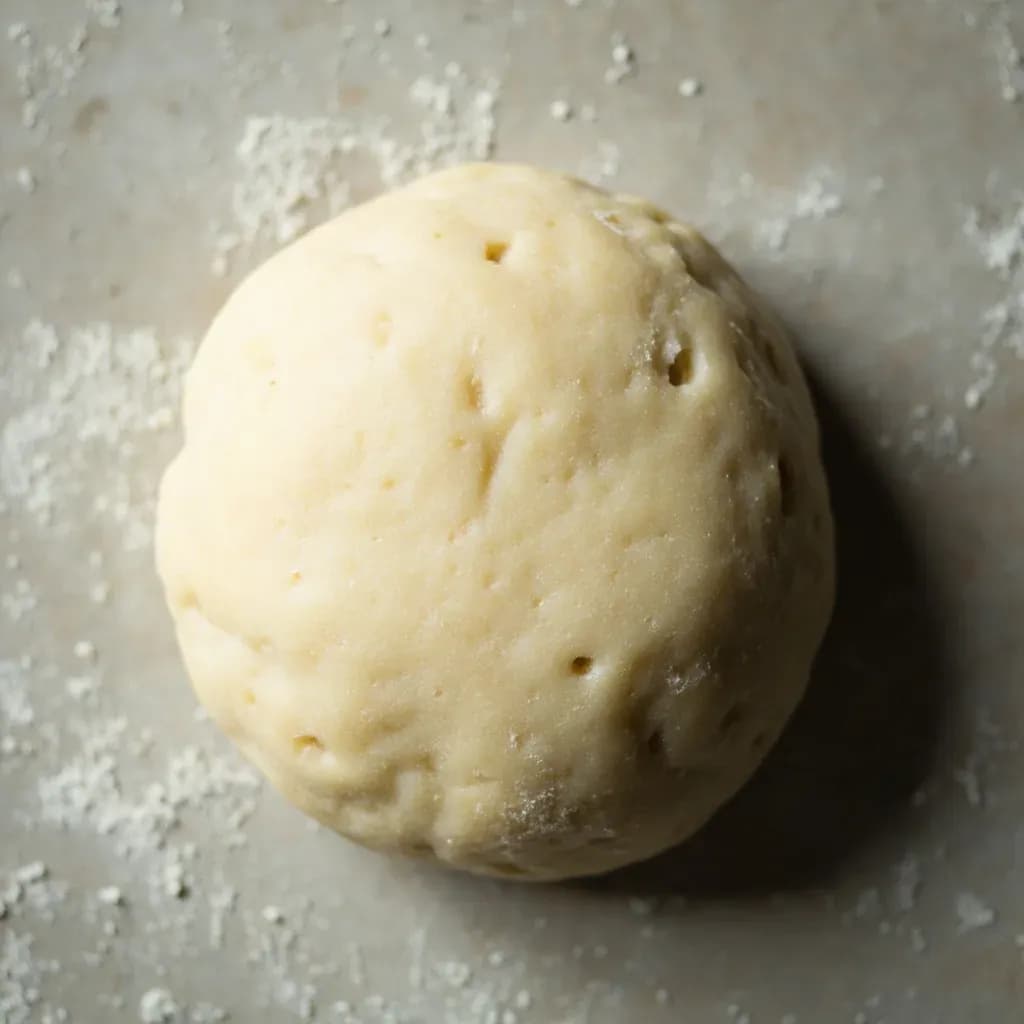
Rounding dough into a tight, domed ball with a taut skin for an even rise.
Boule shaping pulls dough into a round loaf by dragging or cupping it against the bench to build surface tension into a smooth, taut skin. The tight skin holds the dome shape and supports an even oven spring. It is the basic round form for country breads and the starting round for many other shapes.
Boule shaping is the working-bench move that turns a slack mass of fermented dough into a tight, domed round ready for its final proof. The baker cups the dough against the counter and drags it in short quarter-turns, using friction to stretch the outer layer into a smooth, taut "skin." That skin is the whole point: it locks in the loaf's round form, channels the gas from final proof upward into a controlled oven spring, and gives the baker a clean canvas for scoring.
The technique works across a wide range of doughs, from lean 60%-hydration sandwich loaves to wet, 80%+ sourdough miche that would otherwise puddle on the bench. Hydration changes how the move feels — wetter doughs need lighter hands and a tighter, repeated drag, while lower-hydration doughs round with a gentler cup. The associated equipment is a round cane banneton, where the boule proofs seam-up so the taut skin ends up on top of the finished loaf.
The same tension-building motion is the foundation for shaping an elongated bâtard, a country miche, or even dinner rolls — change the final form after the skin is built. Most professional bakers split the work into a light pre-shape, a 20–30 minute bench rest, and a tighter final shape; this two-stage method relaxes the gluten between passes and produces a more open, even crumb than a single aggressive round.
- Difficulty
- Medium
Types & varieties
High surface tension achieved by repeated rounds of cupping and dragging; suited to wet, slack doughs that would otherwise spread.
Gentler shaping for lower-hydration or enriched doughs where minimal tension is needed to keep a round form.
The two-stage method taught by most professional bakers: a light pre-shape, a bench rest, then a tighter final shape.
A larger, rustic round incorporating whole grain and often a sourdough levain; the boule shape supports a thick, even crust.
Enriched or olive-oiled doughs sometimes get a boule pre-shape before being pressed flat into a pan.
How to do it
- 1
Divide and pre-shape
Tip the bulk-fermented dough out onto a lightly floured counter. Using a bench scraper, divide into portions by weight without degassing. Gently round each piece into a loose ball by cupping your hands around it and drawing it across the counter a few times. Let rest seam-up, 20–30 minutes, uncovered or lightly dusted.
- 2
Flip and flatten
Turn a rested pre-shape seam-up. With lightly floured or wet fingers, gently pat it into a thick disc about 5–7 cm (2–3 in) across, pressing out large bubbles without fully deflating.
- 3
Build the skin (cup-and-drag)
Cup both hands around the dough. Drag it toward you across an un-floured part of the counter with a slight back-pressure from your pinky-side palms. Rotate a quarter turn and repeat. After 4–6 drags, the top should feel smooth, taut, and domed.
- 4
Close the seam
Flip the boule seam-side down. Cup your hands around the base and pull gently toward you a few times to seal the seam against the counter and even out the bottom. The seam should now be flat against the bench with even tension on top.
- 5
Bench proof or basket
Place the boule seam-up into a floured round banneton, or seam-down on a parchment-lined sheet for a free-form bake. Cover and proof until puffy and a finger poke leaves a slow, partial spring-back.
- 6
Score and bake
Invert onto a baking surface so the taut skin is on top. Score with a single curved slash, an X, or a spiral just before baking — the rounded form makes a clean, controlled bloom. Bake with steam (Dutch oven or stone + water pan) until deep mahogany and the internal temperature reads 96–99 °C (205–210 °F).
Why the pre-shape and bench rest matter
A single aggressive round works on stiff doughs, but for any loaf where you want an open, even crumb, the two-stage approach earns its time. The pre-shape gives the dough a gentle first round, after which the gluten is partly relaxed and the gas cells are evenly distributed. During the 20–30 minute bench rest, the gluten finishes relaxing and a thin skin forms on the exposed surface, so the final shape grabs onto a more cooperative, less springy piece. The result is a final round that holds deeper tension without tearing, and a crumb with larger, more uniform holes.
- The pre-shape should be visibly loose — if it looks tight, you have already done the final shape.
- Leave the bench rest uncovered or only lightly dusted; a tight cover traps surface moisture and keeps the exterior too damp for the skin to set.
- If the dough resists the final shape, give it another 5–10 minutes of rest rather than forcing it.
Reading tension at the bench
A well-shaped boule has a smooth, domed top that feels almost like a fully inflated ball. Two quick checks confirm the skin is right before the dough goes into its basket.
- Press the side gently with a floured finger — it should spring back with a slight firmness, not feel slack or puffy.
- Look for a tight, even sheen across the top; wrinkles or visible seams mean the drag was uneven or the seam wasn't sealed.
- Cold dough straight from the fridge usually holds its shape better and develops a tighter skin than fully room-temperature dough.
Common uses
Tips & pitfalls
- Flour the bench only as much as needed; an unfloured patch gives more grip to build tension.
- Wet or lightly oiled hands help manage sticky, high-hydration doughs without deflating them.
- Build the boule seam-up, then flip seam-down at the end so the seam is hidden and tension sits on top.
- Drag in short quarter-turns across an un-floured patch — friction is what creates the skin, not the tuck.
- Once you feel even tension across the top, stop. Over-handling drives out gas and tightens the crumb.
- Rounding by tucking the edges under without drag leaves weak spots and a wrinkled top instead of a smooth, taut dome.
- Too much flour under the loaf burns onto the bottom and prevents the skin from sealing cleanly.
Good to know
- French term
- Boule means "ball" in French; the shaping produces a round, domed loaf.
- Purpose
- Builds surface tension ("skin") so the dough holds its shape and rises upward rather than spreading sideways.
- Typical weight range
- Home loaves 500 g–1 kg; bakery boules commonly 1–2 kg.
- Hydration range
- Works across roughly 60% (lean pan loaves) to 80%+ (open-crumb sourdough).
- Time required
- Pre-shape 1–2 minutes; bench rest 20–30 minutes; final shape 1–2 minutes; total active time under 5 minutes.
- Associated proofing basket
- Banneton or brotform (round), traditionally coiled cane, often lined with a linen couche.
- Common bake vessels
- Dutch oven, cloche, baking stone with steam, or a sheet pan with a water pan.
- Difficulty
- Beginner-friendly as a concept; high-hydration sourdoughs require practice to avoid tearing the skin.
- Related shape
- The bâtard is the elongated counterpart made by the same tension-building principle.
Also called
Rounding · Shaping Boules
Related

Whisk
Beat ingredients smooth and aerated with a looping wire motion

Sift
Pass dry ingredients through mesh to aerate and remove lumps

Strain
Pour through mesh to separate solids from liquid for a smooth result

Filter
Pass liquid through fine material to clarify out the smallest particles

Rice
Press cooked potatoes through small holes for fluffy, lump-free texture

Mash
Crush soft cooked food into a rustic, creamy purée

Grind
Crush food into a coarse to fine texture, from spices to meat

Grate
Shred food into fine bits against a sharp-toothed surface