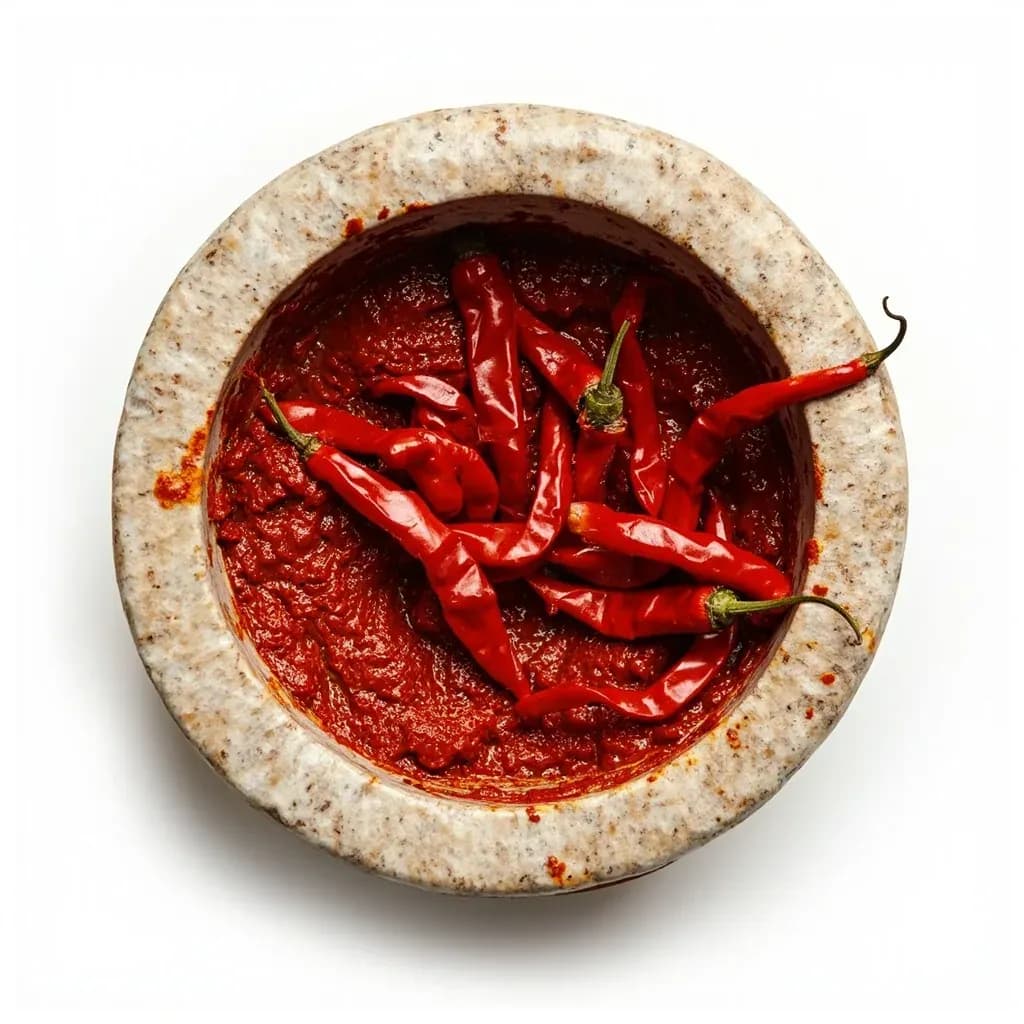
Prep & Assembly
Chili Paste Making
Grinding chilies with aromatics and salt into a paste that bases sauces and stews.
Chili paste making grinds fresh or dried chilies, often with garlic, salt, and oil, into a smooth or coarse paste. It forms the flavor base for countless dishes, from Argentine aji molido to Southeast Asian curry pastes. Toasting or rehydrating the chilies first deepens their flavor before grinding. The paste stores well and delivers consistent heat and color to many dishes at once.
Chili paste making is a method, not a recipe, and the same handful of steps produces gochujang, doubanjiang, sambal, nam prik, harissa, and Mexican adobo. Across every cuisine that cooks with heat, the foundational act is the same: reduce chilies and aromatics to a paste with salt, then shape the result through drying, fermentation, oil, or acid. The paste concentrates flavor, disperses capsaicin evenly through a dish, and carries fat-soluble aromatics — garlic, shallot, toasted spices — into sauces that would otherwise taste thin or sharp.
Three levers define a paste's character: the chilies themselves (fresh, dried, rehydrated, roasted, smoked, or fermented), the grind (a rough sambal chop to a glossy, tamis-smooth purée), and what you fold in afterward (oil, vinegar or citrus, sweetener, a fermenting grain). Salt does triple duty — seasoning, preserving, and, in a volcanic-stone molcajete, acting as abrasive grit that shears cell walls. Acid is almost always a finishing move, because volatile citrus and vinegar notes collapse with heat and time.
Skill shows up in texture control and balance. A molcajete releases chili oils without aerating the paste; a food processor is the realistic home compromise but tends to foam and over-process if run continuously. Most pastes benefit from a final pass through a fine tamis to catch fibrous skins. And because oil-packed fresh paste is a low-acid, anaerobic environment, refrigeration is non-negotiable unless the recipe is acidified or genuinely lacto-fermented.
- Difficulty
- Medium
Types & varieties
Raw or briefly cooked chilies ground with shallot, garlic, salt, and lime; bright, grassy, and sharp
Toasted dried chilies soaked, then ground; deep, smoky, and color-concentrated, the base of Mexican and Sichuan sauces
Chilies aged with salt, grains, or legumes; complex, savory, and umami-rich — gochujang, doubanjiang
Chilies charred before grinding; smoky-sweet profile, as in nam prik pao
Ground chilies suspended or bloomed in oil; richer mouthfeel and the base of chili crisp (youchili)
Chilies blended with fresh herbs, citrus zest, or greens — chimichurri-style, Thai prik gaeng
Toasted whole spices (cumin, coriander, Sichuan pepper) ground with chilies; harissa and most curry pastes
How to do it
- 1
Choose and prepare the chilies
Decide on fresh, dried, or a mix. Trim stems. For a milder paste, slit lengthwise and scrape out the seeds and pale membranes; for maximum heat, leave them intact. Rinse fresh chilies and pat dry.
- 2
Toast dried chilies (if using)
Heat a dry skillet over medium. Press each chili flat and toast 15–30 seconds per side until fragrant and just pliable. Do not scorch — burnt chilies turn acrid and will taint the whole batch.
- 3
Rehydrate dried chilies (if using)
Place toasted chilies in a bowl and cover with just-boiled water, or hot water plus a splash of vinegar for depth. Weight them down and soak 20–30 minutes until soft and pliable. Reserve the soaking liquid.
- 4
Prep aromatics
Peel garlic and shallots; slice ginger and lemongrass thinly. Optionally char aromatics in a dry pan or over a flame for smokiness. Coarsely chop so the grinder can bite them evenly.
- 5
Build the grind
In a mortar or food processor, start with salt and the hardest aromatics (garlic, ginger, galangal). Crush to a rough paste, then add chilies in batches. With a molcajete, use steady circular pressure; with a processor, pulse in short bursts and scrape down between pulses.
- 6
Adjust texture and seasoning
Stream in reserved soaking liquid, fresh water, or oil until the paste reaches the target — coarse for sambal, smooth for gochujang-style bases. Taste and correct salt, acid (vinegar or citrus), and sweetness (sugar, palm sugar, or honey).
- 7
Cook or store
For an oil-packed paste, gently warm neutral oil and bloom the paste 2–5 minutes to deepen flavor and stabilize color. For raw paste, pack into sterilized jars, cap with a thin oil layer, label, and refrigerate. Use within 1–3 weeks fresh, 2–6 months oil-packed.
Texture and equipment
The grind you choose has more impact on the final dish than most cooks realize. A volcanic-stone molcajete shears cells, releasing chili oils and aromatics without whipping air into the paste, so the result tastes denser and glossier. A food processor cuts and tears — faster, but it aerates and can over-process fresh chilies into a foamy, watery purée. The compromise is to pulse in short bursts, scrape down between pulses, and finish with a pass through a fine-mesh tamis or chinois to remove fibrous skins. Meat grinders and stone mills sit between the two, giving body without the foam.
- Mortar-and-pestle pastes keep more volatile aroma and look glossier
- Food processors foam fresh chilies; pulse, scrape, and rest the bowl in the fridge to settle
- A final tamis pass separates skins and seeds for restaurant-quality smoothness
- For very dry mixes (dried chilies, toasted spices), a blade grinder is faster than a mortar
Safety and storage
Two safety points matter more than the recipe. First, capsaicin is a potent irritant: wear disposable gloves, work in a ventilated space, and never touch your eyes mid-prep. Second, a fresh chili paste sealed under a layer of oil is a low-acid, anaerobic environment — exactly the conditions Clostridium botulinum spores need to germinate. Always refrigerate such pastes and consume within weeks, or use a tested vinegar-acidified or lacto-fermented recipe if you want true shelf stability.
- Gloves and ventilation are not optional with hot chilies
- Refrigerate oil-covered fresh paste without fail
- Acidified (vinegar) and properly fermented pastes are the only safe shelf-stable options at home
- If a paste smells yeasty, fizzy, or ammoniated, taste a tiny bit — acidic tang and bubbles are normal in ferments; off odors mean discard
Common uses
Tips & pitfalls
- Wear disposable gloves when handling hot chilies and keep them far from your eyes — capsaicin burns are the most common kitchen injury in chili work
- Toast dried chilies in a dry pan 20–40 seconds per side to wake up aromatic oils before soaking; skipping this step gives a flat, papery paste
- Reserve chili soaking liquid and add it back gradually — it carries far more flavor than plain water for adjusting consistency
- Use coarse salt in a stone mortar; it acts as both preservative and grinding grit, and finer table salt dissolves too fast to help shear
- For a smoother paste, pass the final grind through a fine-mesh tamis or chinois to catch fibrous skins and seeds
- Avoid running a blender continuously on fresh chilies — excess water release and air incorporation give a thin, foamy purée; pulse and scrape, or rest the bowl in the fridge to settle
- Balance heat, salt, acid, and sweetness only at the end; volatile acids and aromatics collapse once they hit the grinder, so corrections late preserve brightness
- Always refrigerate oil-covered fresh chili paste and consume within weeks; without acidification or fermentation, the oil layer can support botulism growth
- Roast garlic, shallot, or ginger in a dry pan before grinding for rounder, less sharp flavor in the finished paste
- Remove seeds and inner membranes for milder paste, or keep them in for maximum heat — they hold most of the capsaicinoids
Good to know
- Core operation
- Reducing chilies and aromatics to a coarse or smooth paste via grinding or blending
- Typical time
- 15–60 minutes active, excluding optional fermentation (days to years)
- Yield
- About 250 g of chilies yields roughly 200–300 ml of paste
- Chili forms accepted
- Fresh, dried, rehydrated, roasted, smoked, or fermented
- Standard equipment
- Molcajete, food processor, blender, meat grinder, or stone mill
- Salt function
- Flavor, preservative, and abrasive aid in a stone mortar
- Texture range
- Rough chopped (sambal) to fully smooth (gochujang-style)
Also called
Chili Paste Making (Ají Molido) · Aji Molido
Related

Whisk
Beat ingredients smooth and aerated with a looping wire motion

Sift
Pass dry ingredients through mesh to aerate and remove lumps

Strain
Pour through mesh to separate solids from liquid for a smooth result

Filter
Pass liquid through fine material to clarify out the smallest particles

Rice
Press cooked potatoes through small holes for fluffy, lump-free texture

Mash
Crush soft cooked food into a rustic, creamy purée

Grind
Crush food into a coarse to fine texture, from spices to meat

Grate
Shred food into fine bits against a sharp-toothed surface