Heat & Fire
Toasting Dried Chiles
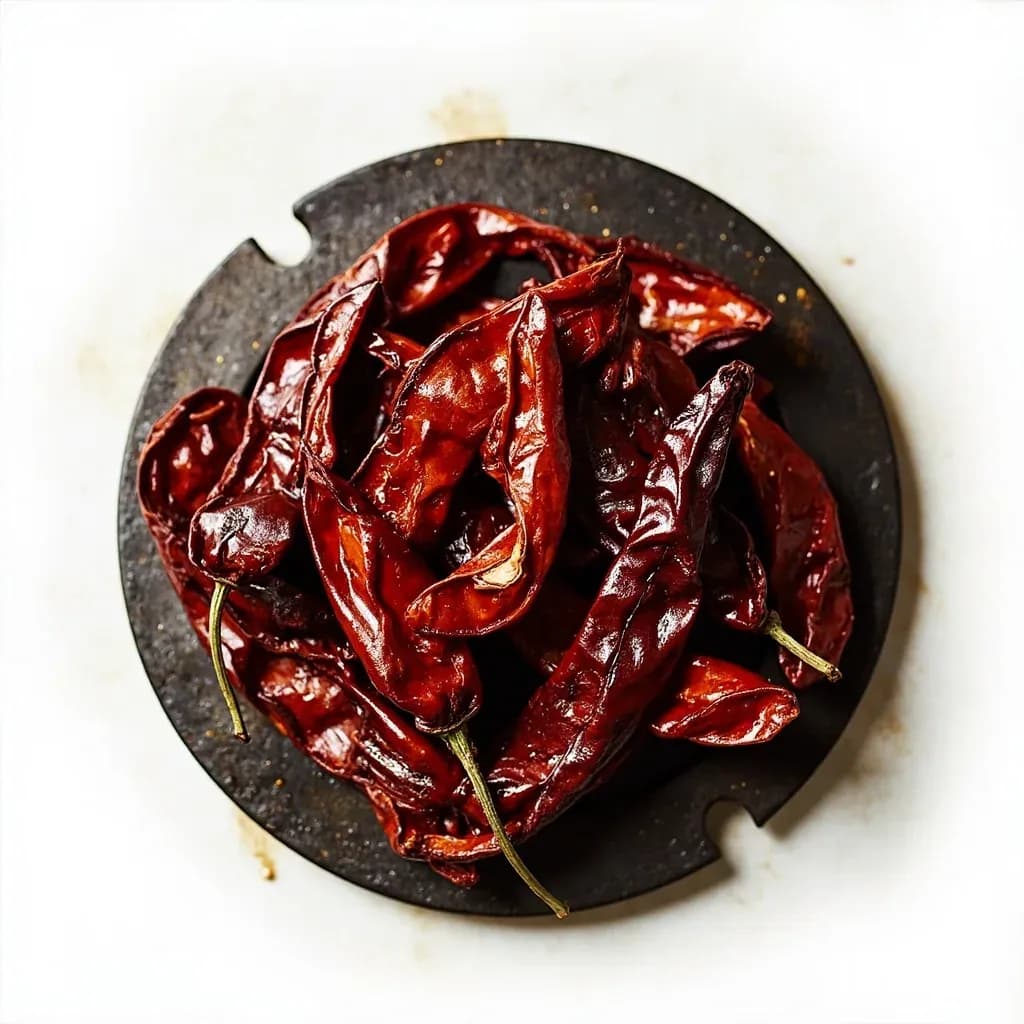
Dry-toasting dried chiles on a hot surface to wake up their flavor.
Toasting dried chiles presses them briefly onto a hot dry comal or skillet until they soften, blister, and release a smoky fragrance. The heat awakens dormant oils and deepens flavor before the chiles are soaked and blended into salsas, moles, and adobos. The chiles toast in seconds and scorch easily, so cooks flip them constantly, since a burnt chile turns the whole sauce bitter.
Toasting dried chiles is the dry-heat transformation of whole dried pods on a hot, ungreased surface — a comal, a heavy skillet, or an open flame — carried out before rehydration or grinding. It is the foundational move of Mexican and Central American cooking: fast, quiet, and unforgiving. A skilled cook can toast a batch of anchos in under two minutes; an inattentive one can ruin them in five seconds.
The technique rebuilds flavor. The Maillard reaction between the chile's reducing sugars and amino acids generates new aromatics — pyrazines, furans, aldehydes — while dusty, hay-like volatiles are driven off. Capsaicinoids survive intact, so pungency is preserved while fragrance deepens, sweetens, and rounds. A correctly toasted pod is pliable, lightly blistered, and fragrant with a faint wisp of smoke; a burnt one is black and bitter.
Timing is set by the thickness of the chile wall, not the heat of the pan: thin pods like de árbol need only 10–20 seconds per side, while thick-fleshed anchos and mulatos need one to two minutes. Toasting is distinct from frying chiles in oil (for rellenos and rajas) and from charring fresh chiles (tatemado, for salsa tatemada), though the three are often blurred in English-language recipes.
- Difficulty
- Medium
Types & varieties
The traditional method on a flat clay or cast-iron griddle; even heat and a wide surface for working through a batch of chiles quickly.
Cast-iron or carbon-steel skillet on the stovetop — the everyday home-kitchen method and the most widely used today.
Holding chiles directly over a gas burner or open flame with tongs until blistered and lightly charred; more aggressive, used for salsas tatemadas and very thick, leathery pods.
Low-heat oven at 275–300°F / 135–150°C for hands-off, even results; favored in commercial kitchens but generally considered less flavorful than direct-heat methods.
How to do it
- 1
Inspect and clean the chiles
Wipe each whole dried chile with a dry or barely damp cloth to remove dust and field chaff. Decide whether to keep the stem on (a useful handle, especially for thin chiles) or remove it. For very thick chiles — ancho, mulato, pasilla — slice them open lengthwise and shake out the seeds for more even toasting and faster rehydration.
- 2
Heat the pan
Place a comal, cast-iron skillet, or heavy dry skillet over medium to medium-low heat and give it 1–2 minutes to come to a steady, even temperature. A drop of water should sizzle and evaporate in about a second; the surface should not shimmer aggressively. No oil.
- 3
Lay chiles in a single layer
Place 2–4 chiles flat on the hot surface with space between them — never stacked or overlapping. For thick chiles, lay them fleshier side down first; for thin chiles, start with the flatter side.
- 4
Press and toast the first side
Use a flat spatula (or tongs for thin chiles) to press thick chiles flat so the entire surface makes contact with the metal. Watch for the skin to lighten in patches, form small bubbles or blisters, and release a toasty fragrance. Thin chiles need only 10–20 seconds; medium chiles 20–40 seconds; thick chiles 1–2 minutes.
- 5
Flip and toast the second side
Turn each chile with tongs and toast the other side to the same degree. The pod should feel pliable rather than stiff, and the color will have shifted slightly — never toward deep black.
- 6
Remove at the first sign of smoke or char
Transfer toasted chiles to a plate, into a bowl, or directly into hot water for rehydration. A few light blisters or a small char mark is correct; large blackened areas mean the chile is burned and will taste bitter — set those aside or discard.
- 7
Rehydrate or grind immediately
Submerge toasted chiles in hot but not boiling water for 15–30 minutes, weighing them with a small plate to keep them under the surface. Reserve the soaking liquid — it carries real flavor. For powders, let the chiles cool and grind in a molcajete, spice grinder, or mortar. Deglaze the toasting pan with a splash of the soaking water and add that fond to the sauce.
Why toasting changes the flavor
Toasting is not just warming the chile — it is chemical reconstruction. Three things happen at once on the hot surface. First, the Maillard reaction between the chile's reducing sugars and amino acids creates new brown, savory, and roasty aromatics, including pyrazines (the same family responsible for the smell of roasted coffee and seared meat) and furans. Second, the heat drives off the lighter, more fugitive volatile compounds that read as dusty, grassy, or hay-like in a raw dried chile — the 'cardboard' note that turns people off dried chiles when they have never been toasted. Third, the surface lipids and pigments undergo mild pyrolysis, contributing a faint smokiness without actual combustion. The capsaicinoids that carry heat are largely unaffected, so the chile's pungency survives intact. The trade-off: those newly created aromatics are themselves volatile and begin to fade within hours of cooling, which is why toasted chiles should be rehydrated or ground the same day they are toasted.
Matching technique to chile thickness
The single most useful decision a cook makes when toasting is how long to leave the chile on the heat. A useful working taxonomy:
- Thin-walled chiles (de árbol, japones, chiles piquín, guindillas) — 10–20 seconds per side; they scorch fast, so keep them moving and pull them the moment they smell toasty and the color shifts.
- Medium chiles (guajillo, puya, pasilla, New Mexico) — 20–40 seconds per side; these are the everyday workhorses of the technique and respond well to gentle pressing with a spatula.
- Thick, leathery chiles (ancho, mulato, cascabel) — 1–2 minutes per side, pressed flat against the pan so the uneven middle makes full contact; split them open and remove the seeds first for faster, more even toasting and rehydration.
Common uses
Tips & pitfalls
- Wipe chiles with a dry or barely damp cloth before toasting — dusty pods will scorch and taste like burnt paper.
- Press thick chiles flat with a spatula so the whole surface contacts the hot metal; otherwise the raised middle stays raw while the edges burn.
- Move chiles constantly and pull them the moment they smell toasty; they go from perfect to acrid in 5–10 seconds.
- Work in small batches of 2–4 chiles at a time — overcrowding causes uneven toasting and trapped steam.
- Skip nonstick pans: they do not hold enough heat for proper Maillard development and can off-gas if overheated dry.
- Never toast over high heat to save time — the skin scorches long before the flesh warms through, leaving a bitter, burned top note.
- After toasting, soak chiles in just-off-boiling water, not boiling; simmering cooks the chiles and dulls the toasted notes you just built.
- Toasted chiles are best used within a few hours; the volatile aromatics that toasting creates begin to fade quickly once the chile cools.
Good to know
- Method
- Dry-heat on a hot surface, no oil
- Primary tools
- Comal, cast-iron or carbon-steel skillet, heavy-bottomed pan; open flame for tatemar
- Heat level
- Medium to medium-low
- Time per side
- 10–20 seconds for thin chiles (de árbol, japones, piquín); 20–40 seconds for medium (guajillo, puya, pasilla); 1–2 minutes for thick (ancho, mulato, cascabel)
- Doneness signal
- Fragrant, slightly puffed, skin lightly blistered, pliable rather than rigid
- Burned signal
- Deep black patches, sustained heavy smoke, acrid or bitter smell
- Origin
- Pre-Columbian Mesoamerica, on the clay comal
- Followed by
- Rehydration in hot (not boiling) water, then blending, grinding, or grinding into powder
Also called
Chili Roasting (Asar Chiles) · Chile Toasting on Comal · Dry-Toasting Chilies · Toasting Dried Chiles
Dishes that rely on it
Related

Sear
Blast the surface hot for a deep-browned, savory crust

Sauté
Cook quickly in a little fat over lively heat, tossing as you go

Stir-Fry
Toss bite-sized pieces over roaring heat for fast, smoky cooking

Pan-Fry
Crisp food in a shallow layer of hot fat, turning once or twice

Deep-Fry
Submerge in hot oil for an all-over crackling crust

Roast
Cook uncovered in dry oven heat for browned edges and tender centers

Bake
Cook with steady, surrounding oven heat — the soul of bread and pastry

Broil
Hit food from directly above with fierce overhead heat