Heat & Fire
Coffee Bean Roasting
Applying dry heat to green coffee beans to develop flavor, aroma, and color.
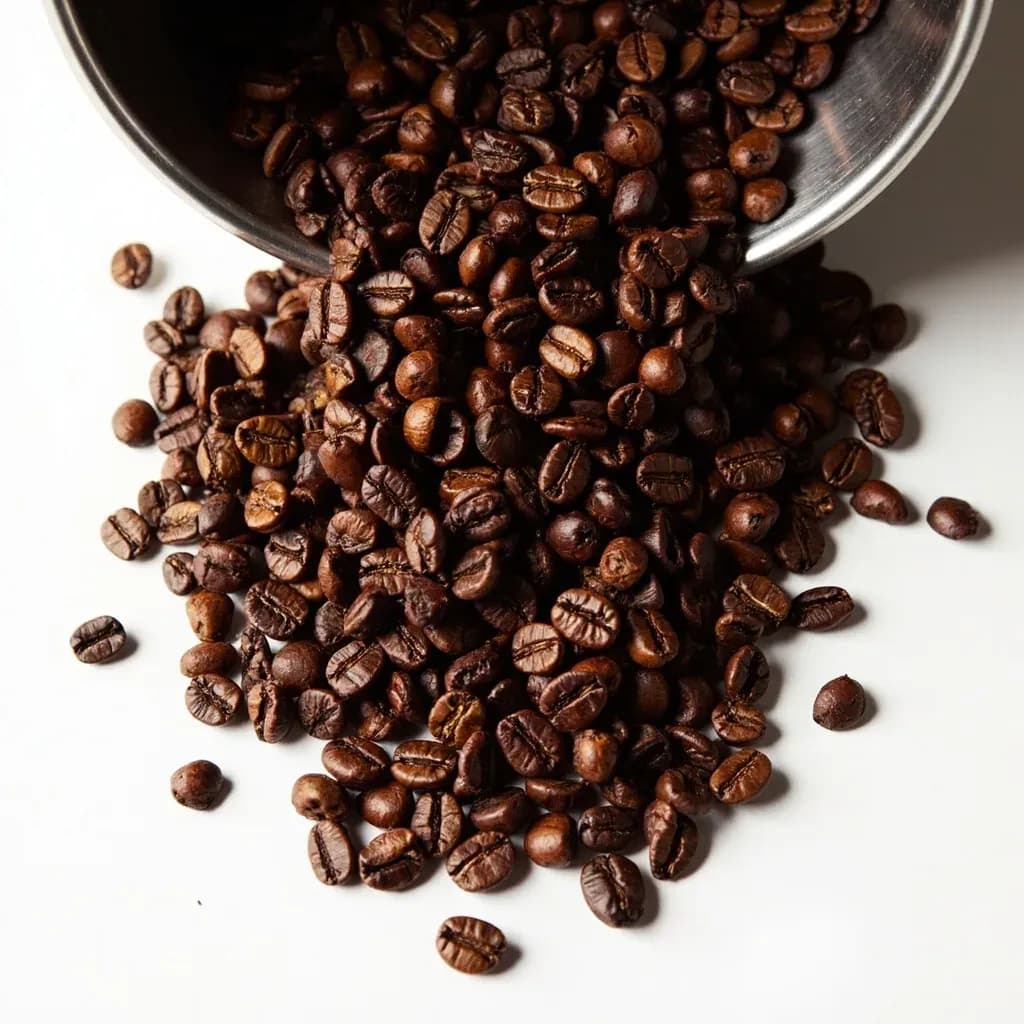
Coffee roasting heats green beans to between roughly 190 and 230 degrees Celsius, driving Maillard browning and caramelization that turn grassy, dense seeds into aromatic brown coffee. Roasters listen for first and second crack to gauge development, controlling time and temperature to land a light, medium, or dark profile. The roast level dictates acidity, body, and bitterness in the final cup.
Coffee roasting is the controlled application of dry heat to raw, green coffee beans until they develop the color, aroma, and soluble compounds that define a brewed cup. The beans arrive with no real coffee flavor — only starches, sugars, chlorogenic acids, trigonelline, and moisture. Heat converts those precursors through three overlapping stages: moisture evaporation (drying), the Maillard reaction and caramelization (browning), and pyrolysis (the deeper, smoky breakdown that produces dark roast character). A roaster's job is to manage the rate of heat transfer and airflow so the bean develops evenly from inside out, then stop the process at a chosen point along a continuous spectrum.
The craft lives in the details of timing, temperature, and airflow. A roast typically runs 8 to 15 minutes, with the critical pivot being first crack — the audible popping of the bean's expanding cell walls at roughly 196–205 °C. How long the roaster lets development continue after that sound shapes everything in the final cup: a fast drop yields bright, acidic, origin-driven coffee; a slower, longer development produces darker, sweeter, more roast-driven coffee. Because every variable — charge temperature, gas pressure, drum speed, ambient humidity, bean density — affects the outcome, roasting is one of the few cooking techniques where a written log is as important as the cook's intuition.
The result is a product that has lost 12–20% of its original weight but gained roughly 800 volatile aromatic compounds. Roasted beans must rest before brewing because they continue to outgas carbon dioxide for days, and that CO2 physically blocks water from extracting solubles — so a roast pulled too fresh will taste flat, sour, and under-extracted no matter how carefully it was grown or brewed.
- Difficulty
- Hard
Types & varieties
Also called Cinnamon, Half City, or New England; dropped just after first crack; bright acidity, origin character forward, lighter body.
City or American; a small gap after first crack; balanced acidity, sweetness, and aroma — the default for most filter brewing.
Full City or Vienna; the very beginning of second crack; heavier body, caramelized sweetness, slight toast notes, origin still present.
French or Italian; well into second crack; oily bean surface, smoky and bittersweet, origin character largely replaced by roast character.
Not a fixed level on the color scale; usually medium-dark to dark, developed slightly past first crack for solubility and crema.
Typically light to medium, designed to highlight clarity, acidity, and origin transparency.
How to do it
- 1
Source and weigh green beans
Select known-origin green coffee, free of defects and at a moisture content near 10–12%. Weigh out the batch size appropriate for your roaster, typically filling the drum no more than about 60–75% of its rated capacity so beans can tumble freely.
- 2
Preheat the roaster
Bring the roaster to a stable charge temperature before adding beans (roughly 180–205 °C drum temperature for most drum machines). A stable heat reservoir is the foundation of a repeatable profile; a cold roaster will punish you on every batch.
- 3
Charge the beans
Drop the green beans in and start the timer. The drum temperature will dip — this is normal. Record the lowest temperature reached and the time it takes to recover (the turn-around). A short, shallow turn-around usually means more even development ahead.
- 4
Drying phase
Run the roaster with consistent heat and airflow for roughly 4–8 minutes. The beans will fade from green to straw-yellow as moisture drives off. Aim for a smooth, even descent and a steady rate of rise — the rate you set here carries through the rest of the roast.
- 5
Maillard and browning
As beans turn tan and then brown, the smell shifts from grass to bread to nuts and caramel. This is the main flavor-building window. Adjust gas and airflow here to control how quickly the bean temperature climbs; the goal is steady, not fast.
- 6
First crack
A sharp, crackling popcorn sound marks first crack, typically at a bean temperature of 196–205 °C. Note the time to the second. For light roasts, drop within seconds of the first pops; for medium and beyond, begin the development phase.
- 7
Development phase
After first crack, slow the rate of rise — usually by reducing heat and sometimes increasing airflow. Most balanced roasts keep the development time ratio (post-first-crack time divided by total time) between 15% and 25%. A controlled development here is what gives the cup sweetness and body.
- 8
Approach second crack (optional)
For medium-dark and dark roasts, continue carefully. Second crack sounds like softer, faster ticking. Drop just as it begins to avoid an ashy, carbonized cup. A few snaps into second crack gives a classic Viennese or Full City profile; a sustained rolling second crack defines French and Italian.
- 9
Drop and cool
Discharge beans into a cooling tray with strong airflow, or in a fluid-bed roaster, into the cooling chamber. Stir or agitate to drop bean temperature below roughly 100 °C within 3–4 minutes. Slow cooling continues to bake the bean and dulls flavor.
- 10
Rest and store
Store roasted beans in a valve bag or airtight container with a one-way degassing valve. Wait at least 24 hours, ideally 3–7 days, before brewing to let CO2 dissipate. Brew within about 4 weeks of roasting for best flavor; after that, staling accelerates noticeably.
The Roast Curve
Every roast is plotted as a line: bean temperature (or drum temperature) on the vertical axis, time on the horizontal. The shape of that line — the rate of rise at each stage, the depth of the turn-around dip after charging, and the ratio of post-first-crack time to total roast time — is what experienced roasters actually taste. A profile that climbs too fast early on scorches the exterior; one that climbs too slowly in the Maillard window produces a baked, papery cup. The single most useful number on the curve is the development time ratio (DTR): post-first-crack time divided by total time. Most balanced roasts sit between 15% and 25% DTR; below 15% the cup tends toward grassy and sharp, above 25% it tilts flat and ashy.
Equipment and Scale
Roasting hardware runs from improvised to industrial, and the choice shapes what you can do. A heavy skillet or heat gun over a colander can roast a handful of beans for tasting, but offers almost no repeatability. Modified hot-air popcorn poppers are the classic learning platform: cheap, fast, and a real lesson in airflow and rate of rise. Dedicated home machines — single-drum units and fluid-bed roasters — give software logging and repeatable profiles in 100 g to 1 kg batches. Commercial drum roasters scale from 1 kg samples to 600 kg production batches with sophisticated gas and airflow control.
- Skillet or heat gun: under 100 g, learning only, expect scorched edges and uneven development.
- Popcorn popper (modified): 50–150 g, fast and cheap, but limited control past first crack.
- Home drum roaster: 200 g–1 kg, profile logging, good for daily use.
- Home fluid-bed roaster: 200 g–1 kg, very clean smoke and fast roast times, excellent repeatability.
- Sample roaster: 50–200 g, used in green-buying and quality control at origin and import.
- Commercial drum or fluid-bed: 1–600 kg, designed for blend consistency and high throughput.
Common uses
Tips & pitfalls
- Pull a sample with a trier every 30–60 seconds once the beans are brown — sight trumps the clock for catching the right moment to drop.
- Listen for the rolling popcorn sound of first crack; it is your primary pivot point, not the thermometer reading on the wall.
- Stop a hair before the bean surface looks completely uniform — a few faint streaks of tiger striping indicate good, even development rather than an underdeveloped interior.
- Cool beans within 3–4 minutes of dropping. Slow cooling continues to cook the bean and flattens the cup, especially in lighter roasts.
- Do not brew a roast within 24 hours. Trapped CO2 physically blocks extraction, mutes aroma, and ruins crema in espresso.
- Keep a written log of charge temperature, turn-around, first crack time, drop time, and development ratio. Without a log you cannot reproduce a good profile or diagnose a bad one.
- Avoid flicking — pushing heat too hard early in the roast to chase development time. It scorches the outside while the inside stays raw and grassy.
- Ventilate the roasting area. Chaff is flammable, the smoke contains acrolein and other irritants, and the smell will saturate a kitchen and its neighbors for hours.
- Roast in small, even batches rather than packing the drum full. Airflow and tumbling suffer in an overloaded machine, and the result is uneven development across the batch.
Good to know
- Also called
- Coffee roasting, drum roasting, hot-air roasting
- Core chemistry
- Maillard reaction, caramelization, and pyrolysis transform sugars, amino acids, and chlorogenic acids into aromatic compounds
- First crack temperature
- Bean temperature ~196–205 °C / 385–401 °F
- Second crack temperature
- Bean temperature ~224–230 °C / 435–446 °F
- Total roast time
- 8–15 minutes for most profiles; longer development styles can run 14–20+ minutes
- Weight loss
- 12–20% of green weight lost as moisture and chaff; darker roasts lose more
- Roast yield
- Roughly 1 kg green ≈ 0.80–0.88 kg roasted (light to medium-dark)
- Common heat sources
- Gas flame, electric element, hot forced air (fluid bed)
- Rest before brewing
- Minimum 24 hours; 3–7 days preferred for most origins
Also called
Coffee Bean Roasting
Related

Sear
Blast the surface hot for a deep-browned, savory crust

Sauté
Cook quickly in a little fat over lively heat, tossing as you go

Stir-Fry
Toss bite-sized pieces over roaring heat for fast, smoky cooking

Pan-Fry
Crisp food in a shallow layer of hot fat, turning once or twice

Deep-Fry
Submerge in hot oil for an all-over crackling crust

Roast
Cook uncovered in dry oven heat for browned edges and tender centers

Bake
Cook with steady, surrounding oven heat — the soul of bread and pastry

Broil
Hit food from directly above with fierce overhead heat