Prep & Assembly
Controlled-Variable Recipe Testing
Changing one factor at a time across batches to isolate what actually drives a result.
Controlled-variable testing is the recipe-development practice of holding everything constant except a single variable, such as hydration, oven temperature, or rest time, then comparing the outcomes side by side. It lets a cook attribute differences in texture or flavor to a known cause rather than guesswork. Professional test kitchens rely on it to refine formulas and document repeatable results before publishing a recipe.
Controlled-variable recipe testing is the kitchen's working version of the scientific method: cook a batch exactly as written, then cook a second batch that differs by one and only one factor — an ingredient, an amount, a temperature, a tool — and judge the two side by side. It is the discipline behind every confident recipe footnote in a test kitchen, and the most reliable way to convert cooking intuition into knowledge that holds across batches, kitchens, and years.
The method is most powerful where outcomes are sensitive to small inputs: baking, bread, pastry, fermentation, charcuterie, emulsions, deep-frying, and any dish where ratios, temperatures, and timing drive the result. It is less useful in highly improvisational cuisines built on multi-variable balance by design, where oil amount, aromatic order, and wok heat move together and the cook's hand is the constant.
A run of three to five test cycles, each holding all but one variable constant and judged against a fresh control, answers most kitchen questions with a confidence no amount of guessing can match. The trap is changing two things and crediting one, and the cost is patience: a single useful finding can take an afternoon, a bag of flour, and a willingness to admit the first batch was the winner.
- Difficulty
- Medium
Types & varieties
Holds quantity, technique, and equipment constant; substitutes one ingredient (e.g., butter vs. oil vs. lard in pie crust) to isolate its effect.
Adjusts the amount of a single ingredient in graduated steps (e.g., 0%, 1%, 2%, 3% salt by flour weight) to find a threshold or curve.
Varies time, temperature, mixing method, or order of operations while keeping ingredients identical (e.g., creaming vs. reverse-creaming for cakes, autolyse length for bread).
Holds recipe constant and changes only the tool (e.g., stand mixer vs. hand whisk; gas vs. electric oven; cast iron vs. stainless).
Controls for ambient humidity, room temperature, or altitude — decisive for baking, chocolate work, bread, and candy.
Uses trained or consumer tasters with blind or triangle-test protocols to score attributes rather than relying on a single cook's palate.
How to do it
- 1
Define the question and prediction
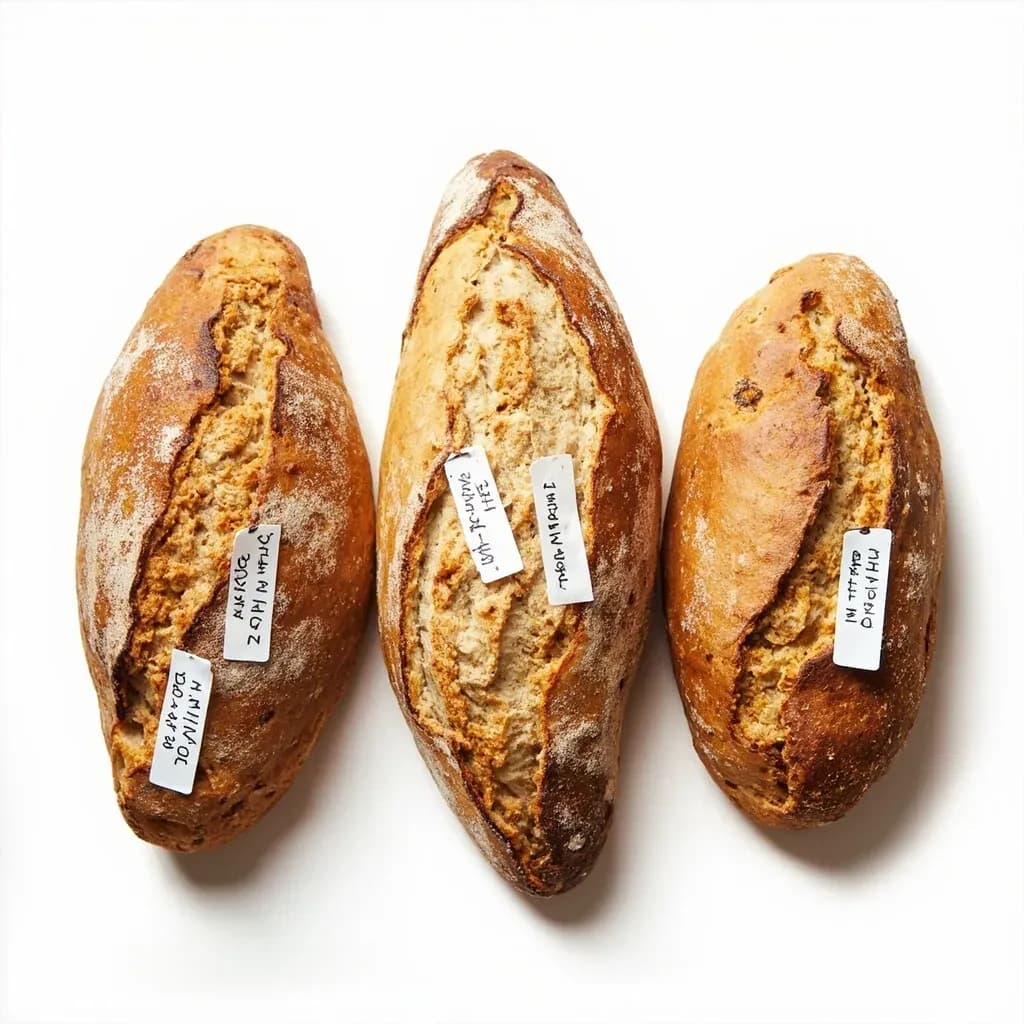
Write a single, specific hypothesis before you turn on the stove: 'Increasing hydration from 65% to 70% in this lean bread dough will produce a more open crumb without collapsing the structure.' A clear prediction lets you design a test that can actually falsify it, and stops you from chasing whatever the last batch happened to taste like.
- 2
Lock down the reference recipe
Pin every detail of the base recipe: ingredient brands, weights in grams, temperatures, timings, equipment, ambient conditions. This is your control protocol. Re-write it in full each time you run a control so nothing is implied from memory — the day you skip a step is the day the test becomes uninterpretable.
- 3
Set up a scoring rubric
Before cooking, decide what you will measure. Sensory attributes: salt, sweetness, acidity, bitterness, aroma, texture. Structural attributes: rise, crumb openness, sauce break, glaze snap. Quantitative data: internal temperature, weight loss, pH where relevant. Print or template the form so every batch is scored on the same scale, and decide the scale in advance — a 0–5 line works well for most home tests.
- 4
Prepare the control batch first
Cook the unchanged recipe in full and immediately set it aside under serving conditions. The control anchors every comparison and tells you whether your cooking environment — oven, humidity, your own hands — is consistent day to day. Without it you are comparing today's variable batch to last week's memory, which is not a test.
- 5
Prepare the variable batch with one change
Change exactly one thing and document it in the recipe header: name of variable, old value, new value, and units. Use the same equipment, same preheat, same plating. Label the vessel clearly with a code letter or number so it cannot be confused mid-service or mid-tasting.
- 6
Cook and plate in parallel
Run the control and variable batches as close together as practical — same oven load if you can manage it, same resting time, same plate temperature. Hold anything that cannot be cooked simultaneously in identical holding conditions (covered, ambient, timed) and note the hold on the score sheet. A 10-minute hold difference can swamp the variable you are actually testing.
- 7
Taste and score blind
Have a helper hand you samples in randomized order without telling you which is which, and record scores before discussing. Triangle tests — two of one batch, one of the other, pick the odd one — are useful when the differences are subtle. The point is to defeat expectation bias, which is real, measurable, and very good at making the new method look like the winner.
- 8
Compare results and decide
Reveal the codes, lay scores next to the recipe, and write a one-sentence conclusion: 'Variable beat control,' 'No meaningful difference,' or 'Variable worse.' Distinguish between a difference you can detect on the rubric and a difference large enough to matter to a real eater — the second is what you are actually trying to find.
- 9
Replicate before committing
Repeat the test on a different day with a fresh control. If the result holds, you have a finding worth trusting. If it flips, run a third cycle or test a larger magnitude of the variable before drawing a conclusion — a single cook can be a fluke, especially on the first round of any new recipe.
- 10
Record, photograph, and queue the next question
File the dated test sheet with photos and the final recipe version in a dedicated notebook. Write the next single-variable question at the bottom of the page — 'If 70% hydration is the winner, does autolyse time change the result?' — and start the cycle again. A queue of one-sentence questions is the difference between a productive testing habit and a year of unfocused cooking.
When single-variable testing isn't enough
OFAT is the right default for a home cook or solo recipe developer because each batch is easy to interpret: the only thing that changed was the thing you changed. Its blind spot is interactions — situations where variable A matters only above a certain level of variable B. A baker who finds that 2% salt tastes flat, then later finds that 2% salt at higher sugar tastes excellent, has actually discovered an interaction, and OFAT alone can take a long time to reach that finding.
The professional answer is factorial design: lay out a small grid (e.g., two salt levels crossed with two sugar levels = four batches in one round) and score them together. You learn the main effect of each variable and any interaction in fewer total cooks than running OFAT to the same depth, at the cost of more batches per round and the need to read a results table. For most home kitchens it is overkill. Reach for it when a variable keeps giving ambiguous results and you suspect it depends on something else you are also moving.
- OFAT is interpretable but slow when variables interact — a salt finding can flip depending on sugar level.
- Factorial design tests several variables in one round of cooks and surfaces interactions, but needs more batches and basic statistical literacy.
- A practical hybrid: use OFAT until a result is ambiguous or contradictory, then run a small 2×2 or 2×3 factorial grid.
- Always re-verify the winning factorial cell with a single OFAT confirmation batch before publishing the conclusion.
Common uses
Tips & pitfalls
- Change exactly one variable per test — if you swap the salt and the pan in the same batch, the result cannot be attributed to either, and the test is wasted.
- Always run a true control batch in parallel; do not rely on memory of a previous cook, because ovens, humidity, and your own hands drift day to day.
- Weigh ingredients in grams rather than using volume measures whenever the variable is quantity — a measuring cup can introduce 15–20% error in flour, which is larger than most variables you are trying to detect.
- Calibrate your oven with a hanging thermometer and use an instant-read probe for internal temperatures; a 25°F oven swing will swamp the salt or sugar level you are actually testing.
- Taste blind when possible — have someone else hand you samples labeled A, B, C in random order. Expectation bias is strong enough to make a new method taste better on the first bite.
- Write a scorecard before you taste, not after, with fixed scales for salt, sweetness, texture, color, and aroma. A scorecard decided in the moment is just an opinion.
- Replicate at least twice before declaring a winner; a single cook is a single data point and a frequent fluke.
- Do not taste while hungry or immediately after strong flavors like coffee, toothpaste, or hot sauce — both blunt the palate and bias the next sample.
Good to know
- Core principle
- One Factor At a Time (OFAT) — change a single variable per test batch while holding every other input constant.
- Comparison method
- Each test batch is evaluated against an unchanged control batch cooked in parallel, not against memory.
- Typical batch size
- Small laboratory portions — enough to plate identically for tasting, usually 2–6 servings per test.
- Sample size for validity
- Minimum one control plus one variable batch; ideally 2–3 replicates of each to catch inconsistency.
- Sensory method
- Best paired with blind tasting, triangle tests, and a fixed scored rubric rather than a single palate.
- Equipment
- Identical cookware, calibrated oven thermometer, instant-read probe, digital gram scale, standardized tasting forms, camera.
- Related design
- Factorial design tests several variables at once to expose interactions; it is the professional R&D alternative but needs more batches and basic statistics.
- Documented origin (modern cooking)
- Evolved from laboratory food science; popularized for home cooks by Harold McGee (On Food and Cooking, 1984) and Shirley Corriher (CookWise, 1993).
- Notable practitioners
- America's Test Kitchen, Cook's Illustrated, J. Kenji López-Alt (The Food Lab), Nathan Myhrvold (Modernist Cuisine), Serious Eats test kitchen.
Also called
Single-Variable Testing · Recipe Iteration
Related

Whisk
Beat ingredients smooth and aerated with a looping wire motion

Sift
Pass dry ingredients through mesh to aerate and remove lumps

Strain
Pour through mesh to separate solids from liquid for a smooth result

Filter
Pass liquid through fine material to clarify out the smallest particles

Rice
Press cooked potatoes through small holes for fluffy, lump-free texture

Mash
Crush soft cooked food into a rustic, creamy purée

Grind
Crush food into a coarse to fine texture, from spices to meat

Grate
Shred food into fine bits against a sharp-toothed surface