Heat & Fire
Live-Fire Dome Baking
Baking pizza or bread in a wood-fired domed oven where radiant, conductive, and convective heat combine.
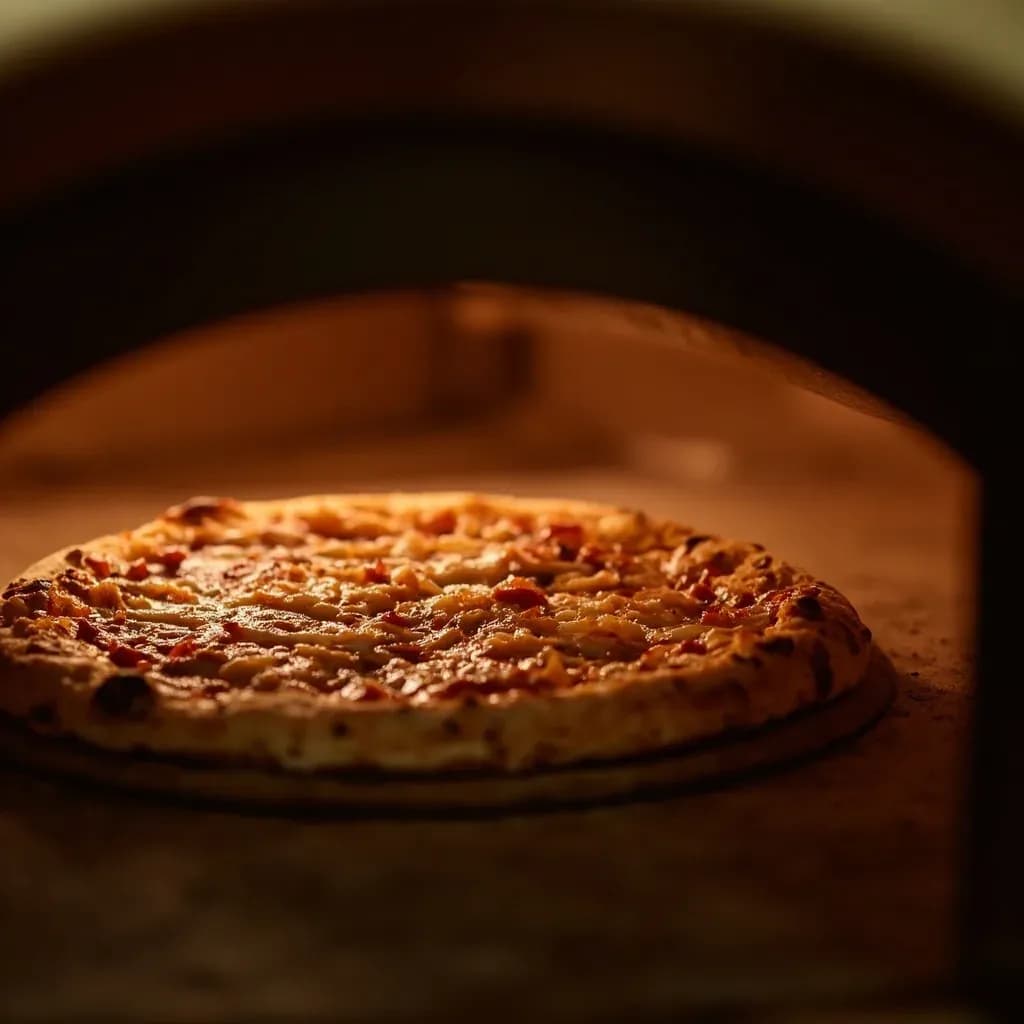
Live-fire dome baking cooks in a wood-burning oven whose curved dome radiates intense heat back onto the food while the hot floor conducts heat into the base. The combination of high radiant, conductive, and convective heat bakes a pizza in 60 to 90 seconds, charring the crust and leaving a leopard-spotted, blistered cornicione. The fire is pushed to one side so flames lick the dome without scorching the food.
Live-fire dome baking is the practice of cooking inside a vaulted masonry chamber — brick, stone, cob, or refractory ceramic — that is heated from within by a wood fire, then used either with the flame still in the chamber or with that flame pushed aside so the stored heat can do the work. The dome's curved geometry does most of the cooking: it reflects radiant heat back down onto the food from above and the sides, while the hearth floor delivers intense conductive heat from below and the hot gases circulate convectively around whatever is set on it. Because all three modes act simultaneously, the oven behaves like nothing else in a kitchen: a Neapolitan pizza can blister and char in 70 seconds, while a loaf of sourdough in the same oven, hours later and in falling heat, will emerge with a deeply caramelized crust and an open crumb.
The technique is older than any recipe written for it. Beehive and domed clay ovens are attested across the Mediterranean, the Levant, and Central Asia for thousands of years, and the modern Neapolitan form — codified by the Associazione Verace Pizza Napoletana in 1984 — is essentially a refinement of that lineage. What the dome gives a cook that a flat oven cannot is thermal mass and reflection: a properly built dome holds heat the way a battery holds a charge, releasing it steadily and uniformly for hours. Mastering the technique is less about recipes than about reading the fire, reading the masonry, and reading the food — the color of the dome, the sizzle on launch, the leopard-spotted cornicione, the hollow knock on bread.
- Difficulty
- Hard
Types & varieties
Low Roman dome with the fire managed in the same chamber as the bake; flame often licks the pizza directly; standard for Vera Pizza Napoletana.
Fire chamber offset from the bake chamber; cleaner hearth, more even radiant floor heat; common for bread, roasts, and many American wood-fired pizzerias.
Taller, narrower dome that channels flame and heat across a longer hearth; favored for long, oval pizzas like pizza alla pala.
Adobe or cob beehive oven of the American Southwest and Iberian Peninsula, used for bread, posole, and roasted meats over coals.
Vertical cylindrical clay oven from South and Central Asia; live-fire but inverted-dome geometry; used for naan, kebabs, and tandoori dishes.
Hand-built sand-clay-straw dome; cheap and effective but must be cured slowly over days before the first real bake.
Modern metal-clad refractory or cordierite domes for home use (Ooni, Roccbox, Gozney); reach 900 °F+ on gas, wood, or wood-pellet fuel.
How to do it
- 1
Cure the oven (new builds only)
Light a series of small fires of increasing size over 5–7 days. Day 1–2: a few twigs, dome barely warm. Day 3–4: a sustained small fire, 1–2 hours. Day 5–7: a full fire reaching normal bake temperature. Never rush a cure; trapped steam will spall the hearth.
- 2
Build the fire
Stack 8–15 lb (4–7 kg) of split, seasoned hardwood against the side or back of the oven in a loose teepee or crib so air can flow. Use a small starter of kindling underneath. Light and let the fire establish a rolling flame before closing any damper.
- 3
Bring the dome to temperature
Stoke with a fresh split every 15–20 minutes. After 60–90 minutes the interior surfaces will soot, then clear; the dome should turn a pale ash white. Measure the hearth with an infrared thermometer — aim for 850–930 °F (450–500 °C) for pizza, 450–550 °F (230–290 °C) for hearth bread.
- 4
Manage the fire for what you are baking
For Neapolitan pizza, leave flame in the chamber so it licks the crust. For bread, focaccia, and roasts, push the coals to one side or back with a wet iron peel, leaving a clean, hot hearth in front of the opening.
- 5
Clean and check the hearth
Sweep ash with a damp brass-bristle brush; do not scrape. Spot-check floor temperature in several places with an IR thermometer — even heat matters more than peak heat for most bakes.
- 6
Launch the food
Dust a wooden peel with flour or semolina, or a metal peel with semolina, and slide the food onto the hottest part of the hearth. For pizza, you should hear an immediate, sustained sizzle — silence means the floor is not hot enough.
- 7
Rotate frequently
Turn pizza every 15–20 seconds, quarter-turns, to even out the leoparding and avoid burning the leading edge. Rotate hearth bread once at the color you want on the bottom.
- 8
Finish and remove
Pull pizza at 60–90 seconds when the cornicione is puffed and spotted with char. Remove bread when the internal temperature reads 205–210 °F (96–99 °C) and the bottom sounds hollow. Set on a cooling rack, not a cold surface, to preserve the crust.
- 9
Use falling heat, then close down
After high-heat bakes, drop the fire to embers and bake bread, dried tomatoes, or beans in the residual 450–500 °F heat. When done, spread the ashes, close the door, and let the oven cool naturally to protect the masonry.
The Three Heats
A live-fire dome is unusual because it delivers three distinct modes of heat transfer at the same moment, and the balance between them changes as the bake progresses. Conductive heat from the hearth floor is what sets and browns the bottom of a pizza or the crust of a loaf — it is intense at first contact and falls as the floor cools. Radiant heat from the dome and walls reaches the top and sides of the food without touching it, and is responsible for the rapid puff and char of a Neapolitan cornicione. Convective heat from the flame and from hot air moving across the food drives drying, color, and smoke uptake. Pushing the fire aside does not eliminate these forces — it shifts the balance away from convection and toward stored radiant and conductive heat, which is why bread and roasts bake cleanly in falling heat while pizza needs flame in the chamber.
- Conductive: floor-to-food heat; dominates the underside and decays as the hearth cools.
- Radiant: dome and walls radiate onto the top and sides; survives in falling heat long after the flame is gone.
- Convective: flame and hot gas; provides the fastest color and smoke, but is also the first heat to disappear when the fire is moved.
Reading the Oven
Cooks who work a wood-fired dome rely on three overlapping cues. The oldest is color: a fresh fire soots the interior black, the soot then burns off to grey, and a fully preheated dome turns a pale ash white — the traditional signal that the masonry is saturated with heat. The most reliable modern cue is an infrared thermometer aimed at the hearth floor, where a 100 °F swing can mean the difference between a leopard-spotted crust and a charred one. The third cue is sound and smell: a properly hot hearth produces an immediate, sustained sizzle when dough touches it; silence means the floor is not ready. White, heavy smoke means wet wood; a clear, rolling draft and a clean flame mean the fire is hot and efficient.
- Black soot → grey ash → white dome is the traditional temperature progression.
- An IR thermometer on the hearth is far more reliable than guessing from dome color alone.
- Listen for the sizzle on launch — it tells you whether the floor will set the bottom in time.
- White billowing smoke means wet wood; clear flame and a strong draft mean a hot, efficient fire.
Falling Heat and the Logic of One Firing
The historic peasant logic of the masonry oven is to make one firing feed a household for a day. Pizza or flatbreads go in first, when the hearth is at its hottest and the flame is in the chamber. The fire is then pushed aside, the embers are gathered, and bread, focaccia, roasts, beans, or dried tomatoes are cooked in falling heat over the next several hours. This is not a compromise — it is the design intent of the dome, which holds and releases heat the way a battery holds a charge. Modern pizzerias often work the same way at scale, sequencing high-heat pizzas, hearth breads, and slow-roasted vegetables across a single firing.
- Sequence from hottest to coolest: pizza (850–930 °F), then hearth breads and flatbreads (450–550 °F), then roasts and slow bakes in residual heat.
- Close the door between bakes to hold heat in the masonry.
- A single long firing will typically produce dozens of pizzas followed by several hours of bread and roasting.
Common uses
Tips & pitfalls
- Cure a new oven across 5–7 days with progressively larger fires before cooking in it — driving out residual moisture prevents spalling and explosions in the masonry.
- Burn only seasoned hardwood; pine, spruce, and any treated or painted wood will deposit resin, soot, and off-flavors on the food.
- Preheat for at least 90 minutes from a cold start and wait until the dome turns a pale ash white; an infrared thermometer on the hearth is far more reliable than reading dome color alone.
- Push or rake the fire to the side or back before laying bread and long bakes so the dough is not charred; for Neapolitan pizza, leave flame in the chamber.
- Rotate the pizza every 15–20 seconds, lifting the edge with a metal peel, to prevent a single spot from burning and to chase the hottest part of the hearth.
- Brush the hearth with a damp brush between pies to lift ash; a heavy scrape will drop the floor temperature by 100 °F or more.
- Watch the dome, not the clock — leoparding (small charred blisters) on the cornicione is the real doneness signal for Neapolitan pizza.
- Do not soak a hot oven with water; thermal shock can crack the dome. A fine mist from a plant sprayer is the limit.
Good to know
- Oven type
- Domed or vaulted masonry chamber of brick, stone, cob, or refractory ceramic, heated by a wood fire built inside
- Heat transfer
- Radiant from the dome, conductive from the hearth floor, and convective from flame and hot air — all acting at once
- Pizza bake temperature
- 850–930 °F (450–500 °C) at the hearth, measured with an infrared thermometer pointed at the floor
- Bread bake temperature
- 450–550 °F (230–290 °C) after the live fire is pushed aside, drawing on residual heat stored in the dome and floor
- Neapolitan bake time
- 60–90 seconds for a 10–12 in (25–30 cm) pizza
- Preheating time
- 1.5–3 hours from a cold start; residual-heat bakes can continue for several hours after the fire is reduced
- Fuel
- Seasoned hardwood — oak, ash, beech, maple, almond, olive, or fruit woods — air-dried 12+ months; softwoods and treated woods are avoided
- Fire management styles
- Fire-in-chamber (flame contacts the food, classic Neapolitan) vs. fire-to-the-side or back (cleaner hearth, used for bread and roasts)
Also called
high-heat-pizza-bake · Wood-Fired Baking
Dishes that rely on it
Related

Sear
Blast the surface hot for a deep-browned, savory crust

Sauté
Cook quickly in a little fat over lively heat, tossing as you go

Stir-Fry
Toss bite-sized pieces over roaring heat for fast, smoky cooking

Pan-Fry
Crisp food in a shallow layer of hot fat, turning once or twice

Deep-Fry
Submerge in hot oil for an all-over crackling crust

Roast
Cook uncovered in dry oven heat for browned edges and tender centers

Bake
Cook with steady, surrounding oven heat — the soul of bread and pastry

Broil
Hit food from directly above with fierce overhead heat