Prep & Assembly
Microfoam Texturing
Steaming milk into a glossy, fine-bubbled microfoam for latte art and silky espresso drinks.
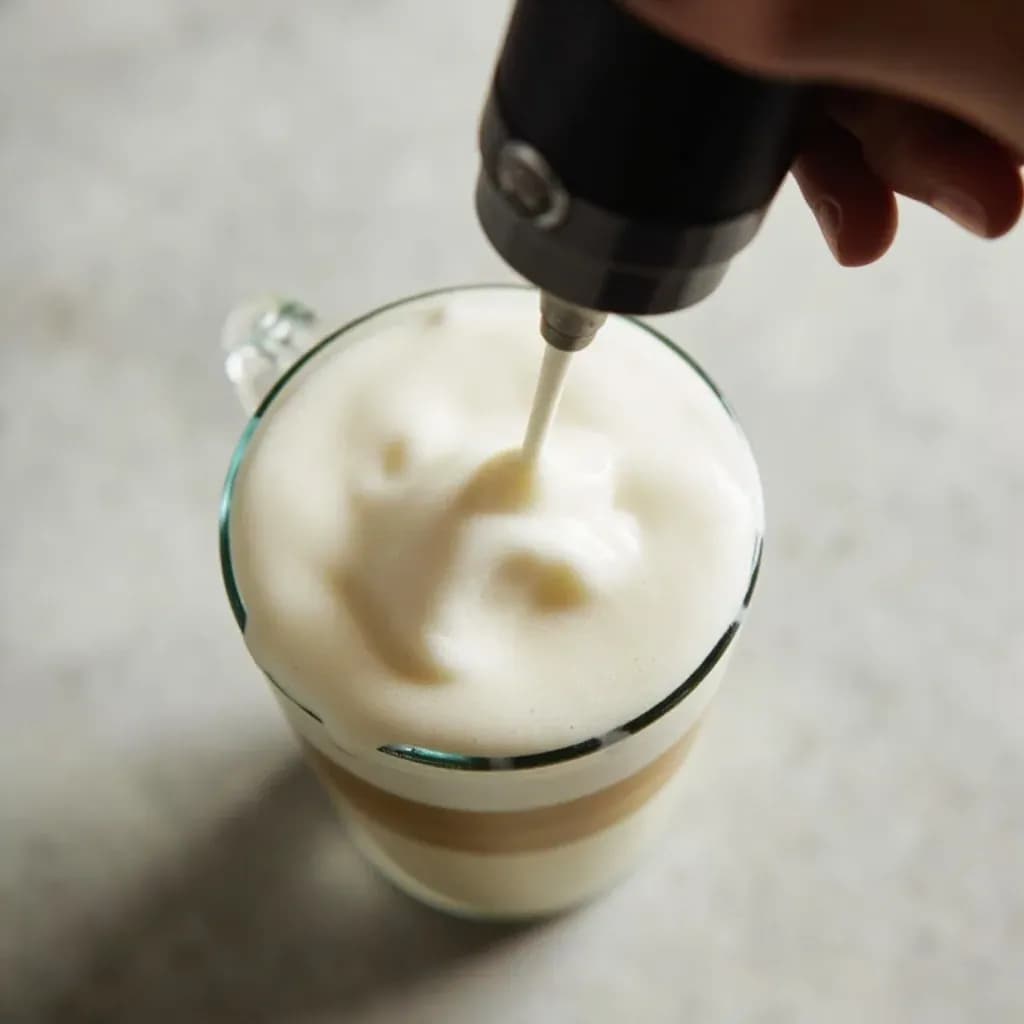
Microfoam texturing uses a steam wand to aerate and heat milk into a smooth, glossy foam made of tiny, uniform bubbles. The barista introduces air at the surface to stretch the milk, then submerges the wand to roll and integrate it into a velvety, paint-like texture. Properly textured microfoam pours cleanly for latte art and gives espresso drinks their sweet, creamy mouthfeel.
Microfoam texturing is the two-phase barista technique of using an espresso machine's steam wand to inject air into cold milk, then shear that air into bubbles so fine they become part of the liquid itself. In the first phase — the stretch — the wand tip sits at or just below the surface and pulls in air, expanding the milk's volume by roughly a fifth for wet foam or up to double for drier cappuccino-style foam; in the second phase — the texture or spin — the tip submerges and a whirlpool grinds those bubbles down until the surface shows no bubble skin at all, just a mirror-like gloss. The result is milk that pours like warm paint and integrates into espresso rather than floating on top of it.
The technique matters because mouthfeel is half the experience of a milk drink. Properly textured microfoam carries espresso oils, suspends crema, and gives latte art its contrast; badly textured foam floats in a stiff cap, drains fast, and tastes thin or burnt. It is also unforgiving in a way most kitchen work isn't: you have about twenty seconds between "perfect" and "scalded," and the only feedback is the sound the steam makes, the temperature of the pitcher, and the sheen of the milk.
Underneath the choreography, microfoam is a piece of food chemistry happening in a pitcher. Milk proteins (mainly casein and whey) migrate to the air–water interface and stabilize bubbles; milk fat slows bubble coalescence and adds body and sheen. That is why whole dairy steams differently from skim, and why barista-formulated plant milks exist — they add fat, protein, or emulsifiers to recreate the same physics.
- Difficulty
- Medium
Types & varieties
Glossy, pourable, fully integrated into the liquid with virtually no visible bubbles; the standard for free-pour latte art.
Lighter, more voluminous, stiffer body with more visible (though still fine) bubbles; sits on top of the drink rather than sinking in.
The third-wave benchmark — milk pours like warm paint, sheen intact, no bubble surface visible.
Foamed without heat, typically with a French press or handheld frother, for iced drinks where hot milk would shock the espresso and melt the ice.
Achieved using barista-formulated oat, soy, or pea milks with added fats and emulsifiers chosen to mimic dairy behavior.
How to do it
- 1
Choose and chill the milk
Pour very cold whole milk — or a barista-formulated non-dairy alternative — into a cold stainless-steel pitcher until it is roughly one-third full. The cold start gives the proteins time to set around air bubbles before the milk overheats, and a cold pitcher buys you a few extra seconds of working time.
- 2
Purge the wand and position the pitcher
Briefly open the steam valve into the drip tray to clear condensation and any milk residue from the last drink. Place the wand tip just at or just below the milk surface, slightly off-center, with the pitcher tilted so the milk is already beginning to swirl.
- 3
Stretch — introduce air
Open the steam valve fully. The wand tip should sit at the surface so you hear a steady paper-tearing sound, not a loud hiss. Hold for about 3–6 seconds, letting the milk expand by roughly 20–30% for wet latte-style foam or up to 50–100% for drier cappuccino-style foam.
- 4
Texture — incorporate and refine
Lower the pitcher so the wand tip submerges about a centimeter into the milk. Adjust the angle to maintain a smooth whirlpool. The tearing sound should stop; you should hear a quiet hiss instead. The vortex shears large bubbles into fine, glossy microfoam. Continue for another 10–20 seconds.
- 5
Stop at the right temperature
Shut off the steam when the pitcher becomes too hot to comfortably hold — roughly 150–155°F (65–68°C). Higher temperatures scald the milk, collapse the foam, and dull the natural sweetness.
- 6
Tap, swirl, and pour
Tap the pitcher firmly on the counter to burst any remaining surface bubbles, then swirl — do not stir — until the milk looks like wet, glossy paint with a mirror-like sheen. Pour into the espresso shot within about 10–15 seconds for best latte-art contrast and crema integration.
What the Milk Is Actually Doing
Two components of milk do most of the work during texturing, and understanding them explains why different milks behave so differently under steam.
- Proteins (casein and whey) adsorb to the air–water interface around each newly introduced bubble. Once there, they unfold slightly, hold the bubble in place, and prevent it from merging with its neighbors. This is why over-heated milk loses its foam — the proteins are already denatured and can't do their job.
- Milk fat contributes body, sheen, and slower bubble coalescence. Higher fat means richer, more stable foam with a glossy surface; lower fat means more voluminous foam that drains faster and looks chalky.
- Plant milks lack casein entirely. Barista-formulated oat and pea milks compensate with added proteins, sunflower or soy lecithin, and sometimes extra fat to recreate the same stabilizing system. Standard almond and most supermarket soy milks tend to steam thin or split.
- Temperature is the clock. Below about 100°F the foam is loose and sweet; above 155°F the proteins tighten too much, lactose begins to brown, and the foam collapses. The pitcher going from holdable to too-hot-to-hold is your cue to stop.
Reading the Sound
Because you cannot see inside the pitcher mid-steam, the sound of the steam against milk is the barista's primary instrument.
- A gentle paper-tearing or hissing-rip sound during the stretch means the wand tip is just at the surface and air is entering in small, controllable amounts.
- A loud, high-pitched screech means the tip is too shallow — too much air, too fast — and you'll end up with big, dry, cappuccino-style bubbles rather than fine microfoam.
- A low, smooth, almost silent roar during the texture phase means the tip is properly submerged and a whirlpool has formed; this is the sound of bubbles being sheared into gloss.
- If the pitcher goes silent and the milk seems to stop swirling, the tip is likely clogged with burnt milk — purge the wand and wipe it before retrying.
Common uses
Tips & pitfalls
- Always start with milk straight from the fridge; warm milk resists foaming because the proteins are already partially denatured.
- Purge the steam wand before each use to clear condensed water and residue from the previous drink — that water will otherwise dilute the espresso and add visible white spots to crema.
- During stretching, listen for a gentle paper-tearing sound; a loud screech means the tip is too shallow and you'll get big, dry bubbles instead of microfoam.
- Stop steaming when the pitcher becomes too hot to comfortably hold (around 150°F). Beyond that the milk scalds, the foam collapses, and the drink tastes flat or burnt.
- Tap the pitcher firmly on the counter and then swirl to pop any visible bubbles and bring the milk to a wet-paint sheen — swirl, do not stir, as stirring churns the foam and dulls the gloss.
- Wipe the steam wand with a damp cloth and purge into the drip tray after every drink; burnt milk on the wand taints the next pour and is harder to remove the longer it sits.
- Use whole milk for the richest, most stable microfoam; for non-dairy, choose a barista-formulated oat milk (most reliable) or pea milk — standard almond and soy milks tend to steam thin or split.
- Match the pitcher spout to the pour: a narrow, pointed spout for detailed latte art like rosettas and tulips; a wider spout for pouring larger volumes straight into mugs.
Good to know
- Also known as
- Milk texturing; stretching and spinning (or stretching and texturing)
- Origin
- Italy, with espresso steam wands in use from the mid-20th century; modern microfoam-driven latte art codified by Luigi Lupi and popularized in the US by David Schomer (Espresso Vivace, Seattle) in the late 1980s–1990s
- Target finishing temperature
- ~150–155°F (65–68°C); some baristas cap at 160°F (71°C) for non-dairy milks
- Starting milk temperature
- Cold from the refrigerator, roughly 35–40°F (2–4°C)
- Pitcher fill at start
- About one-third full; expands to roughly one-half by the end
- Core equipment
- Espresso machine with steam wand, stainless steel milk pitcher (12–20 oz), damp cloth for purging
- Time required
- Roughly 4–8 seconds of stretching plus 10–20 seconds of texturing, 15–30 seconds total
- Difficulty
- Moderate; consistent latte-art pour takes weeks to months of practice
- Key variables
- Milk fat and protein content, milk temperature, pitcher size, steam pressure, wand position and angle
Also called
Milk Stretching · Milk Stretching (Aeration) · Milk Steaming
Dishes that rely on it
Related

Whisk
Beat ingredients smooth and aerated with a looping wire motion

Sift
Pass dry ingredients through mesh to aerate and remove lumps

Strain
Pour through mesh to separate solids from liquid for a smooth result

Filter
Pass liquid through fine material to clarify out the smallest particles

Rice
Press cooked potatoes through small holes for fluffy, lump-free texture

Mash
Crush soft cooked food into a rustic, creamy purée

Grind
Crush food into a coarse to fine texture, from spices to meat

Grate
Shred food into fine bits against a sharp-toothed surface