Prep & Assembly
Free-Pour Latte Art
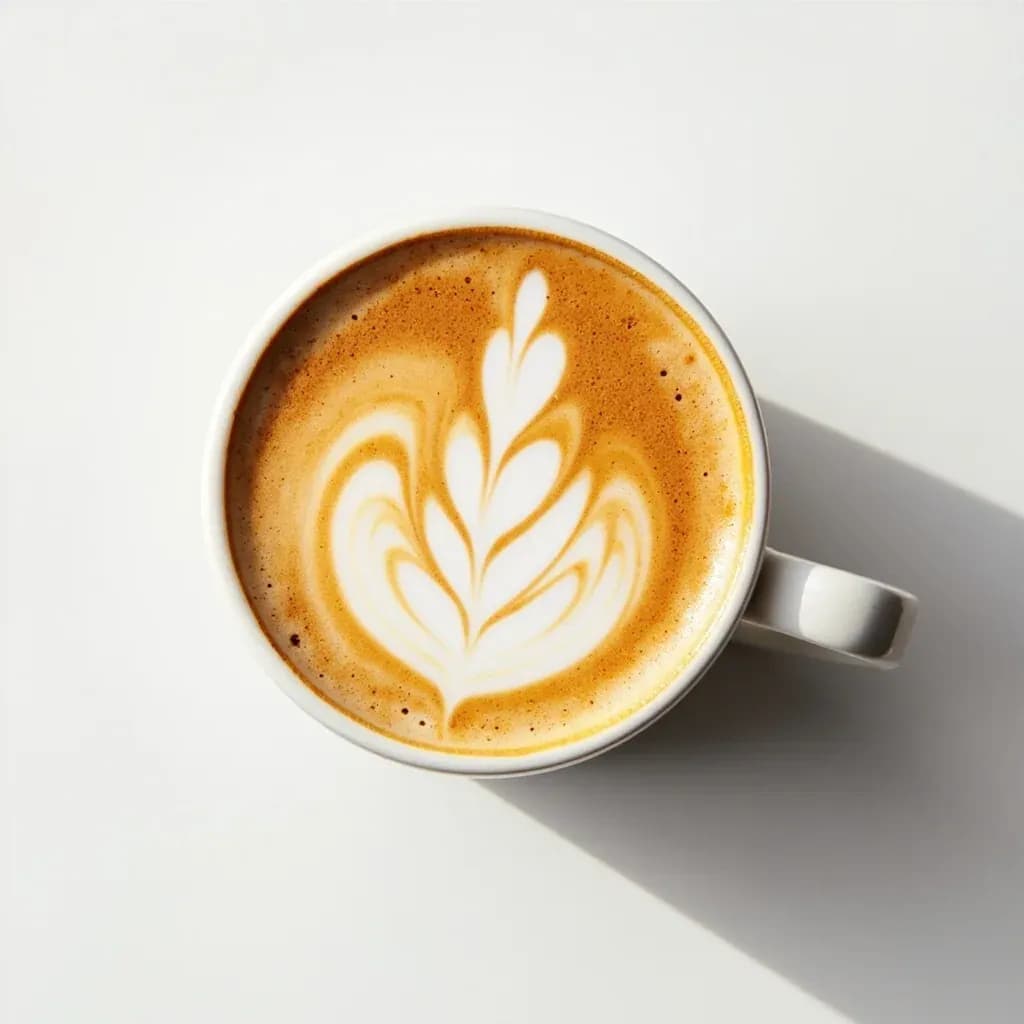
Pouring steamed microfoam milk into espresso to form patterns like hearts, rosettas and tulips.
Free-pour latte art creates designs on the surface of a coffee drink by controlling how steamed microfoam milk is poured into espresso. Proper milk texture (glossy, paint-like microfoam) and steady wrist movement let the barista paint hearts, rosettas and tulips without tools. The art also signals well-integrated foam and a properly textured drink.
Free-pour latte art is the practice of shaping steamed milk into espresso using nothing but the velocity, height, and oscillation of the pour stream. A barista begins high above the cup to blend milk with crema, then drops the spout close to the surface so the milk floats, sketches a pattern, and finishes with a single clean pull-through. No tools touch the drink — which is what separates free pour from etching, stenciling, or 3D printed designs — and that constraint is also why the technique is treated as a kind of diagnostic: a crisp heart or rosetta is visible proof that the espresso was fresh, the milk was steamed correctly, and the barista had control of both at the same moment.
Beneath the pretty surface, free pour is the meeting point of three physical systems. Milk composition (fat and protein) determines whether the foam holds its shape. Steam pressure and wand technique govern bubble size, which dictates the glossy, wet-paint texture that takes a pattern. Cup geometry and crema condition decide how the design spreads once it lands. Mastering one element without the others produces a flat, lifeless cup; balancing all three is what separates a serviceable drink from one a customer photographs.
Italian espresso bars of the 1980s are widely cited as the practice's starting point, though the codified vocabulary most baristas learn today — heart, tulip, rosetta — was developed in late-1980s Seattle coffeehouses, where David Schomer refined the side-to-side wrist motion that produces the rosetta. The practice has since expanded through barista competition into layered tulips, swans, and apples, all built from the same elementary movements of high pour, low pour, break, wiggle, and pull-through.
- Difficulty
- Hard
Types & varieties
The foundational pattern: a symmetrical heart with a pointed tip, made by pouring centrally and finishing with one quick forward pull-through.
A stacked bud of layered leaves resembling a tulip, built by briefly cutting the stream with a wrist break to drop successive leaf-shaped bands before a final pull-through.
A leaf or fern motif with a central spine and rippling sides, made by a side-to-side wrist wiggle while slowly walking the pitcher backward through the cup.
An extension of the basic tulip in which the barista counts out exact stacked leaves (commonly 3–6) for a competition-style presentation.
An advanced variation built on tulip mechanics; the final curved pour suggests a bird's neck and head.
An advanced rounded variant of the tulip, finished with a circular pour that suggests a piece of fruit rather than a flower.
How to do it
- 1
Pull the espresso
Extract a fresh single or double shot directly into the serving cup. Target a 25–30 second extraction with thick, tiger-striped crema. Begin pouring within about 10 seconds of the shot finishing — older crema loses the surface tension needed to hold a design.
- 2
Steam the milk to microfoam
Fill a cold pitcher about one-third with cold whole milk. Place the steam wand tip just below the surface and stretch for 3–5 seconds (a clear, audible hiss) to incorporate air, then lower the tip and roll the milk until it is glossy and paint-like at roughly 140–160°F. Tap the pitcher firmly on the counter and swirl until any remaining bubbles integrate into a single liquid.
- 3
Start the high pour
Hold the pitcher 10–15 cm above the cup and pour a thin, steady stream into the center of the crema. This stage exists only to mix milk with espresso and lighten the base color — resist the urge to start patterning here.
- 4
Drop the spout to the surface
When the cup is roughly half full and the surface has turned a uniform light tan, lower the pitcher so the spout sits within 1–2 cm of the crema. Reduce the pour rate slightly so the milk begins to float on top rather than punch through.
- 5
Form the pattern
Heart: keep the spout centered and pour steadily, then finish with a single quick forward pull through the center to draw the point. Tulip: briefly cut the stream with a quick wrist break to deposit one leaf-shaped band, reset, deposit another, repeating for 3–6 layers before the final pull-through. Rosetta: wiggle the spout side-to-side in small, even amplitude while walking the pitcher slowly backward through the cup, building a row of symmetrical leaves around a central spine.
- 6
Finish the pour
End every pattern by drawing the spout straight through the centerline of the design in one smooth motion while lifting away. This creates the defining tip of a heart or tulip, or the stem of a rosetta. Use the same motion to top the drink up to its final volume.
- 7
Serve immediately
Present the drink right away. Latte art begins to blur and spread within 1–2 minutes as the crema continues to evolve, so any photo or service should happen promptly.
The three constraints that govern the pour
Free-pour art is governed by a small set of physical constraints, and ignoring any one of them collapses the design. Understanding them in advance is faster than learning by failure.
- Milk composition: fat and protein are what stabilize foam. Whole milk gives the longest-lasting contrast; lower-fat milks produce thinner foam that dissipates faster; non-dairy milks generally need barista-formulated versions to hold a design consistently.
- Steam texture: bubble size must be invisible to the eye. Visible bubbles — foam that looks like shaving cream or meringue — were over-aerated at the start of steaming and cannot be saved by tapping.
- Crema condition: the design rides on crema's surface tension. A shot older than about 10 seconds, or one extracted too slowly, has thin or broken crema that swallows patterns instead of holding them.
Choosing a pitcher and cup
Equipment shapes what you can pour as much as technique does. Most free-pour problems blamed on the barista are actually mismatches between pitcher, cup, and milk volume.
- Pitcher size: a 12 oz (≈350 ml) pitcher is standard for one 6–8 oz drink; smaller 5–8 oz pitchers give finer control and are favored for detailed rosettas and layered tulips.
- Spout shape: sharp, narrow spouts lay down thin lines for clean rosettas and crisp leaf tips; rounded spouts are more forgiving for beginners practicing hearts.
- Cup shape: wide, rounded cups give rosettas room to spread and develop their fern shape; narrower, tulip-shaped cups constrain the design and suit tulips and hearts better.
- Pre-warming: a cold cup thickens crema on contact and dulls the contrast between white foam and brown base. Cups should be warm to the touch before the shot lands.
Reading the surface as you pour
The most common mistake beginners make is to begin patterning too early, when the crema is still dark and unbroken. The cup itself tells you when it is ready.
- Pour high and thin until the surface turns a uniform light tan — this is the espresso–milk integration stage and is not where art is made.
- Drop the spout only when the cup is roughly half full; the surface must be light enough for white foam to read against it.
- Watch for the milk to 'float' rather than punch through the crema; a sinking stream means the cup is either too full, the crema is too thin, or the spout is still too high.
Common uses
Tips & pitfalls
- Stretch the milk only at the start of steaming — a brief hiss for 3–5 seconds — then keep the wand submerged and roll to a glossy texture; large bubbles introduced early cannot be rescued later.
- Tap the pitcher firmly on the counter and swirl until the foam integrates into a single, paint-like liquid. Foam that looks like shaving cream or meringue is already over-aerated.
- Pour into a freshly pulled shot. Crema that has sat longer than about 10 seconds loses the surface tension required to hold a pattern, and the design will sink rather than float.
- Anchor your elbow and move from the wrist. Whole-arm motion produces wavy, imprecise lines, especially on rosettas where the wiggle needs to be small and rhythmic.
- Do not start patterning until the cup is roughly half full and the espresso has begun to lighten. Pouring shapes onto dark, unbroken crema makes them disappear into the surface.
- Finish a rosetta with a single decisive forward pull through the centerline to draw the stem; hesitation leaves a muddy or split tip.
- Steam in small batches. Milk that sits in the pitcher for more than a minute thins out as foam collapses and will not hold shape.
- Pre-warm cups so the espresso does not cool too quickly — a cold cup thickens the crema and dulls the contrast that makes the finished design readable.
Good to know
- Origin
- Roots in 1980s Italian espresso bars; codified in the United States when David Schomer popularized the rosetta and tulip in Seattle coffeehouses in the late 1980s and early 1990s.
- Requires
- A freshly pulled espresso shot with stable crema and milk steamed to glossy, wet-paint microfoam.
- Milk temperature
- Roughly 140–160°F (60–71°C); texture matters more than exact temperature — when the pitcher is too hot to hold on the bottom, the milk is ready.
- Pour height
- Begin ≈10–15 cm above the cup to integrate, then drop the spout to within 1–2 cm of the crema to draw the pattern.
- Difficulty
- Heart (beginner); tulip (intermediate); rosetta (intermediate to advanced); swan and apple (advanced).
- Milk type
- Whole milk foams most reliably thanks to higher fat and protein; lower-fat milks produce thinner foam that dissipates faster.
- Pattern lifespan
- Begins to spread and lose definition within 1–2 minutes as crema continues to evolve.
Also called
latte art · milk pour art
Related

Whisk
Beat ingredients smooth and aerated with a looping wire motion

Sift
Pass dry ingredients through mesh to aerate and remove lumps

Strain
Pour through mesh to separate solids from liquid for a smooth result

Filter
Pass liquid through fine material to clarify out the smallest particles

Rice
Press cooked potatoes through small holes for fluffy, lump-free texture

Mash
Crush soft cooked food into a rustic, creamy purée

Grind
Crush food into a coarse to fine texture, from spices to meat

Grate
Shred food into fine bits against a sharp-toothed surface