Transform & Preserve
Rapid Cooling for Storage
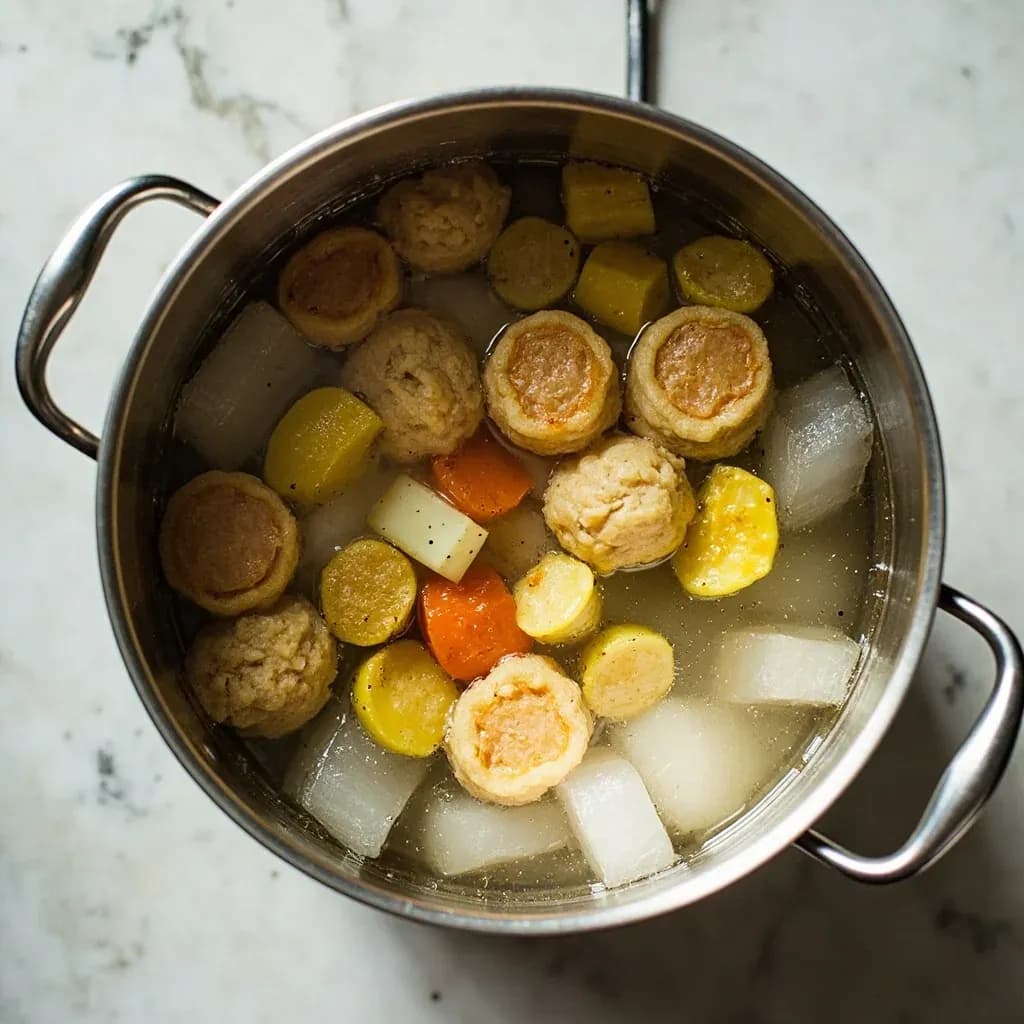
Quickly chilling hot food through the danger zone to keep it safe for storage.
Rapid cooling brings cooked food down through the bacterial danger zone fast, using ice baths, shallow pans, blast chillers, or ice paddles to prevent pathogen growth before refrigeration. Food-safety guidelines call for cooling from hot to refrigerated within a few hours, with the steepest drop happening first. It is standard practice for stocks, sauces, rice, and large batch-cooked items destined for the cooler.
Rapid cooling is the practice of moving hot, cooked food through the bacterial danger zone (roughly 40°F–140°F / 4°C–60°C) as quickly as possible so it can be safely refrigerated or frozen. In a professional kitchen it is a regulatory requirement; at home it is the single most overlooked step between a finished braise and a container in the fridge. The FDA Food Code two-stage rule — 135°F to 70°F (57°C to 21°C) in 2 hours, then 70°F to 41°F (21°C to 5°C) in 4 more hours — exists because most pathogenic bacteria (Salmonella, Clostridium perfringens, Bacillus cereus) can double in population in roughly 20–30 minutes inside the upper part of that range, and the spores some leave behind survive cooking only to germinate again as food cools slowly.
The physics are simple: heat must leave the food, and the rate of heat loss is governed by surface area, the temperature difference between food and surroundings, the conductivity of the container, and whether the food is moving or still. A five-gallon stockpot is a near-perfect insulator of itself; the same stockpot divided into four shallow hotel pans on an ice bath loses heat many times faster. Stainless steel moves heat roughly 15–20 times faster than plastic, salted ice water sits well below 32°F/0°C, and stirred liquid sheds heat far more quickly than a still pot.
Done well, rapid cooling preserves flavor, texture, and food safety simultaneously. Done poorly — leaving a Dutch oven on the counter for hours, or putting a steaming pot of soup straight into a crowded fridge — it ruins leftovers, wastes food, and risks illness. The methods below are the same ones used on restaurant lines and in sous-vide programs, scaled down to what a home cook can do with a sink, ice, a sheet pan, and a thermometer.
- Difficulty
- Easy
Types & varieties
Setting a pot or bowl inside a larger container of ice water; classic restaurant method for soups, stocks, and sauces.
Decanting food into wide, shallow metal hotel pans to maximize surface area.
A sealed plastic or metal paddle filled with water, frozen, and stirred directly through the food.
A commercial forced-air or impingement chiller designed to drop core temperature through the danger zone rapidly.
For stocks, soups, purées, and braises, adding measured ice directly to the food is the fastest field method used in professional kitchens.
Vacuum-bagged food submerged in circulating ice water — the standard technique in sous-vide cooling.
Setting a pot on a chilled marble, steel, or wet towel and stirring constantly to draw heat out through the base.
How to do it
- 1
Start cooling immediately
Begin the process the moment cooking is done. Don't let food rest on the burner or counter 'for a few minutes' — the danger zone clock starts right away.
- 2
Divide into smaller portions
Transfer food from a large pot into multiple shallow containers (3 inches deep or less). More surface area = much faster heat loss. For very large batches, split into 4–6 hotel pans.
- 3
Choose the right vessel
Use stainless steel for speed; avoid deep plastic containers, which insulate. Wide, flat metal pans (sheet trays with low rims for sauces; hotel pans for liquids) are ideal.
- 4
Set up an ice bath
Fill a larger sink or bowl with ice and a small amount of cold water, then add salt (about 1 cup per gallon) to drop the temperature below 32°F/0°C. Nestle the food container in it, ensuring water level reaches as high as the food line.
- 5
Stir regularly
Stir liquid foods every few minutes. For thick preparations, switch to a cooling paddle (a frozen, sealed wand) for even faster results.
- 6
Use ice as an ingredient when appropriate
For stocks, purées, and braising liquids, weigh and add ice directly to the food to drop temperature instantly. Account for the dilution in your recipe.
- 7
Monitor temperature
Check the core with an instant-read thermometer. Aim to reach 70°F (21°C) within 2 hours, then 40°F/4°C within 4 more hours (6 hours total).
- 8
Vent, then cover
Keep lids ajar or use parchment 'cartouches' until the food drops below about 70°F (21°C), so steam escapes. Once cool, seal and move to the refrigerator.
- 9
Store properly
Place cooled food on the coldest shelf (usually the back of the bottom), leave airspace between containers, and label with contents and date.
Why 'let it cool on the counter' is wrong
The instinct to leave a hot pot alone is built on a misunderstanding. A large stockpot of soup can take many hours to fall from 180°F to 70°F on a wooden counter, and several more to reach 40°F — a stretch that can run most of a workday parked in the danger zone. By contrast, the same quantity divided between shallow metal hotel pans on a salted ice bath will pass 70°F in well under an hour. The volume of food hasn't changed — the surface-area-to-mass ratio has. Cooling is a surface phenomenon, and a wide shallow pan has dramatically more of it.
- Heat must physically leave the food; air at room temperature is a poor heat sink (roughly an order of magnitude worse than ice water).
- A 140°F pot will not 'cool quickly' in a 70°F room; the temperature difference shrinks as the food cools, and the rate slows with it.
- Putting a very hot pot in the fridge forces the appliance to work harder, warms neighboring food, and can leave the pot itself in the danger zone for hours.
- The food-safety danger is not always acute illness — it is the spores left behind by surviving bacteria (notably Clostridium perfringens and Bacillus cereus) that germinate during slow cooling and reheating.
The math that governs the method
Three numbers quietly run the entire technique. First, the two-stage 2-hour/4-hour rule: 2 hours to reach 70°F, 4 more to reach 41°F. Second, container depth: 3 inches or less is the practical ceiling above which food insulates itself. Third, the ice-bath temperature: salted water at 15–20°F maintains a steeper temperature gradient than 32°F ice water, which is what keeps heat flowing out of the food as it nears the danger zone's lower edge. Combine a thin layer, a metal pan, and a sub-freezing bath, and you compress a passive cool that takes many hours into something measured in tens of minutes.
- Surface area is the single biggest lever; dividing food into more, smaller containers almost always beats one big one.
- Salt in the ice bath is not optional for serious work — it can mean the difference between passing and failing the 2-hour mark.
- Depth has a greater-than-linear effect on cooling time; for conduction through a liquid layer, time scales roughly with the square of the depth, so a 1-inch layer cools in a small fraction of the time of a 3-inch one.
- Stirring liquid food cuts cooling time by eliminating the insulating boundary layer at the pan wall; even occasional stirring helps significantly.
Common uses
Tips & pitfalls
- Start the clock the moment the food leaves heat — cooling begins in the pan, not when it reaches the fridge.
- Stainless steel hotel pans cool roughly 4× faster than the same volume in a stockpot; use them.
- Add salt to the ice bath (about 1 cup per gallon) to drop the bath well below 32°F/0°C.
- Stir frequently — even once a minute — because heat transfer is far faster in moving liquid.
- For very thick foods (risotto, stew, porridge), use a cooling paddle AND an ice bath; conduction alone is too slow.
- Don't tightly cover hot food: steam condenses on the lid and drips back, slowing cooling and diluting flavor.
- Avoid the 'freeze then thaw to fridge' shortcut: ice crystals rupture cell walls, so textures of purées, custards, and meats suffer.
- A wet towel wrapped around a pot and set in a breezy spot is a respectable no-equipment method for home cooks.
- Label and date every cooled container; cooled food still has a finite life, typically 3–4 days refrigerated.
- Use an instant-read thermometer to confirm the food has actually passed 70°F (21°C) — don't trust the clock alone on a busy line.
- Don't crowd the fridge; airflow around containers matters. Leave space between pans.
- If you must cool a large batch of soup at home, ladle it into a clean sink filled with ice water and stir — far safer than waiting for a stockpot to cool.
Good to know
- Danger zone (USDA/FDA)
- 40°F–140°F (4°C–60°C) — the range in which most pathogenic bacteria multiply rapidly
- FDA Food Code two-stage rule
- Cool from 140°F to 70°F (60°C to 21°C) within 2 hours, then from 70°F to 41°F (21°C to 5°C) within 4 more hours
- Updated FDA threshold (2017+ Food Code)
- Top of danger zone lowered to 135°F (57°C); cooling target is now 135°F → 70°F in 2 hours, then 70°F → 41°F in 4 hours
- Maximum refrigeration shelf life, cooked food (typical)
- 3–4 days for most cooked dishes when cooled and stored properly
- Best container material for speed
- Stainless steel conducts heat roughly 15–20× faster than plastic, so metal pans cool much quicker
- Ideal container depth
- 3 inches (7.5 cm) or less — thinner layers release heat much faster
- Ice-bath temperature
- Plain ice water sits at 32°F/0°C; adding salt drops it to roughly 15–20°F (−9 to −7°C) for even faster heat transfer
- Blast chiller typical cycle
- Commercially, a blast chiller drops food from ~160°F to 40°F (71°C to 4°C) in about 90 minutes
Also called
Blast Chilling · Ice Bath Cooling · Quick Chilling
Related

Confit
Cook slowly submerged in fat for silky tenderness and keeping

Cure
Draw out moisture with salt and time to preserve and concentrate

Pickle
Steep in acidic brine for bright, tangy, crunchy preservation

Ferment
Let friendly microbes transform food into tangy, complex flavor

Marinate
Soak in a seasoned mix to flavor and tenderize before cooking

Brine
Soak in salt water so meat stays juicy and seasoned throughout

Dehydrate
Slowly dry out moisture to concentrate flavor and extend shelf life

Cold-Smoke
Perfume cured food with smoke without cooking it through