Transform & Preserve
Water Bath Canning
Processing high-acid foods in jars submerged in boiling water to create a vacuum seal for storage.
Water bath canning submerges filled, lidded jars in boiling water for a set time to safely preserve high-acid foods like jams, pickles, and tomatoes with added acid. The heat drives out air and creates a vacuum seal as the jars cool, and the acidity prevents botulism without the higher temperatures of pressure canning. It is unsafe for low-acid foods, which require a pressure canner instead.
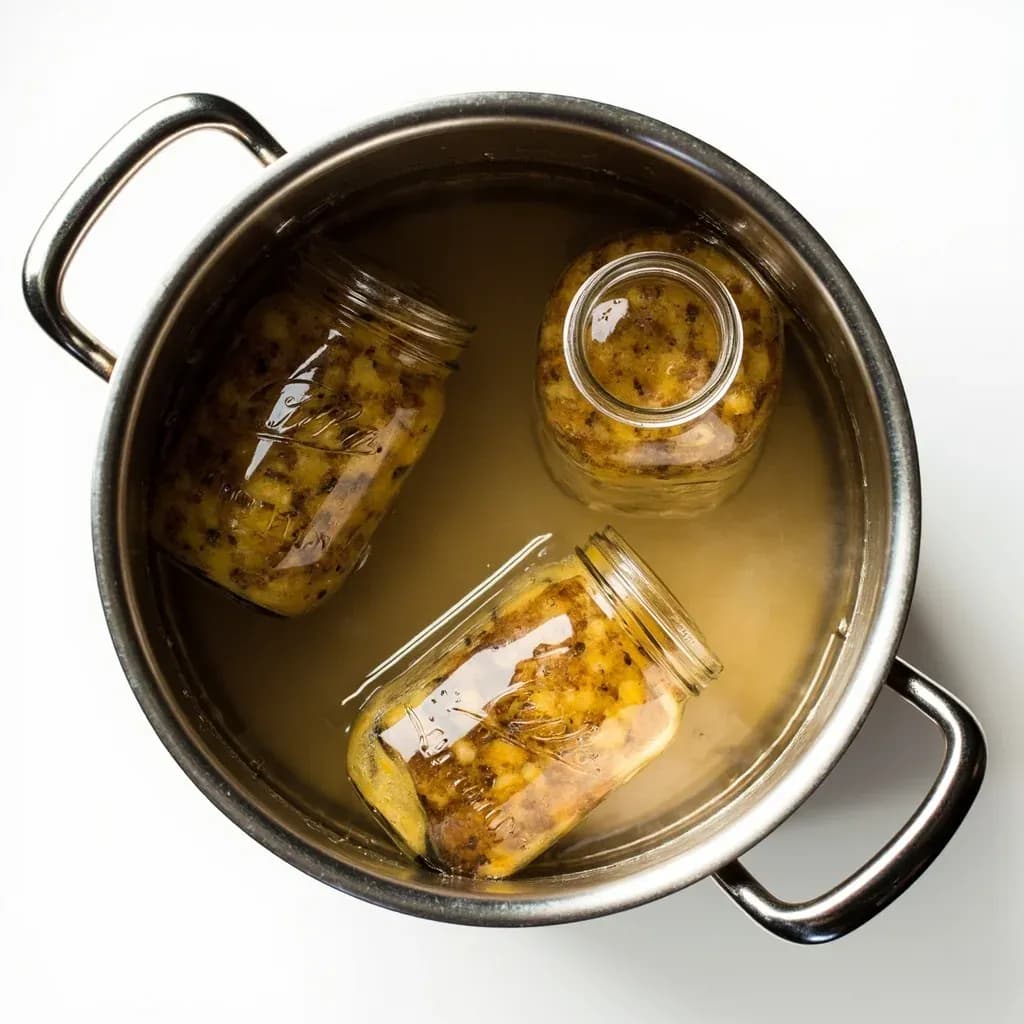
Water bath canning is a heat-preservation method in which filled glass jars are fully submerged in boiling water (212°F / 100°C at sea level) for a timed period. The boiling water heats the jar's contents enough to drive air out of the headspace and destroy molds, yeasts, and most vegetative bacteria. As the jars cool, the contents contract and the lid is pulled downward into a concave, vacuum-sealed position that locks out new contamination. Done correctly, the process turns a fresh, perishable high-acid food into a shelf-stable product that keeps for a year or longer in a cool, dark pantry.
The method is governed by a single safety line: pH 4.6. Foods at or below that acidity — most fruits, vinegared pickles, and properly acidified tomatoes — can be processed in a boiling water bath because the acidic environment prevents the spores of Clostridium botulinum from germinating and producing toxin. Foods above 4.6 (most vegetables, meats, fish, soups, stocks, and combinations like stews) cannot be safely preserved this way; boiling water cannot reach the 240°F-plus temperatures needed to neutralize botulism spores, and those foods require a pressure canner. Modern tomato varieties are often less acidic than the heirlooms older canning books assumed, which is why current USDA guidance calls for bottled lemon juice or citric acid to be added to every jar of tomatoes, salsa, and similar products.
The technique traces to the French chef Nicolas Appert, who won a Napoleonic-era prize in 1809 for sealing food in glass jars and heating them in boiling water, and it remains the entry point for most home preservers because the equipment is modest and the procedure is forgiving within tested recipes. The work is closer to kitchen chemistry than cooking: ratios of sugar, acid, and pectin, headspace, jar size, and processing time all matter, and improvisation is the most common path to spoiled (or dangerous) jars. Stick to current recipes from the USDA Complete Guide to Home Canning, the Ball Blue Book, the National Center for Home Food Preservation, or a state university extension service, and the method is among the most reliable things a cook can do with a stockpot.
- Difficulty
- Medium
Types & varieties
The standard method: jars fully submerged in actively boiling water on a rack for the full processing time. The workhorse of home preserving.
USDA-approved alternative that processes jars with steam at 212°F in a covered pot. Faster to heat up but limited to tested recipes, jar sizes, and high-acid foods; not a universal substitute for water-bath canning.
Old practice of filling jars from a boiling kettle and sealing without further processing. Not endorsed by the USDA: it produces unreliable seals and inconsistent microbial kill.
Methods that circulate online. Not endorsed by the USDA or extension services because of uneven heat, dry heat that does not penetrate jars reliably, and unsafe temperature profiles.
How to do it
- 1
Assemble equipment and ingredients
Wash jars, bands, and lids in hot soapy water and rinse well. Set a water-bath canner (or tall stockpot with a fitted rack) on the burner, fill it about halfway with water, and begin heating. Put a small saucepan of water on to simmer for warming lids — do not boil the flat lids, simmering keeps the sealing compound pliable. Lay a clean kitchen towel on the counter and gather the jar lifter, funnel, bubble remover, lid wand, and a clean damp cloth.
- 2
Prepare the food
Wash, peel, and cut produce as the recipe directs. Pre-cook jams, syrup-pack fruits, or make pickle brines as specified. Measure pectin, sugar, acid, and other ingredients precisely — canning is chemistry, and the ratios in the recipe are the safety margin as much as the flavor.
- 3
Heat the canner to a simmer
Bring the canner water to 180–185°F and keep it at a gentle simmer. Jars will go into warm water so they do not crack from thermal shock; cold jars into boiling water is a common way to lose a batch before it starts.
- 4
Fill the jars
Using a canning funnel, pack hot food into warm jars. Leave the headspace the recipe specifies — 1/4 inch for jellies and jams, 1/2 inch for fruits, pickles, and tomatoes. Slide a bubble remover or thin plastic spatula down the inside of the jar in two or three places to release trapped air bubbles, then top up to restore the correct headspace.
- 5
Wipe rims and apply lids
Wipe each jar rim with a damp paper towel or a cloth dampened with white vinegar to remove any food, syrup, grease, or mineral residue — a dirty or chipped rim is one of the most common reasons a jar fails to seal. Center a warmed flat lid on the clean rim. Screw a band on until fingertip tight: you feel resistance, then stop. Do not muscle it down.
- 6
Load the canner
Use a jar lifter to lower jars onto the rack in the canner, keeping them upright and not touching each other or the sides. Add more hot water until jars are covered by 1 to 2 inches. Cover the canner and bring the water to a vigorous, rolling boil.
- 7
Process at a rolling boil
Once the water reaches a full, rolling boil with all jars in the canner, set a timer for the recipe's processing time, adjusted for altitude. Maintain a steady boil and keep the water 1–2 inches above the jar tops for the entire period. Do not begin counting time until the boil is achieved, and do not let the boil fall during processing.
- 8
Rest, then remove the jars
When the timer ends, turn off the heat, remove the canner lid, and let the jars stand in the hot water for 5 minutes. This rest reduces siphoning — the loss of liquid from the jar — by letting pressure inside and outside the jar equalize before the temperature drops.
- 9
Cool undisturbed
Lift jars out with the jar lifter and set them on a towel-lined surface, spaced about an inch apart. Do not retighten bands, do not press on lids, and do not move them. Leave jars untouched for 12 to 24 hours. You may hear a 'ping' as lids pull down and seal.
- 10
Check seals, label, and store
Press the center of each cooled lid — it should be concave and not flex or pop. Remove the bands, wipe jars clean, and label with contents and date. Store sealed jars in a cool, dark, dry place; refrigerate any jar that did not seal and use it within a few weeks, or reprocess the contents within 24 hours with a new lid.
The pH 4.6 Line
The single most important fact in home canning is that the dividing line between safe water-bath foods and pressure-canner-only foods is pH 4.6. Below that number, the acidic environment prevents Clostridium botulinum spores from germinating; above it, the spores can survive boiling-water temperatures and produce one of the deadliest toxins known. The practical consequences shape every recipe:
- Naturally acidic foods — most fruits, fruit juices, and foods preserved with vinegar or citrus — fall on the safe side and can be water-bathed, but only when the recipe's stated ratio of acid is followed exactly.
- Modern tomato varieties and many pepper-onion salsas sit on the wrong side of the line for their water content; recipes require added bottled lemon juice or citric acid to drop the pH below 4.6.
- Garlic, onions, herbs, and many vegetables that appear in 'pickle' recipes are low-acid ingredients; they are safe only because the surrounding brine is strongly acidified — never dilute the vinegar or shorten the pickling time and call it a pickle.
- When in doubt about a recipe's safety, look it up in the current USDA Complete Guide to Home Canning or the National Center for Home Food Preservation database before processing.
Equipment That Actually Matters
You can spend a small fortune on canning gear, but the items that genuinely affect the result are few.
- A water-bath canner (or a stockpot of at least 8 quarts with a fitted rack) tall enough that jars sit on the rack with 1–2 inches of water covering them and another inch of headroom for a rolling boil.
- Mason-type glass jars in half-pint, pint, or quart sizes — match the jar size in the recipe, do not substitute.
- New flat lids every time (the sealing compound is single-use); bands and jars in good condition are reusable indefinitely.
- A jar lifter, a magnetic lid wand, a canning funnel, and a bubble remover or thin plastic spatula for headspace. Cloth towels, a timer, and a clean work surface round out the kit.
Common uses
Tips & pitfalls
- Start from a tested, up-to-date recipe (USDA, Ball, or a university extension) and follow it exactly — canning is one of the few areas of the kitchen where improvisation is a safety issue, not a style choice.
- Add bottled lemon juice or citric acid to every jar of tomatoes and tomato-based salsa; modern varieties are often less acidic than the heirlooms older recipes assumed.
- Use new flat lids every time; the sealing compound is single-use. Bands and jars in good condition are reusable indefinitely.
- Wipe every rim with a damp cloth (vinegar-damped works well on hard-water deposits) and inspect for nicks or cracks — a contaminated or chipped rim is the most common cause of seal failure.
- Begin timing only after the water returns to a full, rolling boil with all jars in the canner, and keep that boil going for the full processing time. A simmer is not enough.
- Keep water 1–2 inches above the jar tops throughout processing. Top up with boiling water if it drops — adding cold water will stall the boil and undercut the kill.
- Do not overtighten bands. Air must escape from the headspace during processing; cranking the band down can buckle lids and break the seal as jars cool.
- Remove bands after jars cool and before storage. Bands left on trap moisture against the lid, can rust, and — more importantly — hide a failed seal.
- At 1,000+ feet of altitude, increase processing time (see the table in facts) or switch to a pressure canner for low-acid foods. Boiling water is not hotter at altitude, but it is also not hot enough to process anything above pH 4.6 even at sea level.
- Never use the water-bath method for low-acid foods such as green beans, corn, pumpkin, meat, fish, or stock. A boiling water bath cannot reach the 240°F-plus temperatures required to neutralize botulism spores in those foods — use a pressure canner.
- If a jar fails to seal, refrigerate it and use within a few weeks, or empty the contents back into a pot, bring to a boil, and reprocess within 24 hours with a fresh lid. Do not simply change the lid and re-process without reboiling the food.
- Label every jar with contents and date, and store in the dark. Light fades the color of fruit and gradually degrades some nutrients over months.
Good to know
- Other Names
- Boiling water bath canning, BWB, water-bath processing
- Suitable Foods
- High-acid foods at pH 4.6 or below: fruits, jams, jellies, preserves, fruit juices, vinegared pickles, acidified tomatoes, salsas, chutneys, condiments
- Unsuitable Foods
- Low-acid foods above pH 4.6: plain vegetables, meats, poultry, fish, seafood, soups, stocks, beans, corn, pumpkin — these require a pressure canner
- Processing Temperature
- 212°F / 100°C (boiling water at sea level)
- Altitude Adjustment
- Above 1,000 ft, add 5 min (1,001–3,000 ft), 10 min (3,001–6,000 ft), 15 min (6,001–8,000 ft), or 20 min (8,001–10,000 ft)
- Headspace
- 1/4 inch for jams and jellies; 1/2 inch for fruits, pickles, and tomatoes (recipe-specific)
- Origin
- Developed by French chef Nicolas Appert c. 1809; first published in 1810 as L'Art de conserver les substances animales et végétales
- Authoritative References
- USDA Complete Guide to Home Canning, Ball Blue Book, National Center for Home Food Preservation, state university extension services
Also called
Open-Kettle Cooking · Boiling Water Canning · Hot Water Bath Canning
Related

Confit
Cook slowly submerged in fat for silky tenderness and keeping

Cure
Draw out moisture with salt and time to preserve and concentrate

Pickle
Steep in acidic brine for bright, tangy, crunchy preservation

Ferment
Let friendly microbes transform food into tangy, complex flavor

Marinate
Soak in a seasoned mix to flavor and tenderize before cooking

Brine
Soak in salt water so meat stays juicy and seasoned throughout

Dehydrate
Slowly dry out moisture to concentrate flavor and extend shelf life

Cold-Smoke
Perfume cured food with smoke without cooking it through