Transform & Preserve
Home Canning & Preserving
Sealing food in sterilized jars and heat-processing it for shelf-stable long-term storage.
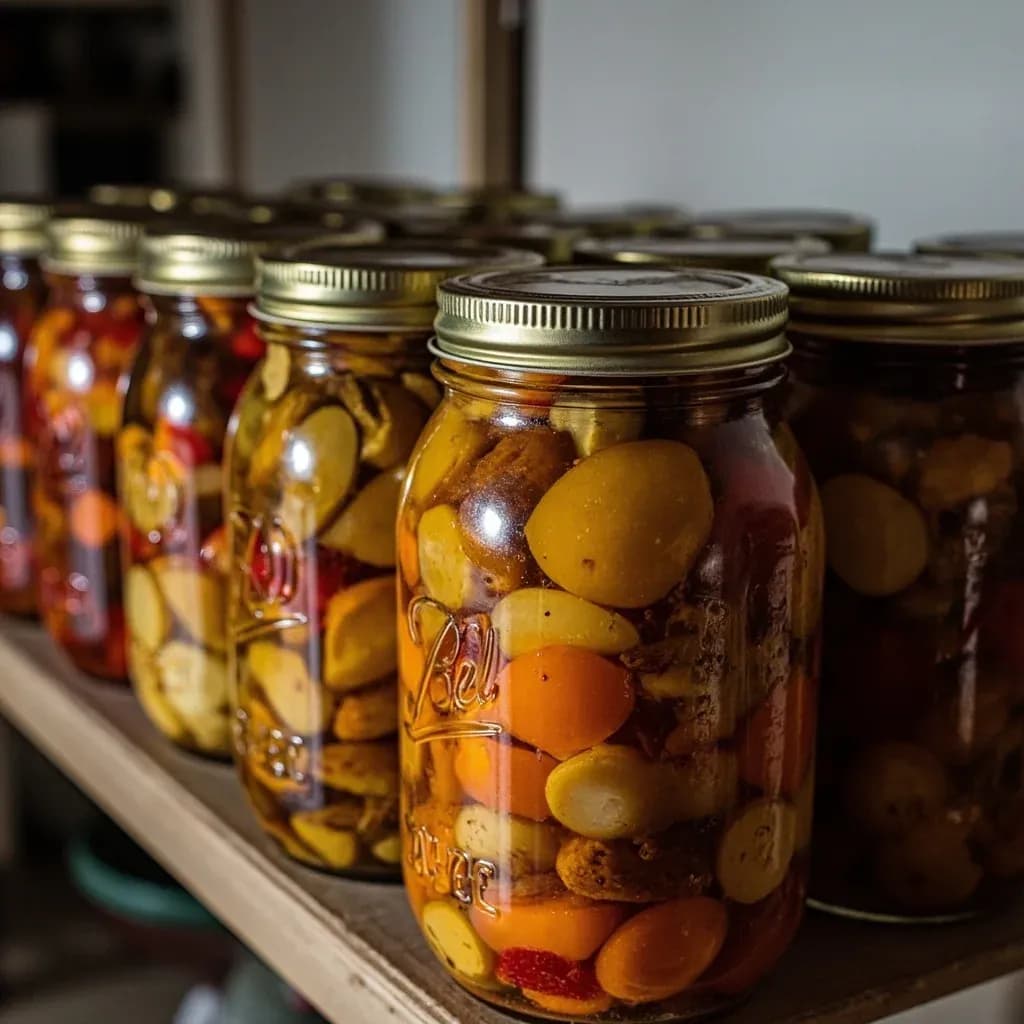
Home canning packs fruits, vegetables, jams, and pickles into sterilized jars, then heats them in a water bath or pressure canner to destroy spoilage organisms and create an airtight vacuum seal. The seal keeps oxygen and microbes out, letting the food keep for months at room temperature. Low-acid foods require a pressure canner to reach the higher temperatures needed to prevent botulism, while high-acid foods are safe in a boiling-water bath.
Home canning is the practice of sealing prepared food in glass jars and heat-processing those jars to destroy spoilage organisms, producing a vacuum-sealed, shelf-stable product that can sit on a pantry shelf for a year or more. The technique exists in two principal forms governed by the acidity of the food: the boiling water bath, which reaches 212°F and is safe only for high-acid foods (pH 4.6 or below) such as fruits, pickles, and properly acidified tomatoes; and pressure canning, which reaches about 240°F under 10–11 lb of pressure and is the only method that destroys the heat-resistant spores of Clostridium botulinum in low-acid foods like vegetables, meat, and soup. The 4.6 pH threshold is the bright line that determines which method a recipe requires — confusing the two is the most dangerous mistake a home canner can make.
The method is older than refrigeration: French chef Nicolas Appert won Napoleon's 12,000-franc prize in 1809 for sealing food in glass jars and heating them in boiling water, and the threaded screw-top jar patented by John Landis Mason in 1858 (later produced by Ball Brothers in Muncie, Indiana, from 1884) gave home cooks the reusable container still in use today. Modern guidance, drawn from USDA research and the National Center for Home Food Preservation at the University of Georgia, replaced older open-kettle and inversion techniques once common in mid-20th-century kitchens. Today the practice sits at the intersection of thrift, seasonality, and food safety, and it demands more deference to tested recipes than almost any other kitchen skill.
- Difficulty
- Hard
Types & varieties
For high-acid foods (pH 4.6 or below): fruits, jams, jellies, preserves, fruit spreads, pickles, relishes, chutneys, salsas, and acidified tomatoes. Uses a covered pot with a rack holding jars submerged in boiling water.
Mandatory for low-acid foods: fresh vegetables (corn, beans, carrots, potatoes), meats, poultry, fish, seafood, soups, stocks, and combination dishes. Uses a sealed pressure canner at 10–15 lb of pressure.
Approved by USDA/NCHFP since 2015 for high-acid foods only. Water heats faster than in a water bath; not safe for low-acid foods.
Subcategory of water-bath canning where added 5%-acidity vinegar lowers pH below 4.6, allowing refrigerator-process or fully shelf-stable pickles.
Sugar plus acid plus pectin preserve fruit in a boiling water bath; tested recipes ensure proper gel and safe pH.
How to do it
- 1
Choose a tested recipe and method
Match the food to the correct method: water-bath for high-acid foods (fruits, pickles, acidified tomatoes) and pressure canning for low-acid foods (vegetables, meat, fish, soup). Use a currently tested recipe from the USDA, the National Center for Home Food Preservation, or Ball, and adjust for your elevation.
- 2
Inspect and prepare equipment
Examine jars for cracks or chips; wash jars, lids, and bands in hot soapy water and rinse well. Simmer (do not boil) flat lids in water to soften the sealing compound, and keep jars hot in a 200°F oven or in simmering water until ready to fill.
- 3
Prepare the food
Wash, peel, trim, and cut produce as the recipe directs. Blanch vegetables as needed. For acidified tomatoes, add bottled lemon juice or citric acid directly to each jar. Measure pectin, sugar, and acid exactly for preserves.
- 4
Fill the jars
Using a canning funnel, pack hot food into hot jars, leaving the headspace specified by the recipe (1/4 to 1 inch). Cover with hot liquid, leaving the same headspace. Remove air bubbles by sliding a plastic bubble remover or chopstick down the jar sides.
- 5
Wipe rims and apply lids
Wipe each jar rim with a clean damp cloth to remove any food or syrup residue. Center a hot flat lid on the rim, then screw a band on until fingertip tight — just snug, not forced.
- 6
Process the jars
Water bath: load jars onto a rack in a canner of boiling water, ensuring 1 to 2 inches of water covers the lids, then boil for the full recipe time at your elevation. Pressure: vent the canner 10 minutes, add the weighted gauge or close the dial gauge, bring to target pressure, and hold for the recipe time, adjusting pressure for elevation.
- 7
Cool and check seals
Turn off the heat. For pressure canning, let the canner depressurize naturally for 30 to 60 minutes before opening. Remove jars with a jar lifter and set them on a towel, spaced 1 inch apart, undisturbed for 12 to 24 hours. Do not press the lid during cooling.
- 8
Test seals, label, and store
After 24 hours, press the center of each lid — it should be firm and concave with no flex. Remove screw bands, wipe jars, label with contents and date, and store in a cool, dark, dry place (50 to 70°F). Refrigerate any unsealed jars and use them promptly.
The acid-safety principle
Every canning decision begins with the pH of the food. Below 4.6, the environment is hostile enough to Clostridium botulinum that boiling-water temperatures (212°F) are sufficient to keep the food safe. Above 4.6, the bacteria's spores can survive boiling and germinate into toxin — and that toxin is odorless, tasteless, and lethal. This is why tomatoes, which hover near the threshold, must always be acidified with bottled lemon juice or citric acid (1 tbsp per pint, 2 tbsp per quart), and why a single low-acid ingredient — a chunk of onion or pepper, a splash of milk — pulls an entire salsa or soup out of water-bath territory and into the pressure canner. When in doubt, treat the food as low-acid.
- High-acid (water-bath safe): fruits, fruit juices, jams, jellies, pickles, relishes, chutneys, salsas with tested acidification, tomatoes with added acid.
- Low-acid (pressure required): fresh vegetables, meats, poultry, fish, seafood, stocks, soups, stews, and any mixed dish not on a tested high-acid recipe.
- Borderline foods: tomatoes, figs, Asian pears, and melons — always follow a tested recipe and add acid when called for.
Equipment essentials
Canning requires a small set of dedicated tools beyond a stockpot. Jars come in standard sizes — 4 oz, 8 oz (half-pint), 16 oz (pint), and 32 oz (quart) — and must be matched to recipe times. A water-bath canner is a tall stockpot with a lid and a rack; a pressure canner is a heavy kettle with a lockable lid, a vent, a pressure gauge, and a safety plug. A jar lifter, a magnetic lid lifter, a wide-mouth canning funnel, a plastic bubble remover, and a clean cloth for wiping rims round out the kit. The two-piece metal lid — a flat disc with sealing compound plus a separate screw band — is the modern standard; the flat is single-use, the band is not.
- Standard jar sizes: 4 oz, 8 oz (half-pint), 16 oz (pint), 32 oz (quart).
- Pressure canner gauges: dial gauges must be tested annually for accuracy; weighted gauges need only rock freely and stay unblocked.
- Never improvise: oven canning, dishwasher canning, microwave canning, and paraffin wax seals are not USDA-approved.
- Keep jars hot until filling — cold glass into hot food will crack.
Common uses
Tips & pitfalls
- Use only recipes from currently tested sources — USDA, the National Center for Home Food Preservation, Ball, or university extension — and never invent or 'eyeball' canning times, especially for low-acid foods.
- Always add bottled lemon juice or citric acid to home-canned tomatoes (1 tbsp per pint, 2 tbsp per quart) — modern tomato varieties are typically lower in acid than heirlooms.
- Wipe jar rims with a clean damp cloth before applying lids; even a trace of food or syrup can break the seal.
- Apply screw bands 'fingertip tight' — over-tightening prevents air from venting and causes seal failure.
- Do not reuse flat lids; the sealing compound deforms after one use. Screw bands are reusable but should be removed before long-term storage.
- Test dial pressure gauges annually for accuracy; weighted gauges are accurate but must rock freely and stay unblocked.
- Never use oven canning, dishwasher canning, microwave canning, or paraffin wax seals — all are unsafe and not USDA-approved.
- Wait 12 to 24 hours before checking seals; press the center of the cooled lid — it should not flex or pop.
- If in doubt, throw it out — botulism toxin is odorless and tasteless, and a single compromised jar can poison a household.
- Let pressure canners depressurize naturally; do not force-cool or run cold water over them, which can cause liquid to siphon from the jars.
Good to know
- Origin
- French chef Nicolas Appert won Napoleon's 12,000-franc prize in 1809 for developing airtight food preservation in glass jars heated in boiling water.
- Mason jar patent
- John Landis Mason patented the threaded screw-top glass jar in the United States in 1858; Ball Brothers Glass Manufacturing Company began producing home canning jars in Muncie, Indiana, in 1884.
- pH safety threshold
- 4.6 is the dividing line between high-acid foods (water-bath safe) and low-acid foods (must be pressure-canned).
- Processing temperatures
- Boiling water bath reaches 212°F (100°C); pressure canner at 10 lb (weighted) or 11 lb (dial) reaches 240°F (115.6°C) — the latter required to destroy Clostridium botulinum spores.
- Headspace range
- 1/4 inch for jams and jellies, 1/2 inch for fruits and pickles, 1 inch for low-acid pressure-canned foods.
- Altitude adjustments
- Water-bath times extend 1 minute per 1,000 ft above 1,000 ft; pressure must be raised 1 lb per 2,000 ft above 2,000 ft (dial-gauge) or 1/2 lb per 1,000 ft above 1,000 ft (weighted-gauge).
- Lid usage
- Flat two-piece canning lids are single-use; screw bands are reusable. Never reuse flats.
- Shelf life
- Properly sealed home-canned food keeps best quality 12–18 months in a cool, dark, dry place; the food remains safe longer if the seal holds.
- Critical safety reference
- USDA Complete Guide to Home Canning (rev. 2015), informed by research at the National Center for Home Food Preservation at the University of Georgia.
Also called
Canning · Preserving · Jam Making · Zakatka · Zimnica · Konservavimas
Dishes that rely on it
Related

Confit
Cook slowly submerged in fat for silky tenderness and keeping

Cure
Draw out moisture with salt and time to preserve and concentrate

Pickle
Steep in acidic brine for bright, tangy, crunchy preservation

Ferment
Let friendly microbes transform food into tangy, complex flavor

Marinate
Soak in a seasoned mix to flavor and tenderize before cooking

Brine
Soak in salt water so meat stays juicy and seasoned throughout

Dehydrate
Slowly dry out moisture to concentrate flavor and extend shelf life

Cold-Smoke
Perfume cured food with smoke without cooking it through