Transform & Preserve
Pressure Canning
Sealing low-acid foods in jars under high-pressure steam to safely kill spores for shelf-stable storage.
Pressure canning processes jars of low-acid foods such as vegetables, meats, and beans inside a sealed pressure canner that reaches temperatures above the boiling point of water. The higher heat, typically around 240F at 10-15 psi, is required to destroy Clostridium botulinum spores that ordinary boiling cannot. It is the only safe home method for shelf-stable low-acid foods and demands a calibrated gauge and verified processing times.
Pressure canning is the only safe home method for putting low-acid foods on the pantry shelf. Food is sealed in glass jars under high-pressure steam, where temperatures climb to 240–250 °F (116–121 °C) — well above the 212 °F that boiling water ever reaches. That extra heat is the whole point. It is the only thing that reliably destroys the dormant spores of Clostridium botulinum in foods that are not acidic enough (pH above 4.6) to suppress it on their own. Vegetables, meats, poultry, fish, stocks, soups, and beans all fall into that category, which is why water-bath canning simply cannot do the job for them.
The technique depends on a careful chain of decisions: a recipe validated by a trusted source (the National Center for Home Food Preservation, the USDA Complete Guide to Home Canning, the Ball Blue Book, or a state extension service), a canner in good working order, the correct headspace, and a processing time and pressure matched to the food, the jar size, and your altitude. Pressure is the variable that ties everything together. At sea level, 10–11 pounds of pressure yields the target temperature; climb in elevation and you must add more pressure to keep that temperature. Skip that step, and the jars may seal and look perfect while remaining dangerously under-processed inside.
Pressure canning rewards cooks who treat it as precision work rather than approximate cooking. The process itself is straightforward: prepare the food, pack hot jars, vent the canner of air, hold a steady pressure for a set time, let the canner depressurize naturally, and check seals the next day. Done well, the reward is a shelf-stable pantry of foods you grew, hunted, or bought in season — beans ready for a Tuesday night, tomatoes for winter sauce, broth for soup — that will keep for at least a year in a cool, dark cupboard.
- Difficulty
- Hard
Types & varieties
Shows exact pressure on a weighted needle; precise but must be tested annually for accuracy at a cooperative extension office
Rocks gently at 5 lb, moderately at 10 lb, or vigorously at 15 lb; self-regulating, simpler, and altitude-adjustable by changing the weight
Countertop unit with built-in heating element and programmed cycles; only certain models are NCHFP-validated for low-acid canning, so verify a unit's current validation status before relying on it
Filling jars with raw food and hot liquid; works for some vegetables and meats, usually yields a looser pack and a clearer finished product
Pre-cooking or blanching food before packing; recommended for most dense foods (corn, beans, meat) because preheating improves heat penetration and yields a denser, more uniform pack
Light, liquid foods processed in half-pint or pint jars under standard pressure; strain through cheesecloth for clarity before packing
Mixed-ingredient meals processed as a single product under pressure; requires a tested recipe, and thickening agents like flour, cornstarch, rice, or pasta must be omitted before canning
How to do it
- 1
Inspect and prepare equipment
Examine the canner lid gasket, vent pipe, petcock, and safety valve for cracks or blockages. Wash jars in hot soapy water, rinse, and keep them hot in a 200 °F oven or a pot of simmering water until packing. Simmer new flat lids in water (do not boil) to soften the sealing compound. Gather a jar lifter, canning funnel, bubble remover or thin plastic knife, headspace tool, and clean cloths.
- 2
Prepare the food
Select fresh, unbruised produce and trim, peel, and cut to recipe specifications. Blanch vegetables in boiling water 3–5 minutes for hot-pack, or leave them raw for raw-pack. Brown cubed meat in small batches and cook off excess moisture for soups. Keep prepared food hot until packing.
- 3
Pack the jars
Following the tested recipe, pack food into hot jars either raw or hot. Ladle hot cooking liquid, broth, or boiling water over the food, leaving the headspace specified by the recipe (typically 1 inch for low-acid foods). Pack firmly without crushing so heat can penetrate, but avoid leaving large air pockets.
- 4
Remove air bubbles and adjust headspace
Slide a bubble remover or thin plastic knife down the inside of the jar in 2–4 places to release trapped air. Top up with additional hot liquid to bring headspace back to the correct level. Wipe each jar rim with a damp paper towel to remove any food, grease, or salt crystals — anything on the rim can break the seal.
- 5
Apply lids and bands
Center a new flat lid on the clean rim. Screw a band on until resistance is met, then turn just a quarter turn more (fingertip-tight). Over-tightening prevents air from venting during processing and causes lids to buckle or seal failure.
- 6
Load the canner
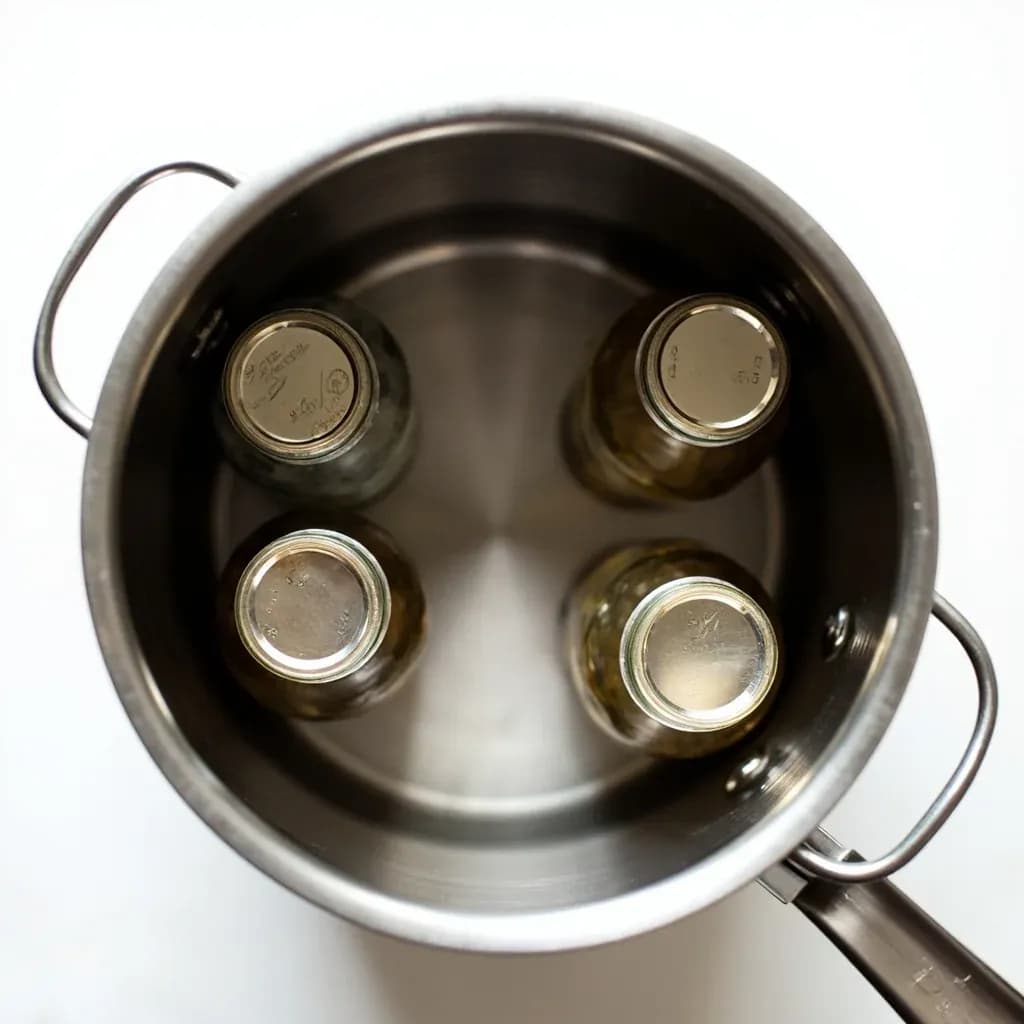
Place filled jars on the canner rack using a jar lifter; keep jars upright and not touching each other or the sides. Add the amount of hot water specified by the canner manufacturer (usually 2–3 inches). Position the lid and lock it in place, leaving the petcock open or the weighted gauge in the venting position.
- 7
Vent the canner for 10 minutes
Bring the canner to a boil over high heat. When a continuous, steady column of steam flows from the vent pipe for 10 full minutes, all air has been purged. This step is critical — trapped air lowers the internal temperature and can result in under-processing.
- 8
Bring to processing pressure
Close the petcock or place the weighted gauge on the vent. Watch for the dial gauge to reach 11 lb (or altitude-adjusted pressure) or for the weighted gauge to begin rocking at the specified pressure. Start the processing time the moment correct pressure is reached. Adjust heat to maintain a steady pressure — small, frequent adjustments are best.
- 9
Process for the full time
Hold the canner at the correct pressure for the full time given in the recipe, never less. Do not let the canner boil dry; keep water above the rack throughout. If pressure dips below the target, bring it back up; for a brief dip, continue timing, but a sustained pressure drop means restarting the timing from the moment the correct pressure is regained.
- 10
Depressurize naturally
When the timer ends, turn off the heat. Let the canner cool naturally until the pressure returns fully to zero. Wait an additional 10 minutes before opening. Do not force cooling with cold water or wet towels — this causes siphoning (loss of liquid from jars) and can break seals.
- 11
Remove jars and cool
Open the lid away from your face to allow steam to escape away from you. Lift jars straight up with the jar lifter and place them on a folded towel or wooden board, spaced 1–2 inches apart, out of drafts. Do not retighten bands. Do not press the lid center. Let jars cool undisturbed for 12–24 hours.
- 12
Check seals, label, and store
After 12–24 hours, press the center of each lid — it should be concave and not flex or pop. Remove the bands, wipe jars clean, and label with the food, jar size, processing time, pressure, altitude, and date. Store in a cool (50–70 °F), dark, dry place. If a jar did not seal, refrigerate it and use within a few days, or reprocess the contents in a new jar with a fresh lid.
Why Pressure Canning is Non-Negotiable for Low-Acid Foods
Botulism is the reason the rules exist. Clostridium botulinum spores are present in soil and on most fresh produce; they are not destroyed by boiling and they thrive in the oxygen-free, low-acid environment inside a sealed jar. The toxin they produce is odorless and tasteless, which means a contaminated jar gives no warning. A pressure canner holds food at 240–250 °F long enough to destroy those spores. Water-bath canning tops out at 212 °F, which is fine for high-acid foods (most fruits, pickles, jams) but lethal to leave spores alive in low-acid foods. If a recipe calls for pressure canning, there is no shortcut.
- Low-acid foods (pH above 4.6) include all vegetables, meats, poultry, fish, seafood, broth, and combinations of these
- Tomatoes sit on the acid line at roughly pH 4.5–4.6, and modern varieties are often less acidic than heirlooms — add bottled lemon juice or citric acid whenever you add low-acid ingredients like onion, pepper, garlic, butter, or mushrooms to tomatoes
- If you cannot find a tested pressure-canning recipe for a food, the safe answer is to freeze it instead
Altitude and Pressure: The Hidden Variable
At higher elevations, water boils at a lower temperature because atmospheric pressure is lower. A pressure canner compensates by holding more pressure, which forces the internal temperature higher. A one-pound error on a dial gauge translates to roughly a two-degree temperature error inside the jar, which is meaningful when the target range is only ten degrees wide. Get the gauge tested annually, and use altitude-adjusted recipes rather than sea-level ones.
- At 0–1,000 ft, process at 10 lb (weighted) or 11 lb (dial)
- At 1,001–2,000 ft, process at 15 lb (weighted) or 11 lb (dial)
- At 2,001–4,000 ft, process at 13 lb (dial); at 4,001–6,000 ft, 15 lb; at 6,001–8,000 ft, 15 lb
- If you live at altitude, many tested recipes list a separate time and pressure for your elevation — use it, not the sea-level version
Choosing a Canner
Both styles of stovetop canner work well when used correctly. Dial-gauge canners show the exact pressure reading, but the gauge drifts over time and needs an annual check. Weighted-gauge canners are nearly foolproof — the rocking tells you the pressure — and you simply change the weight to adjust for altitude. Electric pressure canners are a good option for kitchens without a stovetop that can handle a heavy pot, and they regulate pressure automatically — but only those specifically validated for low-acid canning should be trusted for shelf-stable preservation. A standard countertop multi-cooker like an Instant Pot is not a substitute; its cycles are not designed to hold a precise canning pressure for the long processing times that low-acid foods require.
- Weighted-gauge canners: a 23-quart is a good household size; Presto and Mirro are common brands
- Dial-gauge canners: All American is a classic, with a metal-to-metal seal that needs no gasket replacement
- Electric pressure canners: confirm NCHFP validation before buying; check the NCHFP website for current approved models
- Inspect the gasket, vent pipe, petcock, and safety plug before every use; replace parts that are cracked, brittle, or blocked
Common uses
Tips & pitfalls
- Never use a countertop pressure cooker (Instant Pot or similar) as a substitute — these are not designed or validated for canning and may under-process food or leak steam around the seal
- Always use a tested recipe from NCHFP, USDA, the Ball Blue Book, or a state extension — do not invent times or pressures
- Vent the canner for a full 10 minutes of steady steam before applying the weight or closing the petcock; trapped air lowers the internal temperature and is a common cause of spoilage
- Adjust pressure for altitude; this is the single most common cause of botulism in home-canned food
- Do not force-cool the canner (no wet towels, no cold water); let it depressurize naturally to avoid siphoning liquid from jars
- Wait 10 minutes after the pressure gauge reaches zero before removing the lid to let jars settle and prevent boil-overs
- Do not add flour, cornstarch, rice, pasta, or other thickeners before canning — they slow heat penetration and can support bacterial growth
- Have dial gauges tested annually at a cooperative extension office; a 1-lb gauge error translates to roughly a 2 °F error inside the jar
Good to know
- Method
- High-pressure steam processing in sealed glass jars to make low-acid foods shelf-stable
- Required for
- Low-acid foods (pH above 4.6): vegetables, meats, poultry, fish, soups, stocks, and combinations
- Internal temperature
- 240–250 °F (116–121 °C) at 10–15 psi, well above boiling
- Standard pressure (0–1,000 ft)
- 10 lb for weighted-gauge canners; 11 lb for dial-gauge canners
- Altitude adjustment
- Dial-gauge: 11 psi to 2,000 ft, 13 psi to 4,000 ft, 15 lb above 4,000 ft. Weighted-gauge: 15 lb above 1,000 ft
- Why pressure is required
- Clostridium botulinum spores in low-acid foods survive boiling (212 °F) and require 240 °F+ to be reliably destroyed
- Headspace for low-acid foods
- Typically 1 inch, varying slightly by food
- Storage life
- Best quality within 1 year; safe beyond if seal holds and jars are kept cool, dark, and dry
Also called
Pressure Preserving
Related

Confit
Cook slowly submerged in fat for silky tenderness and keeping

Cure
Draw out moisture with salt and time to preserve and concentrate

Pickle
Steep in acidic brine for bright, tangy, crunchy preservation

Ferment
Let friendly microbes transform food into tangy, complex flavor

Marinate
Soak in a seasoned mix to flavor and tenderize before cooking

Brine
Soak in salt water so meat stays juicy and seasoned throughout

Dehydrate
Slowly dry out moisture to concentrate flavor and extend shelf life

Cold-Smoke
Perfume cured food with smoke without cooking it through