Prep & Assembly
Cook-Temperature Verification
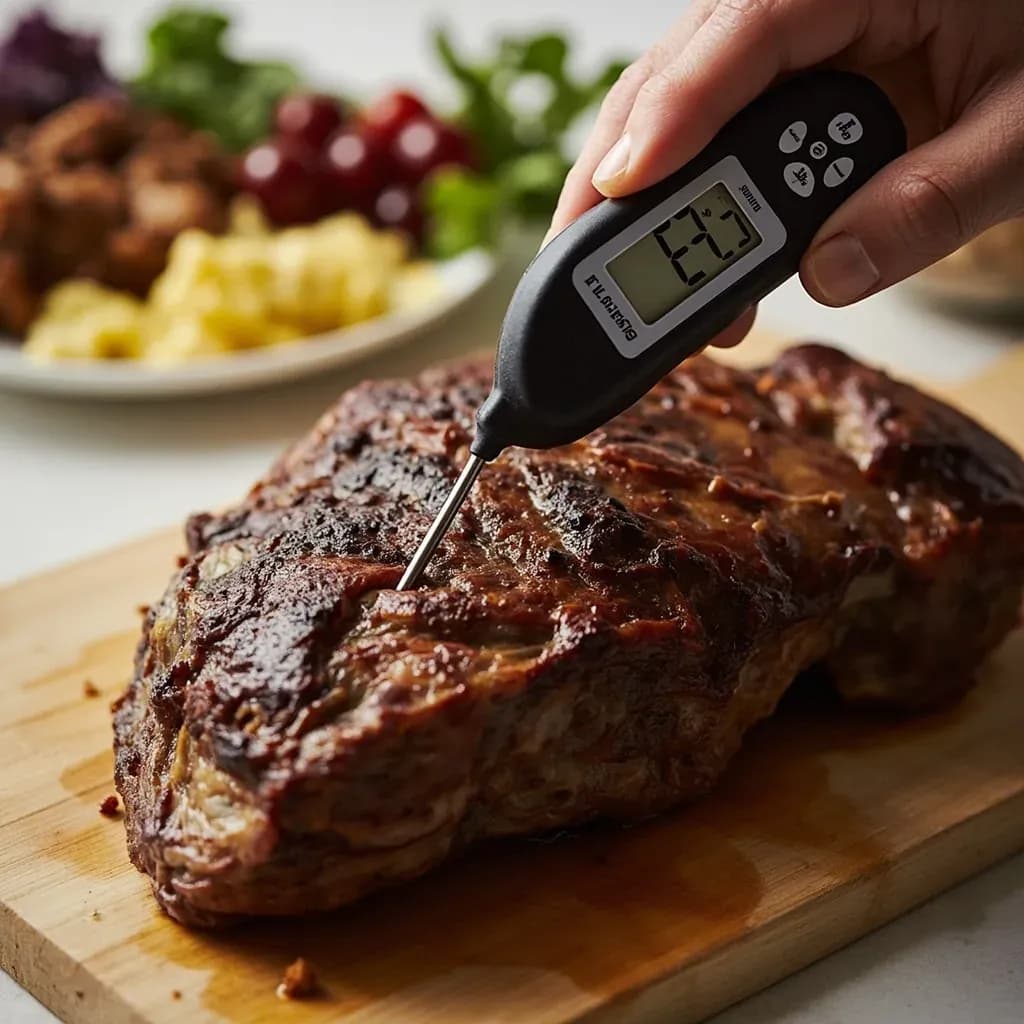
Checking internal temperature with a thermometer to confirm doneness and safety.
Cook-temperature verification uses an instant-read or probe thermometer to confirm that food has reached its target internal temperature for doneness and food safety. The probe is inserted into the thickest part, away from bone, for an accurate reading. It removes guesswork for meats, poultry, and baked goods, replacing visual or touch cues with a reliable number.
Cook-temperature verification is the practice of confirming a food's internal temperature with a probe thermometer, the single most reliable way to judge both safety and doneness. Color, firmness, and timing are useful secondary clues, but only a reading taken at the thickest part of the food tells the truth. This habit matters most with poultry, ground meats, stuffed roasts, and custards, where the gap between undercooked and overcooked is measured in degrees, not minutes.
The technique rests on a few physical facts: heat moves inward from the surface, so the center is always the last point to finish; bones and dense fat conduct heat differently than lean muscle and will skew a reading; and most cooked foods continue climbing in temperature after they leave the heat (carryover). A good verification routine accounts for all three, and it begins with a calibrated tool, because an inaccurate thermometer delivers false confidence, which is worse than no thermometer at all.
The sections below cover how to choose and calibrate the right thermometer, where and how to insert the probe for different foods, and the safe-minimum and target-doneness numbers worth memorizing.
- Difficulty
- Easy
Types & varieties
Fast, accurate, 2–5 second reads; the workhorse of home and pro kitchens. Not meant to stay in food during cooking.
Fastest reads, often under 1 second; thin probe tip ideal for thin cuts, burgers, and delicate fish.
Oven-safe cable connects a probe that stays in the food to an outside display; useful for roasts and long cooks.
No batteries; slower (15–20 seconds) and less precise, but durable and inexpensive.
Reads surface temperature only; cannot measure internal doneness. Useful for checking pan, oil, or sear crust.
Clip-on, designed to hold in hot oil or sugar; not suitable for meat.
Sits inside the oven to verify that the dial temperature matches actual cavity temperature.
How to do it
- 1
Choose the right thermometer
Use an instant-read digital or thermocouple for quick checks during cooking. Use a leave-in probe for long roasts and whole birds. Reserve infrared for surface temperatures such as pan, oil, or sear crust.
- 2
Verify accuracy (calibration check)
Stir a full cup of ice with cold water and insert the probe so the tip is in the slurry — it should read 32°F / 0°C. Or place it in boiling water — 212°F / 100°C at sea level, adjusted for elevation. Adjust or replace the thermometer if it is off by more than 2°F.
- 3
Insert at the right spot
For roasts, whole birds, and steaks, push the probe into the geometric center, the thickest portion, away from bone and large fat pockets. For thin cuts, fillets, and burgers, insert horizontally through the side so the tip reaches the middle of the food rather than poking through the bottom.
- 4
Wait for a stable reading
Hold the probe steady and wait 2–3 seconds (instant-read digital) or until the number stops changing. A reading that is still climbing is not your final temperature.
- 5
Compare to the safe or target temperature
Match the reading against the USDA safe minimum for the food, or your target doneness temperature. Factor in carryover: pull roasts and steaks 5–10°F early if they will rest under foil or in a warm oven.
- 6
Clean the probe
Wipe with a hot, soapy cloth or sanitizing wipe between uses, especially when moving between raw and cooked foods. Probe tips that contact food should not move from one species to another without cleaning.
Calibration: the step most cooks skip
A thermometer that drifts even a few degrees can ruin a roast or, worse, give a false sense of safety with poultry. Calibration takes two minutes and should be done when the thermometer is new, after any hard drop, and roughly once a month during regular use. Two reference points are easy to recreate in any kitchen, and a thermometer that fails both should be adjusted or replaced.
- Ice-bath test: fill a tall glass with crushed ice, top up with cold water, stir, and insert the probe so the tip sits in the ice slurry, not touching the glass. After 30 seconds it should read 32°F / 0°C.
- Boiling-water test: bring a small pot of water to a full, rolling boil and place the probe in the water without touching the pot. At sea level it should read 212°F / 100°C; subtract roughly 1°F for every 500 ft of elevation.
- Adjustable thermometers have a calibration nut or button under the housing; fixed models that read more than 2°F off either point should be replaced rather than trusted.
- Never trust the pop-up plastic indicator shipped with some whole turkeys — it is calibrated to trigger near 180°F and gives no reliable information about safety or doneness.
Safe minimums versus ideal eating temperatures
The USDA numbers are legal food-safety thresholds, not optimal eating temperatures. Whole-muscle red meat is far more tender when pulled well below 145°F and allowed to carryover into the target range; a medium-rare steak is usually pulled around 125–130°F and rested to 130–135°F. Poultry, by contrast, is not improved by serving under 165°F, and the cost of guessing is real. Egg-based custards and sauces must reach 160°F to be safe and to set properly. Knowing the difference between a safe minimum and a preferred doneness lets a cook treat the thermometer as a precision tool rather than a paranoia meter.
- Rare beef: pull 115–120°F, target 125°F after rest.
- Medium-rare beef: pull 125–130°F, target 130–135°F after rest.
- Medium beef: pull 130–140°F, target 135–145°F after rest.
- Pork loin and chops: pull 138–142°F, target 145°F after rest.
- Whole chicken and turkey: 165°F at the thickest part of the thigh; carryover is small, so it is fine to cook right to the target.
- Fish: 125–140°F depending on species; salmon is best around 125–130°F, denser white fish around 135–140°F.
Common uses
Tips & pitfalls
- Calibrate new thermometers in an ice bath (32°F) and boiling water (212°F at sea level); check again monthly and after any drop.
- Insert the probe into the thickest part of the food, pointing toward (but not touching) bone, fat pockets, or gristle — bone conducts heat and gives a falsely high reading.
- For thin items like burgers or fish fillets, insert the probe horizontally through the side rather than straight down from the top so the tip lands in the center.
- Pull roasts and steaks 5–10°F before the target temperature; internal temp continues to rise 5–10°F during resting (carryover).
- Wait for the reading to stabilize for 2–3 seconds — don't trust a flashing number that is still climbing.
- Clean and sanitize the probe between every use, especially between raw and cooked foods, to avoid cross-contamination.
- An infrared gun reads only the surface; it cannot tell you the internal temperature of a roast or chicken breast, so do not substitute it for a probe.
- Don't trust the pop-up plastic indicator that ships with some turkeys — they are notoriously unreliable and pop near 180°F.
- Verify your oven with a separate oven thermometer; many ovens run 25°F or more off their set temperature and skew every recipe you follow.
- For whole poultry, check at the innermost part of the thigh, the thickest part of the breast, and the wing joint — the thigh is the last to finish and the one that must reach 165°F.
Good to know
- Also called
- Internal temperature check; doneness check
- Primary tool
- Instant-read digital or thermocouple probe thermometer
- USDA poultry safe minimum
- 165°F / 74°C (whole, parts, and ground poultry)
- USDA ground meat minimum
- 160°F / 71°C (beef, pork, lamb)
- USDA whole-muscle red meat minimum
- 145°F / 63°C with a 3-minute rest (beef, pork, lamb, veal)
- USDA fish minimum
- 145°F / 63°C, or until flesh is opaque and flakes easily
- Carryover buffer for red meat
- Pull 5–10°F below target; internal temp continues to rise during resting
- Ice-bath calibration point
- 32°F / 0°C
- Boiling-water calibration point
- 212°F / 100°C at sea level (subtract ~1°F per 500 ft of elevation)
- Reading time
- 2–5 seconds for instant-read digital; under 1 second for thermocouple
Also called
temping · internal temperature check
Related

Whisk
Beat ingredients smooth and aerated with a looping wire motion

Sift
Pass dry ingredients through mesh to aerate and remove lumps

Strain
Pour through mesh to separate solids from liquid for a smooth result

Filter
Pass liquid through fine material to clarify out the smallest particles

Rice
Press cooked potatoes through small holes for fluffy, lump-free texture

Mash
Crush soft cooked food into a rustic, creamy purée

Grind
Crush food into a coarse to fine texture, from spices to meat

Grate
Shred food into fine bits against a sharp-toothed surface