Prep & Assembly
Dough Balling (Staglio)
Dividing and rounding dough into smooth, tensioned balls for proofing.
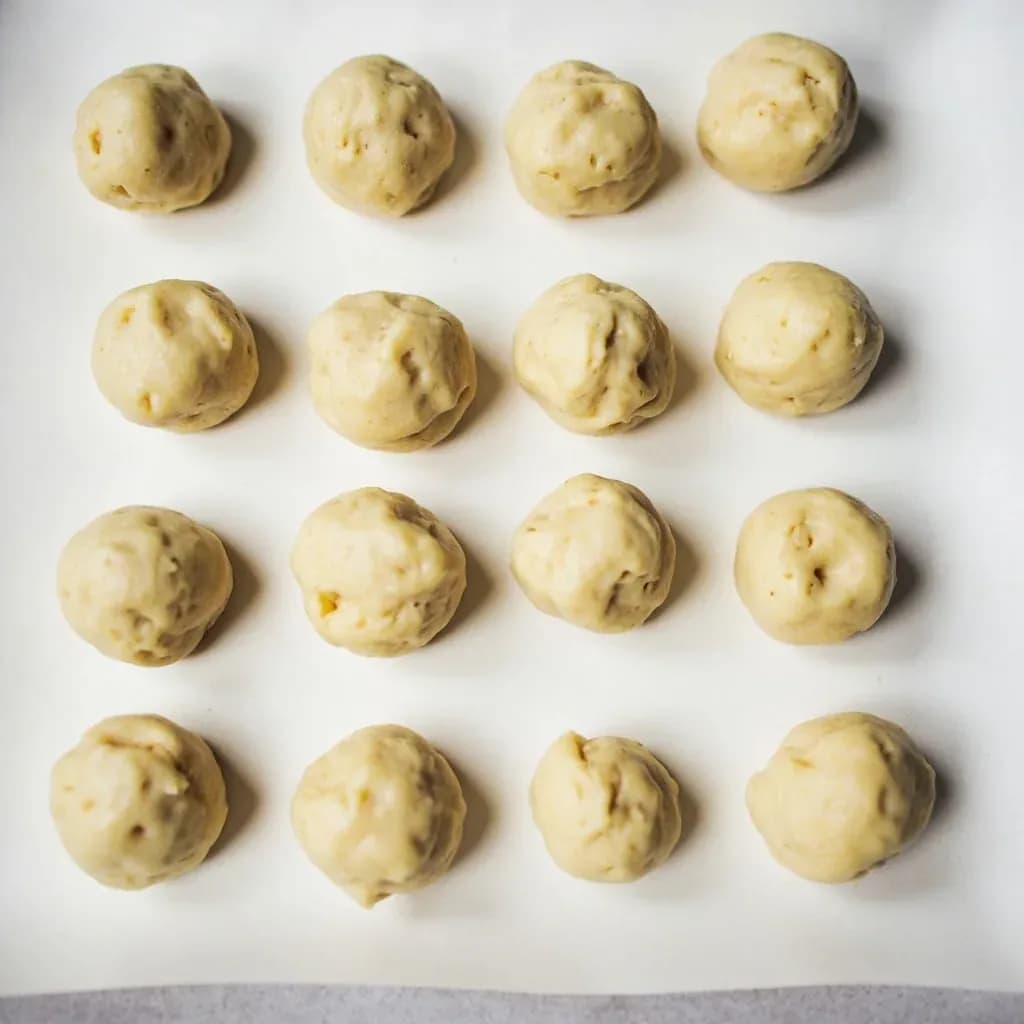
Dough balling, or staglio in Italian pizza making, divides bulk dough into portions and shapes each into a taut, smooth ball by cupping and tucking it against the bench. The surface tension helps the dough hold gas and rise upward during the final proof. Even, well-sealed balls open into rounds with a consistent crust and structure.
Staglio is the bridge between bulk fermentation and final shaping — the moment you divide a single mass of fermented dough into individual portions and round each one into a tight, smooth ball. In Italian pizzerias the term covers both the division and the rounding, and the two actions are inseparable: cutting without tensioning leaves slack, leaky balls, while rounding without weighing produces uneven bakes. The skill is essentially tactile — you use the friction of the bench against the dough's outer skin to pull that skin taut over the gas-filled interior, much like wrapping a filled balloon.
A well-balled ball is drum-taut on top with the seam hidden underneath, and it should feel firm in the hand rather than floppy or slack. Done properly, staglio traps fermentation gas, sets up oven spring, and gives the baker a uniform batch where every portion behaves the same way in the oven. Done poorly, balls spread flat, leak gas, bake unevenly, and produce the dense, gummy centers that plague home pizza makers more than any other flaw.
The other variable most home bakers miss is hydration. Below 65%, a dry, unfloured bench gives the friction you need to tension the skin. Above 70%, flour actually prevents tension — the skin slides on the flour instead of gripping the bench, and a light oil on hands and surface works better. Master the technique on a forgiving 60–65% dough before moving to wet Neapolitan or high-hydration artisan doughs.
- Difficulty
- Medium
Types & varieties
200–280 g, very tight skin, cold-fermented 8–48 h; the canonical application of staglio
250–400 g, slightly higher hydration; shaped on the peel rather than tossed
350–500 g, stretched to fit oiled pans; less tension needed than Neapolitan
300–500 g, often placed directly into oiled trays and dimpled
400–900 g; built up by folding rather than the cup-and-drag method, then flipped seam-up for proofing in a banneton
40–120 g; rounded tightly to support an open-crumb sandwich loaf or burger bun
How to do it
- 1
Tip and divide the bulk dough
Turn the bulk-fermented dough out onto a lightly floured (or unfloured, for wet doughs) work surface. Using a bench scraper, cut the mass into rough equal pieces without pressing the scraper through — slice and separate so you don't degas. Aim for slightly more than your target weight; you'll lose a few grams rounding.
- 2
Weigh each piece
Weigh every portion on a kitchen scale to within ±2 g for pizza balls, ±5 g for bread boules. Uneven balls mean some pies bake through while others stay raw in the center.
- 3
Pre-shape gently
Lightly cup each piece into a loose round, tucking the bottom edges just enough to create a rough skin. This is a pre-shape, not the final round — the goal is even thickness, not tension.
- 4
Build tension with the cup-and-drag
Cup both hands around the dough like a shell, leaving the open ends at the bottom. Press down lightly and drag the ball in small circles across the unfloured bench. The friction pulls the outer skin tight and wraps it under the ball. Repeat 6–10 short drags, rotating as you go, until the top is smooth, drum-tight, and the seam is sealed underneath.
- 5
Check the tension
Lift the ball and feel it: it should feel like a firm balloon, with the skin taut across the top. The bottom may be slightly puckered — that puckering is the seam, and it belongs face-down. If the top wrinkles or the ball slumps, re-cup and drag again.
- 6
Rest seam-down
Place each finished ball on a tray, in a dough box, or on a floured couche with the smooth side up. Cover lightly (damp cloth, plastic, or box lid) to prevent skin formation. Rest 20–30 minutes at room temperature for same-day use, or move to a refrigerator at 3–5 °C for 12–72 hours of cold fermentation.
- 7
Re-tension if needed before shaping
If a ball has spread or relaxed after long cold fermentation, cup-and-drag it once more on an unfloured surface to restore tautness before stretching or rolling.
Why surface tension matters
The point of staglio is not cosmetic smoothness — it is structural. A properly tensioned skin acts like a membrane under pressure: it holds the CO₂ produced during proofing and expands evenly in the oven, giving you open crumb, an airy cornicione, and a ball that keeps its shape through hours of cold retard. A slack skin does the opposite. Gas escapes through weak seams, the ball spreads flat on the tray, and the final bake comes out dense, lopsided, or both. The cup-and-drag motion is the cheapest insurance in bread baking.
Matching the technique to hydration
Hydration changes everything about how you ball. At 55–60% (bagels, lean pan loaves) the dough wants to fight back; a dry, unfloured bench gives you the friction you need. At 65–70% (most pizza doughs) a bare bench or one wiped with a thin film of oil works well. Above 70% (Neapolitan, high-hydration artisan) flour actually prevents tension — the skin slides around on the flour instead of gripping the bench. Lightly oil your hands and the surface instead, work quickly, and accept that the ball will look slightly wet. The skin is still forming; it is just forming against oil rather than wood.
Common uses
Tips & pitfalls
- Work on an unfloured surface for most doughs — flour under the ball prevents the skin from sticking and building tension.
- Cup both hands around the ball and drag it in small circles across the bench; the friction tightens the skin like a drum.
- Keep the seam on the bottom; the smooth side should face up so gas pressure pushes the skin outward, not outward at a weak seam.
- Weigh every ball — eyeballed portions lead to uneven bake times and inconsistent cornicione.
- Avoid degassing the dough during balling; you're dividing, not re-kneading. A gentle pre-shape first, then a tension pass.
- For high-hydration (≥ 70%) doughs, lightly oil your hands and the bench to keep the skin intact rather than dusting with flour.
- Rest the balls seam-down, lightly covered, for 20–30 minutes before shaping so the gluten relaxes — skip this and the dough fights you.
- Cold-ferment the balls covered in boxes or trays, not sealed airtight, to prevent skin formation from CO₂ build-up.
- If a ball spreads flat during rest, re-round it; the gluten was either underdeveloped or the initial tension was too loose.
- A properly tensioned ball holds its shape when lifted and feels firm and balloon-like, not slack or floppy.
Good to know
- Italian term
- Staglio (also stagliare) — literally 'to cut/portion'; refers to both dividing bulk dough and rounding into balls
- When performed
- After bulk fermentation and before final proofing, shaping, or cold retard
- Neapolitan ball weight
- 200–280 g; 250 g is the standard portion for a 30–33 cm pizza
- Pan / Detroit ball weight
- 350–500 g, scaled to pan size
- Roll / bun ball weight
- 40–120 g depending on application
- Bench tool
- A stiff metal bench scraper (Italian tarocco or lametta) is the standard divider; a standard bench scraper works at home
- Work surface
- Unfloured or very lightly oiled for high-hydration doughs; minimal flour to preserve surface tension
- Surface tension
- Tight, drum-taut top with the seam sealed underneath; the ball should feel like a filled balloon
- Skill level
- Beginner-friendly with practice; mainly a feel-and-pressure skill
- Time per ball
- Roughly 15–30 seconds to round once portioned, depending on batch scale
- Rest before use
- 20–30 min at room temperature to relax gluten, or 12–72 h at 3–5 °C for cold fermentation
- Yield impact
- Proper balling preserves fermentation gas and structure; poor balling causes flat, dense final products
Also called
Staglio · Rounding · Pre-Shaping
Related

Whisk
Beat ingredients smooth and aerated with a looping wire motion

Sift
Pass dry ingredients through mesh to aerate and remove lumps

Strain
Pour through mesh to separate solids from liquid for a smooth result

Filter
Pass liquid through fine material to clarify out the smallest particles

Rice
Press cooked potatoes through small holes for fluffy, lump-free texture

Mash
Crush soft cooked food into a rustic, creamy purée

Grind
Crush food into a coarse to fine texture, from spices to meat

Grate
Shred food into fine bits against a sharp-toothed surface