Prep & Assembly
Final Shaping
Forming proofed or pre-shaped dough into its final loaf or roll structure.
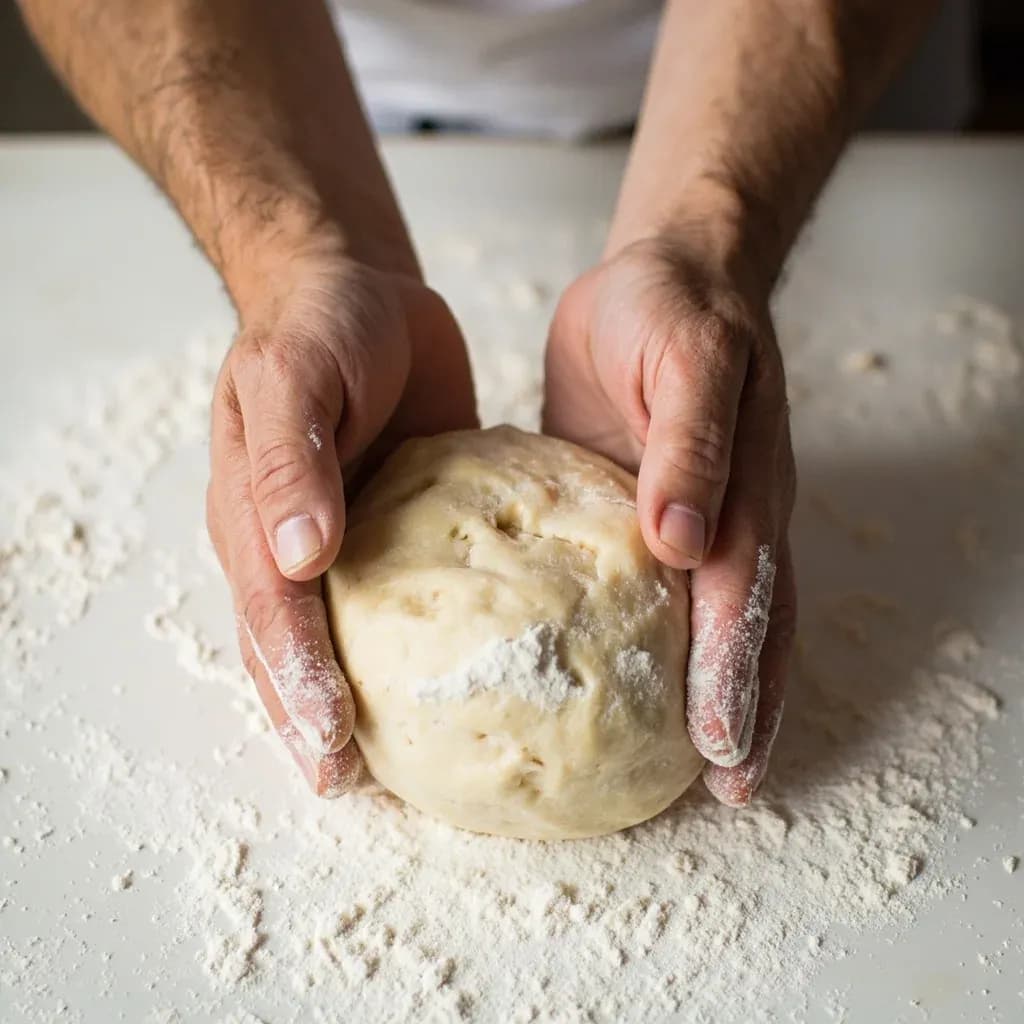
Final shaping tensions and forms dough into its definitive shape, like a boule, batard, or roll, building surface tension that supports rise and gives even crumb. The baker folds and rolls the dough to organize the gluten and trap gas, then sets it to proof. Good shaping prevents weak spots and controls where the loaf opens during baking.
Final shaping is the stage where pre-shaped dough is transformed from a generic mound into the specific object it will become in the oven: a round boule, an oval batard, a slim baguette, a braided challah, or a tight Pullman loaf. It follows the bench rest after preshaping and sets up everything downstream — how the dough rises in the final proof, how it carries its weight on the peel, the pattern of the score, and the crumb the baker will eventually cut into.
The craft lives in two linked ideas: seam integrity and surface tension. Folding and sealing close the dough's internal structure so it retains the gas it developed during bulk fermentation; cupping and dragging build a taut, drum-like skin on the outside so the piece holds its shape through proof, transfer, and the explosive first minutes of the bake. Get the tension right and the loaf springs tall and opens cleanly along the score; get it wrong and the dough sags, blows out at weak seams, or tears when you lift it.
Final shaping is a single decision with four matching parts: choose a shape, choose the fold that builds it, choose the vessel that holds it during final proof, and choose the score that will release it. The classic pairings — boule with a round banneton and a single curved score, baguette with a couche and three quick slashes, batard with an oval brotform and a long arc — are not arbitrary. Each is a system designed so geometry, vessel ridges, and cut all reinforce the same oven spring.
- Difficulty
- Medium
Types & varieties
Round, free-form loaf; folded from a disc, tensioned with cupped hands, proofed in a round banneton
Oval/oblong free-form loaf; letter-folded, lengthened, proofed in an oval banneton or between couche folds
Long thin loaf; pre-shaped as short cylinders, then re-flattened, letter-folded, and rolled to length on a lightly floured surface; proofed on a couche or in a baguette pan
Split-top baguette variant; same shape as a baguette but finished with a deep seam that opens during bake
Baguette-shaped piece cut diagonally on top and fanned to resemble a wheat ear; shaped like a baguette first
Lean or enriched dough rolled flat, jelly-roll style, sealed, and placed seam-down in a lidded Pullman pan
Like pain de mie but baked in an open-top loaf pan; tighter, more uniform crumb
Small round or oval pieces; shaped like a miniature boule or batard
Three or more small dough balls nested in cups of a muffin or cupcake pan
Flat oval, creased and folded in half, baked so the seam opens
Long rope of dough tied into a loose overhand knot
Enriched egg-and-butter dough; a small ball pressed into a larger ball seated in a fluted brioche mold
Ropes rolled from dough and braided in 3-, 4-, or 6-strand patterns
Ring-shaped; a long rope coiled into a circle with the end threaded through the center
Large rustic round country loaf, often from mixed-grain or wild-yeast doughs; shaped like an oversized boule
How to do it
- 1
Set up the work area
Clear a stretch of bench, hold a bench scraper in one hand, and keep a bowl of rice flour or a 50/50 rice-and-wheat blend nearby for dusting bannetons and couche. The work surface itself should be unfloured or carry only the faintest dusting — enough to keep the dough from sticking, not enough to lubricate it.
- 2
Turn out the rested preshape
Tip the rested, preshaped piece (a rounded ball or short cylinder that has relaxed for 20–30 minutes) onto the bench. Slip the bench scraper under it and loosen gently without deflating. The rest is what makes this step possible; preshaping and immediately final-shaping tears the gluten and traps large, uneven gas pockets.
- 3
Gently flatten and degas
For most lean doughs, pat or roll the piece into a disc or rectangle about 1.5–2 cm thick, pressing out the largest gas pockets you can feel. Enriched doughs such as brioche and challah need only the lightest pressure; rye and ciabatta often get no degassing at all. The goal is even thickness, not a squeezed-out slab.
- 4
Fold according to final shape
Boule: bring all four edges into the center like an envelope, then flip seam-side down. Batard: fold the top third down, the bottom third up (letter fold), then fold in half across the short axis and seal. Baguette: fold the top edge to the middle, then the bottom edge to the middle, fold in half along the length and seal the long seam. Pan loaf: roll the flattened piece to roughly the length and width of the pan, dot with butter if enriched, and roll up jelly-roll style, pinching the seam and both ends closed.
- 5
Seal all seams
Pinch the seam firmly together between thumb and forefinger. For a boule or batard, repeat with the two side seams so no openings remain. Any gap becomes a blow-out in the oven — in filled doughs, the filling will escape through the opening as the loaf expands.
- 6
Build surface tension
Place the piece seam-side down. Cup both hands around it like a goalpost and drag it 5–10 cm toward you across an unfloured patch of bench, letting friction tighten the top skin. Repeat a quarter-turn at a time until the surface feels drum-tight and the bottom seam has closed over. You should see a slight pucker forming underneath.
- 7
Set in the proofing vessel
Banneton (round or oval): seam-side up so the basket's ridged pattern becomes the top of the loaf. Couche: seam-side up between two folds of the linen. Sheet pan or couche for baguettes: seam-side down on the floured couche or parchment. Loaf pan (sandwich, Pullman, brioche): seam-side down with ends tucked under. Invert the whole banneton onto a parchment-lined peel or sheet just before baking if you want the seam-side facing down at the oven.
- 8
Cover and final-proof
Mist or cover with a couche flap, plastic, or a proof-box lid. Final-proof at 24–27 °C for 1–4 hours, or retard 8–14 hours at 3–5 °C for deeper flavor and a firmer, more scoreable skin. Test with a gentle finger poke: the dough should spring back slowly and leave a slight indent.
- 9
Score and bake
Transfer to a preheated stone, steel, or Dutch oven, then score decisively with a lame in the pattern that matches the shaping — a single curve across a boule, a long arc down a batard, 3–5 quick slashes on a baguette, a single deep score down a fendu. A confident cut, made quickly at the right depth, is what lets the built-up tension release as oven spring rather than tearing at a random weak spot.
The tension principle
Surface tension is the entire job. The skin you build on the outside of a shaped piece acts like the membrane of a balloon: it traps the gas produced during final proof and redirects that pressure upward through the score during oven spring, instead of letting the dough spread sideways on the peel. The bench, the hands, and the bench scraper are the only tools that build it, which is why an unfloured work surface is non-negotiable — flour acts as ball bearings between dough and bench, and the piece simply slides instead of gripping.
Matching shape, vessel, and score
Think of these as a single four-part decision rather than four independent ones. A boule wants a round banneton (seam up, ridges become the top) and a single curved score that opens like a clamshell. A batard wants an oval brotform or a couche and a long arc or two overlapping slashes. A baguette wants a floured couche and 3–5 quick diagonal slashes that let the slanted sections fan outward. When the four elements agree, the loaf bakes the way the baker imagined it.
Common uses
Tips & pitfalls
- Use a barely-floured, even unfloured surface — flour between dough and bench acts as ball bearings and destroys the grip you need to build tension.
- Let cold dough rest 10–20 minutes on the counter before shaping so the gluten relaxes; straight-from-the-fridge dough tears under the hands.
- Keep a damp (not wet) bench scraper in hand to lift and turn the dough without tearing the skin you are trying to build.
- Match seam orientation to the vessel: seam up in a banneton or couche so the basket ridges become the top crust, seam down on a flat sheet or in a pan.
- Stop as soon as the piece is shaped and tensioned — overworking squeezes gas out and tightens the crumb into something closer to cake than bread.
- Weigh rolls to within about ±2 g for even baking; uneven sizing is the most common reason a tray of rolls finishes at three different shades of brown.
- For very wet doughs (whole grain, rye, ciabatta), shape on a heavily floured couche or use a brotform lined with a well-floured linen towel so the piece releases cleanly.
- Don't skip the bench rest after preshaping; jumping straight to final shaping is the single most common cause of torn surfaces and lopsided oven spring.
Good to know
- Stage in bread workflow
- Follows preshaping and a 20–30 minute bench rest; precedes final proof and bake
- Primary goal
- Build surface tension on the dough's exterior to retain gas, define crumb, and control oven spring
- Typical time per piece
- 45 seconds to 3 minutes for a 500–1000 g loaf; 10–20 seconds for rolls
- Ideal dough temperature
- 24–26 °C (75–78 °F); cold dough tears, warm dough loses tension
- Key tool
- Stainless bench scraper (dough scraper)
- Surface
- Unfloured or very lightly floured work surface to permit grip and tension
- Seam orientation
- Seam up in bannetons and couche; seam down on flat sheet pans or in loaf pans
- History
- Modern codified shaping sequences derive from 19th–20th century French boulangerie practice and were systematized in the artisan revival of the 1970s–1990s (Calvel, Hamelman, Suas)
Also called
Shaping (Final Moulding)
Dishes that rely on it
Related

Whisk
Beat ingredients smooth and aerated with a looping wire motion

Sift
Pass dry ingredients through mesh to aerate and remove lumps

Strain
Pour through mesh to separate solids from liquid for a smooth result

Filter
Pass liquid through fine material to clarify out the smallest particles

Rice
Press cooked potatoes through small holes for fluffy, lump-free texture

Mash
Crush soft cooked food into a rustic, creamy purée

Grind
Crush food into a coarse to fine texture, from spices to meat

Grate
Shred food into fine bits against a sharp-toothed surface