Heat & Fire
Dry-Searing Mushrooms
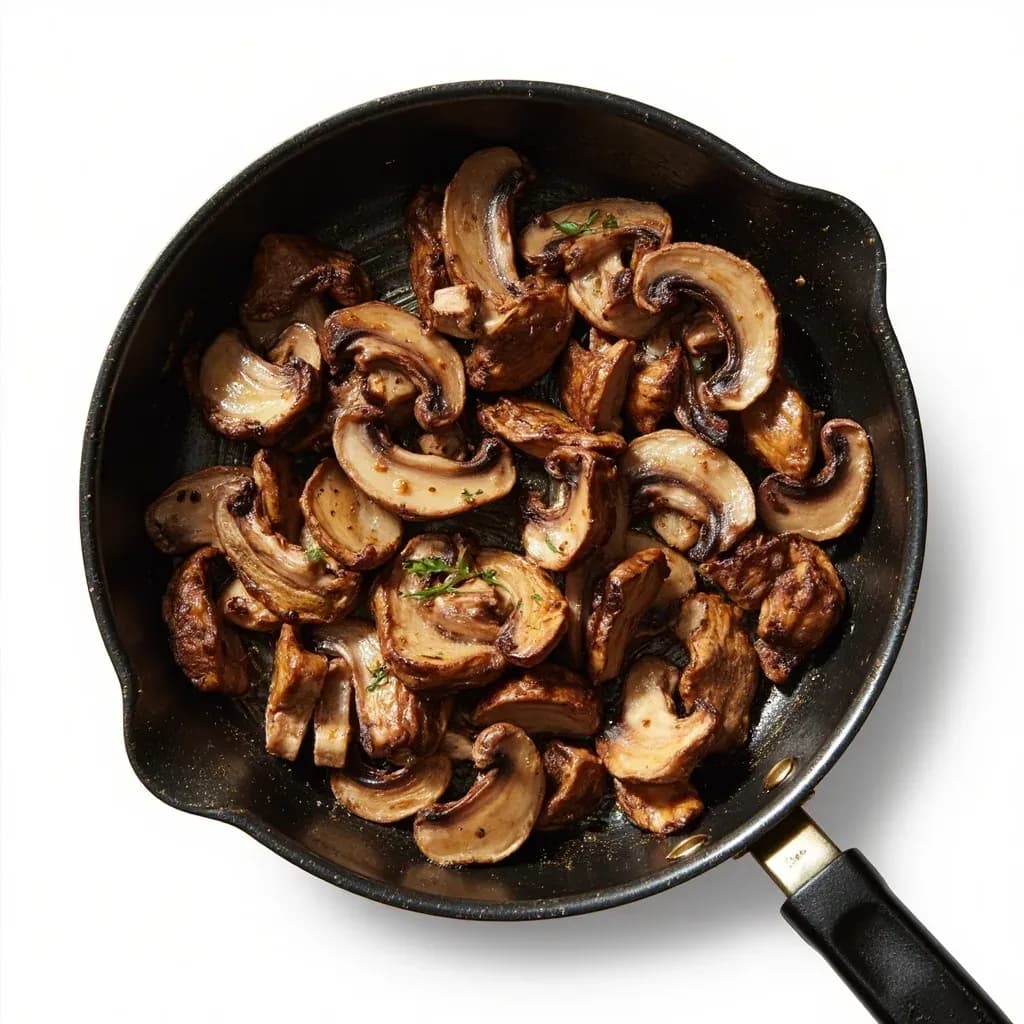
Searing mushrooms in a dry pan first to drive off water and concentrate flavor before adding fat.
Dry-searing cooks mushrooms in a hot, ungreased pan so their abundant water releases and evaporates quickly, after which fat is added to brown them. This avoids the steamed, soggy texture that results when oil is added too early and traps moisture. The result is deeply browned, meaty mushrooms with concentrated umami.
Mushrooms are mostly water — roughly 80–90% by weight — and that single fact dictates almost everything about how they cook. Drop them into a pan of oil or butter and the temperature is pinned near the boiling point of water: the mushrooms release their liquid, the liquid simmers, and the whole skillet steams rather than sears, producing gray, limp mushrooms sitting in a thin puddle. Dry-searing inverts the order. The mushrooms go into a screaming-hot, ungreased pan and cook on contact alone until their internal water has boiled off, after which the pan surface climbs past 212°F / 100°C and the Maillard reaction can finally do its work.
The technique is essentially moisture management. As long as water is leaving the mushrooms, the pan cannot get hot enough to brown them, no matter how high the burner is set. Once that water is gone, the same surface that was just simmering is suddenly able to caramelize the natural sugars and amino acids in the mushroom, producing deep color and the savory, concentrated flavor most cooks associate with restaurant-style sautéed mushrooms. Butter, oil, garlic, and herbs come in only at the end, both to coat the finished mushrooms and to protect delicate aromatics from burning in a dry, ripping-hot pan.
Dry-searing rewards patience and punishes impatience. The hardest part is doing nothing for the first two or three minutes — resisting the urge to stir, to add oil, to turn the heat down, or to cover the pan "to help them cook." Once you understand that the quiet, watery period is when the mushrooms are preparing to brown, the method becomes nearly foolproof. It applies across the mushroom kingdom, from buttons and cremini to chanterelles, maitake, and the dense stems of king trumpet.
- Difficulty
- Easy
Types & varieties
Classic restaurant style: sear dry, then off heat mount with cold butter, smashed garlic, and thyme for a glossy, intensely savory result.
After browning, deglaze with dry white wine, dry sherry, or Marsala and reduce to a quick pan sauce — captures the fond as flavor.
Very finely chopped mushrooms dry-seared in small batches until almost paste-like; the classic filling for beef Wellington, vol-au-vents, and savory tarts.
Larger pieces seared hard to build a deep fond before adding wine, tomato, or stock for ragùs, risotto bases, and braises.
Brown first, then finish with smoked paprika, cumin, chili, or curry powder — keeps ground spices from burning in oil.
Same principle on a sheet pan at 425–450°F / 220–230°C, single layer, no oil — hands-off alternative for large batches.
How to do it
- 1
Clean and dry the mushrooms
Wipe cremini, button, or wild mushrooms with a damp cloth or soft brush. If you must rinse, do it quickly under running water and then dry thoroughly on a clean towel. Trim any tough stem ends. Do not soak — waterlogged mushrooms will steam no matter how hot the pan.
- 2
Cut to a uniform size
Slice or quarter so the pieces are roughly the same size, about ¼-inch / 5–6 mm thick for most cultivated varieties. Smaller, delicate mushrooms (oyster clusters, small maitake) can be torn or left whole. Dense king trumpet stems should be cut a bit thinner so the centers cook through.
- 3
Heat a wide, heavy pan over high heat
Place a 12-inch cast iron, carbon steel, or heavy stainless steel skillet over high heat for 1–2 minutes until genuinely hot. No oil, no butter. A drop of water flicked onto the surface should dance and evaporate in under a second. Non-stick pans are not appropriate here.
- 4
Add mushrooms in a single, uncrowded layer
Tip the mushrooms into the dry pan and spread them out so each piece has contact with the metal and a little breathing room around it. If they pile, cook in two batches. Resist the urge to stir.
- 5
Leave undisturbed until water releases
Let the mushrooms sit for 2–3 minutes. You'll hear a sizzle that quiets as the mushrooms bleed their internal water — the pan will look wet, and that's normal. This quiet phase is the steaming phase, and it's unavoidable.
- 6
Continue cooking until water evaporates
As the released liquid simmers off, the sizzle returns and intensifies. That rising volume is the signal that the pan is drying out and the surface temperature is climbing back up. Keep cooking without moving the mushrooms much.
- 7
Watch for browning to begin
Once the pan is audibly dry and the underside of the mushrooms is deep golden-brown (lift an edge with tongs to check), begin tossing and flipping to brown the other cut sides. Total time from the pan going in to full color is usually 5–10 minutes for cremini.
- 8
Add fat and aromatics
When the mushrooms are well browned, add butter, oil, or a combination along with shallot, garlic, and woody herbs such as thyme or rosemary. Toss for 30–60 seconds — they should sizzle hard and drink the fat. Add a small splash of water or stock if the pan goes totally dry and starts to scorch.
- 9
Season and deglaze
Add salt and pepper now. If you're building a sauce, deglaze with a splash of dry white wine, sherry, Marsala, soy, or stock, scraping up the brown fond stuck to the pan. Reduce briefly to concentrate.
- 10
Finish and serve
Off the heat, add a finishing touch — a small squeeze of lemon, a drizzle of good olive oil, chopped parsley or chives, or a final grind of black pepper. Serve immediately; dry-seared mushrooms lose their magic sitting under a lid.
Why It Works: The Science in Brief
Water can only get so hot. As long as free liquid is in the pan, evaporation keeps the surface at or just above 212°F / 100°C, which is far too cool for the Maillard browning that gives seared food its color and flavor. Adding fat early makes things worse: oil and butter can climb well above that, but the water boiling off the mushrooms cools them and caps the effective pan temperature. By starting dry, you let the mushroom's own moisture do the cooling work it needs to do, then get it out of the way. The moment the pan goes quiet-to-sizzle, the surface temperature recovers, and browning begins within seconds.
- Maillard browning needs roughly 280–330°F / 140–165°C and dry surface contact; steam blocks both.
- Salt early pulls additional water out of the mushrooms by osmosis, lengthening the steaming phase.
- Garlic and shallot contain sugars and amino acids that scorch in well under a minute on a dry, hot pan — hence the "fat and aromatics last" rule.
- The technique was popularized for home cooks in the early 2000s through food-science writing — Harold McGee, the Modernist Cuisine team, Mark Bittman, and J. Kenji López-Alt — though restaurant cooks had been doing it for decades.
Troubleshooting
Most failures with this technique are crowding, premature salt, or premature stirring. If the pan floods and won't dry down, the mushrooms were either too wet going in, packed too tightly, or cooked over heat that was too gentle. Tip the pan and spoon off liquid rather than covering it (covering traps steam and makes the problem worse). If the mushrooms scorch before browning, the heat was too high or the pan was too empty of food. With wild mushrooms of mixed density, sear each variety separately so the wetter ones don't drown the drier ones.
- Crowded pan → gray, steamed mushrooms. Fix: smaller batches or a larger skillet.
- Pan won't dry down → heat too low or mushrooms waterlogged. Fix: increase heat briefly, drain off liquid, or pat mushrooms drier next time.
- Burning before browning → heat too high for the volume of food. Fix: reduce heat, add a touch of fat to arrest scorching, and don't leave the pan unattended.
- Uneven browning in a mixed wild-mushroom batch → mismatched water contents. Fix: sear chanterelles, maitake, and hedgehog mushrooms separately.
Common uses
Tips & pitfalls
- Get the pan genuinely hot before the mushrooms go in — a drop of water should dance and evaporate in under a second.
- Resist stirring for the first 2–3 minutes; a crust forms only on undisturbed contact with the hot metal.
- Salt at the very end, or right after the fat goes in — never before, since salt pulls out more water and extends the steaming phase.
- If the pan floods and won't reduce, briefly increase the heat or tip the pan and spoon off excess water; never cover, which traps steam.
- Cut pieces to a uniform size (around ¼-inch / 5–6 mm for cremini) so they release water and brown at the same rate.
- Skip the non-stick pan — you want fond, and you want surface temperatures that non-stick coatings can't safely reach.
- Add butter, garlic, shallot, and woody herbs (thyme, rosemary, sage) only after browning; they scorch in seconds on a dry screaming-hot surface.
- Finish with an acid (sherry vinegar, lemon juice, or wine) to brighten the deep, earthy flavor that dry-searing concentrates.
Good to know
- Primary goal
- Drive off internal mushroom moisture (roughly 80–90% water by weight) before adding fat, so the pan surface can climb above 212°F / 100°C and trigger browning.
- Best equipment
- Wide, heavy, high-heat-retaining pan: 12-inch cast iron, carbon steel, or heavy stainless steel. Non-stick is unsuitable because it caps temperature and discourages fond.
- Heat level
- High. The pan must be fully preheated so released water evaporates quickly rather than pooling and stewing the mushrooms.
- Crowding rule
- One single, uncrowded layer. Piled mushrooms trap steam and will never brown; cook in batches or use two pans.
- Time
- Roughly 5–10 minutes for a single layer of sliced cremini or button mushrooms; dense varieties such as king trumpet and large portobello caps take longer.
- When to add fat
- Only after released liquid has nearly fully evaporated and the pan begins to sizzle dry with the mushrooms showing color.
- When to salt
- Late. Salt draws out moisture by osmosis; salting early extends the steaming phase and hinders browning.
- When to add aromatics
- Garlic, shallot, and woody herbs (thyme, rosemary, sage), along with butter, go in after browning — they scorch easily in a dry, screaming-hot pan.
Also called
dry-brining-mushrooms · dry pan searing
Related

Sear
Blast the surface hot for a deep-browned, savory crust

Sauté
Cook quickly in a little fat over lively heat, tossing as you go

Stir-Fry
Toss bite-sized pieces over roaring heat for fast, smoky cooking

Pan-Fry
Crisp food in a shallow layer of hot fat, turning once or twice

Deep-Fry
Submerge in hot oil for an all-over crackling crust

Roast
Cook uncovered in dry oven heat for browned edges and tender centers

Bake
Cook with steady, surrounding oven heat — the soul of bread and pastry

Broil
Hit food from directly above with fierce overhead heat