Prep & Assembly
Rolling Out Dough
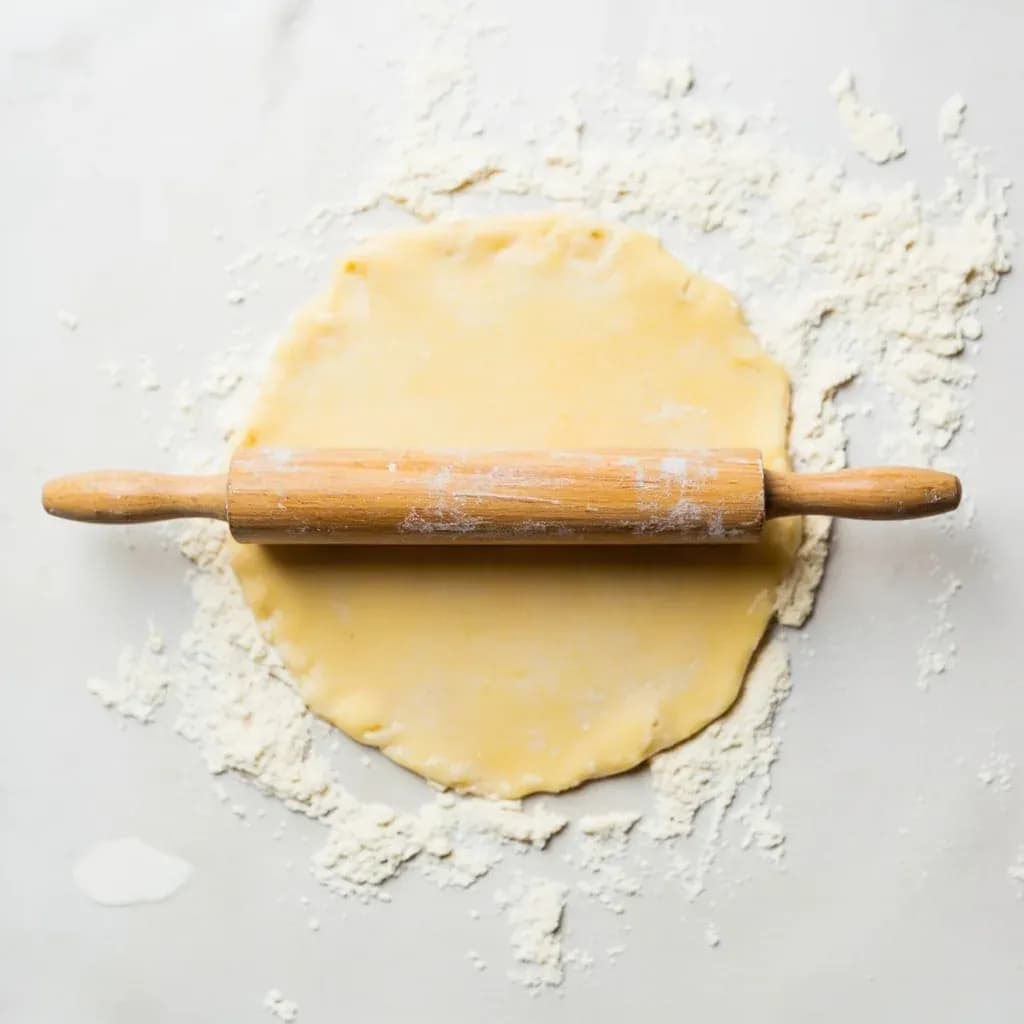
Flattening dough to an even thickness with a rolling pin for crusts, wrappers, and flatbreads.
Rolling out uses a rolling pin to flatten a ball of dough into an even sheet of the desired thickness and shape. It is fundamental to pie and tart crusts, pasta, flatbreads, and dumpling wrappers, where uniform thickness ensures even cooking. Flouring the surface lightly and rolling from the center outward keeps the dough from sticking and tearing.
Rolling out dough is the act of flattening a rested mass of dough into a sheet of controlled, even thickness, almost always with a rolling pin. The goal is not just thinness but uniformity: a pie crust or cookie that bakes from edge to edge without raw spots or burned rims, a pasta sheet that cooks in the same time across the whole sheet, a flatbread that puffs evenly. Equally important, rolling redistributes the dough's gluten and fat in a way that affects final texture — a tender, flaky tart shell or a snappy cracker depends on rolling done with restraint and care.
Dough behavior during rolling is governed by temperature and gluten development. Butter- and shortening-based doughs should stay cold (around 40–45°F / 4–7°C) so the fat remains in discrete flakes rather than absorbing into the flour; warm dough sticks, tears, and produces a tough, greasy crust. Meanwhile, the gluten network relaxes and tightens as it is worked, which is why nearly every dough benefits from a rest both before rolling (30 minutes or so after mixing) and after (5–15 minutes once rolled). Skipping either rest leads to spring-back, shrinkage in the oven, and misshapen final products.
For all its simplicity, rolling is one of the more technique-sensitive steps in the pastry kitchen. It rewards a light touch, the smallest amount of flour possible, and an awareness of how pressure, rotation, and rest work together. Hand rolling competes with mechanical sheeting (pasta machines, stand-mixer sheeter rollers) for the most precise results, and the choice of method depends on the dough and the dish at hand.
- Difficulty
- Easy
Types & varieties
Roll from the middle outward, rotate dough a quarter turn every few passes; the standard method for pie, tart, and cookie doughs.
Push from the thick edge toward the center; used for puff pastry, croissants, and other laminated doughs to preserve the butter layers and avoid sealing them into the dough.
Place dowels or thickness rings on either side of the dough to act as rails; guarantees uniform thickness, used for cookies, fondant, and pastry.
Dough is sandwiched between sheets of parchment or plastic and rolled without added flour; ideal for sticky or chocolate doughs and for thin pasta.
Cold stone surface keeps butter-based doughs firm throughout rolling; favored by professional pastry chefs.
Hand-crank or stand-mixer pasta attachments pass dough through progressively narrower rollers; the most consistent method for pasta, laminated dough, and cracker dough.
How to do it
- 1
Chill the dough
Butter, shortening, or laminated doughs should rest in the refrigerator for at least 30 minutes (or per the recipe) after mixing. A cold dough is firmer, less sticky, and yields a flakier result.
- 2
Prep the surface and pin
Lightly flour a wooden board, lay down a silicone mat, or set up two sheets of parchment. Have a bench scraper, ruler or dowels, and extra flour within reach.
- 3
Position the dough
Place the dough in the center of the work surface. If it is a disc, flatten it gently with the heel of your hand into a thick, even puck about 1 inch thick — this gives the pin a head start and prevents the edges from cracking.
- 4
Anchor and begin rolling
Set the rolling pin in the middle of the dough. Press down lightly and roll outward in a single smooth stroke. Lift the pin back to center rather than dragging it. Repeat, working outward in a star pattern.
- 5
Rotate and repeat
After every 2–3 strokes, turn the dough a quarter turn. This keeps the shape round and signals when one side is getting thinner than the other.
- 6
Check thickness
Periodically lift the dough with the bench scraper and feel it, or measure with a ruler or dowel rails. For most pie and tart doughs, stop at about 1/8 inch (3 mm); for pizza, 1/8 to 1/4 inch; for cookies, 1/4 inch or per recipe.
- 7
Rest the rolled sheet
Slide the rolled dough onto a sheet pan (still on its parchment if using) and chill 5–15 minutes. This relaxes the gluten so cut edges stay sharp and the dough holds its shape in the oven.
- 8
Transfer and shape
Roll the dough loosely around the pin, unroll it over the pan or mold, and gently press it into place without stretching. Trim even with the rim or per the recipe.
Choosing a rolling pin
The right pin is largely a matter of feel and the dough at hand. Each style offers a different balance of control, weight, and chill.
- French tapered pin: narrow at the ends, giving the most control for pie, tart, and small pastry work; favored by most pastry chefs.
- Ball-bearing pin: handles rotate on bearings inside the body, so the pin glides rather than drags; good for beginners or large sheets and easier on the wrists.
- Straight (American) dowel pin: heavier and simpler, delivers sheer force; works well for stiff doughs like bagel, matzo, or cracker dough.
- Marble pin: stays cold in the freezer and provides weight and chill in one tool — a strong choice for laminated dough and very buttery pastry.
- Marked pin: engraved rings along the barrel that act as a built-in ruler for repeatable thickness, useful for cookies and tarts.
Working with laminated doughs
Puff pastry, croissants, and Danish contain thin, discrete layers of butter folded into dough, and they demand a more careful hand than a single-stage dough.
- Keep everything cold — dough, pin, and surface. A marble slab or chilled pin buys valuable time.
- Roll outward from the center rather than back and forth, which can smear the butter layers together.
- Use thickness rings or dowel rails; precision matters more here than for most doughs.
- Rest the dough between every fold or two so the butter re-firms and the gluten relaxes.
- If butter breaks through the surface, stop, chill the dough, and dust the spot sparingly with flour before resuming.
Common uses
Tips & pitfalls
- Keep butter- and shortening-based doughs cold; if the dough softens and sticks, slide it onto a sheet pan and chill for 10 minutes before continuing.
- Dust the bench with the minimum flour needed, or roll between two sheets of parchment to avoid drying out the dough.
- Start rolling at the center and push outward; never run the pin back and forth over the same spot, which thins the middle faster than the edges.
- Rotate the dough a quarter turn every 2–3 passes to keep it round and even, especially with a tapered French pin.
- Rest the rolled dough 5–15 minutes in the fridge before cutting or shaping — this relaxes the gluten so cut shapes hold their size.
- Use dowels, pastry rings, or a marked rolling pin to hit an exact thickness for repeatable cookies, tarts, or laminated dough.
- Never stretch dough to fit a pan; always roll it slightly larger and let it drape in — stretched dough shrinks back during baking.
- Roll away from your body and let your shoulders, not just your wrists, do the work to keep even pressure.
- A cold marble slab or chilled French pin (store in the freezer) buys you extra time with laminated or buttery doughs.
- If the dough springs back, let it rest 5–10 minutes — the gluten is tight; more force will only toughen it.
Good to know
- Primary tool
- Rolling pin (straight, tapered, or ball-bearing)
- Dough temperature (butter-based)
- 40–45°F (4–7°C) — cold but pliable
- Pie/tart shell thickness
- 1/8 inch (3 mm)
- Pizza thickness
- 1/8 to 1/4 inch (3–6 mm); thinner for Neapolitan
- Fresh pasta thickness
- Setting 6–7 on a hand-crank machine, roughly 1–1.5 mm
- Cookie dough thickness
- 1/4 to 3/8 inch (6–10 mm) before cutting
- Rest after rolling
- 5–15 minutes in the fridge to relax gluten
- Difficulty
- Beginner; higher precision needed for laminated doughs
- Work surface options
- Wooden pastry board, marble slab, silicone mat, or parchment
- Anti-stick options
- Bench flour (light dusting), parchment, plastic wrap, silicone mat
- Flouring rule of thumb
- As little as possible — over-flour toughens the dough and can dry it out
Also called
Wrapper Rolling · Rolling Pin Work
Dishes that rely on it
Related

Whisk
Beat ingredients smooth and aerated with a looping wire motion

Sift
Pass dry ingredients through mesh to aerate and remove lumps

Strain
Pour through mesh to separate solids from liquid for a smooth result

Filter
Pass liquid through fine material to clarify out the smallest particles

Rice
Press cooked potatoes through small holes for fluffy, lump-free texture

Mash
Crush soft cooked food into a rustic, creamy purée

Grind
Crush food into a coarse to fine texture, from spices to meat

Grate
Shred food into fine bits against a sharp-toothed surface