Heat & Fire
Stacking Dutch Ovens (Shared Coals)
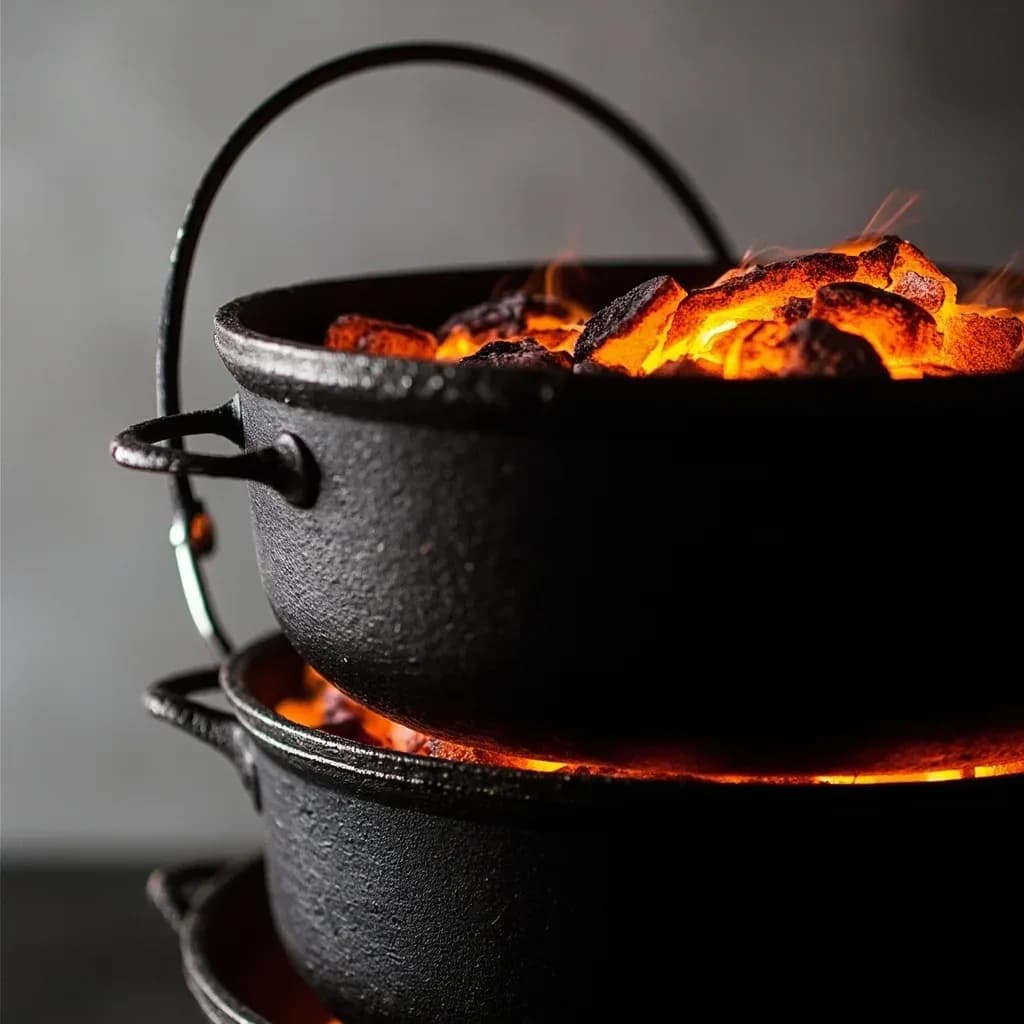
Stacking lidded Dutch ovens so one set of coals heats several pots at once over a campfire.
This camp-cooking technique stacks multiple lidded cast-iron Dutch ovens on top of one another, with hot coals placed on each lid so the embers heat the pot above and below simultaneously. It cooks several dishes at once while economizing on fuel and space at a fire. Cooks balance the number of coals on top versus underneath to set baking, roasting, or simmering heat for each level in the tower.
Stacking camp Dutch ovens is a heat-management technique in which two or more lidded cast-iron pots are tiered directly on top of one another so the lid of the lower oven becomes the cooking floor of the upper pot. A shared charcoal arrangement heats the entire stack: a ring of coals under the bottom pot, a ring of coals on every lid, and the lower oven's own lid radiating heat upward to the base of the pot above. The result is a self-contained cooking system capable of producing a full meal — main, side, and bread or dessert — from one fire.
The technique matters in camp, chuckwagon, and competition cooking because it lets a cook run several dishes at once without building separate fires. Fuel use drops noticeably: each upper oven in a stack skips its own bottom-coal ring, so a two-oven stack uses three rings total where two separate solo ovens would use four. The trade-off is that heat control becomes the cook's responsibility — a stacked oven runs hotter than a single one, and mismatched diameters or a misplaced coal pile will scorch the upper pot's underside in minutes.
The cast iron between the pots stores and re-radiates heat, so the lower oven's lid effectively preheats the upper pot's base. That is why the upper oven still needs its own top ring of coals — where the bulk of its cooking heat comes from — but can run with no bottom coals at all. Coal counts shift with each tier: the lower oven sheds a few top coals, the upper oven takes a full top ring and nothing underneath, and the whole stack settles into the steady ~350 °F (175 °C) zone that baking and braising demand.
- Difficulty
- Medium
Types & varieties
Lower oven sits on its legs on bare ground or a brick ring; its flat lid becomes the platform for the upper pot. The standard two-pot method.
Bricks form a ring around the lower oven to contain bottom coals and cradle the upper pot's legs at a uniform height.
Three ovens tiered on a sturdy lid or trivet; reserved for competition cooking and large groups, with three rings of top coals and staggered start times.
An extra lid turned upside-down between pots acts as a flat, slightly elevated cooking surface for the upper oven's base — useful when frying or simmering on top.
Ovens set into a shallow pit of pre-burned coals; the lower oven draws radiant ground heat while additional ovens stack above on lids.
How to do it
- 1
Plan the menu and match the ovens
Pair a 12-inch oven on top with a 12-inch (or slightly larger) oven on the bottom so the upper pot's legs sit flat on the lower lid. The upper oven runs hotter, so put the quicker-cooking or more delicate dish — breads, cobblers, quick vegetables — on top and the heartier braise or stew on the bottom.
- 2
Light the charcoal early
Fill a charcoal chimney with briquettes and light 25–30 minutes before cook time. Coals are ready when covered in a thin layer of white ash; flame-ups from under-burned coals will scorch cast iron.
- 3
Set up a safe, level station
Work on bare soil, a concrete pad, or a fire-resistant table. Keep a lid-lifter, leather gloves, a long-handled spatula, and a bucket of water within reach. Block wind with a foil or stone windshield.
- 4
Place and load the lower oven
Set the bottom oven on its three legs on the level surface, add the food for this pot, and seat the flanged lid flat-side-up so it forms a stable platform.
- 5
Lay the bottom coal ring
Arrange 6–8 ashed briquettes in a single ring around the base, extending 1–2 inches beyond the oven wall. Do not pile coals under the center.
- 6
Stack the upper oven
Set the second oven, already loaded with food, directly on the lower oven's lid. Its three legs should rest flat on the lid without rocking.
- 7
Add the upper coal ring
Place 12–14 briquettes in a single ring on top of the upper lid, again extending 1–2 inches beyond the rim. This ring supplies most of the upper oven's heat.
- 8
Bring up to temperature
Let both ovens pre-heat for 10–15 minutes. Listen for the food to start sizzling; that confirms the cast iron has reached cooking temperature.
- 9
Rotate and monitor
Every 10–15 minutes, lift the upper lid, turn the food, and rotate both lids a quarter turn in opposite directions to even out hot spots. Add fresh coals to the top ring every 30–45 minutes to hold temperature.
- 10
Check doneness and serve
Test with a long-stem thermometer or by feel. Lift the upper oven off with gloved hands onto a trivet, then open the lower oven. Rest meat 5–10 minutes in the closed pot before serving.
The shared-coal principle
Stacking works because cast iron is a generous heat reservoir, and a Dutch oven's flanged lid is flat enough to act as a second cooking surface. When the upper pot rests on the lower lid, three heat sources combine to cook its contents: radiant heat from the top coal ring, conducted heat through the cast-iron wall, and the steady re-radiated heat coming up from the lower lid beneath it. The lower lid does the job bottom coals normally would, which is why you can drop the bottom-coal count on the upper oven to zero without losing temperature. The cost is a hot, heavy stack that needs constant attention — a stacked pot loses heat fast when a lid is lifted, and a single misplaced coal can scorch a dish in the time it takes to test it.
- Lower oven cooks from below (bottom ring) and above (its own top ring), with its lid re-radiating heat upward to the upper pot.
- Upper oven cooks almost entirely from its top coal ring; the lower lid supplies steady, even bottom heat.
- Cast iron's thermal mass keeps temperatures stable through short lid lifts but drops quickly during long checks — work fast.
- Wind breaks, foil shields, and steady coal replacement are the difference between a stack that holds 350 °F and one that runs away to 425 °F.
Coal counting for a stack
Most stack failures come down to coal math. A single 12-inch camp oven at 350 °F wants 12 top and 6–8 bottom briquettes; once that oven becomes the lower half of a stack, it loses some of its top-heating job to the upper pot and can shed 2–3 top coals. The upper oven, in turn, takes a full top ring (12–14) and no bottom coals at all. Use this baseline and adjust for wind, ambient temperature, and the dishes involved — breads and cobblers on top want every coal you can give them; a slow braise on the bottom wants fewer top coals so it doesn't burn down before it tenderizes.
Common uses
Tips & pitfalls
- Light briquettes in a charcoal chimney 25–30 minutes ahead so they're fully ashed before you count them; open-flame coals will scorch the cast iron.
- Count coals for each oven separately — the upper pot still needs its own top ring, not just the radiant heat from below.
- Reduce the lower oven's top coal count by 2–3 briquettes, or rotate the lids a quarter turn every 10–15 minutes, to prevent the upper pot's underside from over-browning.
- Keep coals in a single ring just outside the lid edge; a center pile creates hot spots and burns the food directly above it — the single most common stacking mistake.
- Use a real Dutch oven lid-lifter rather than pliers; the wire bail handle gets dangerously hot and is easy to drop.
- Block wind with a foil or stone windshield before you light up — wind is the single biggest reason a stacked oven runs hot on one side and cool on the other.
- When stacking three ovens, expect the top pot to cook noticeably faster than the bottom; stagger start times so everything finishes together.
- Pre-warm both stacked ovens for 10–15 minutes before adding food so the cast iron holds a steady temperature through the cook.
Good to know
- Heat source
- Charcoal briquettes or hardwood lump charcoal, lit 25–30 minutes ahead and fully ashed over before counting
- Standard size
- 12-inch (6-quart) camp Dutch oven; 10- and 14-inch also work in matched sets
- Coal rule (12-inch oven, solo)
- 12 briquettes on top, 6–8 underneath; a 1:1 ratio for frying, 2:1 or 3:2 top-to-bottom for baking
- Coal placement
- Single ring around the rim, 1–2 inches beyond the lid edge; never piled under the center, where it scorches
- Maximum practical stack
- Two ovens is standard; three is possible on a sturdy lid but heat control becomes difficult
- Equipment required
- Camp-style Dutch oven with three legs and a flanged rimmed lid, metal lid-lifter, leather gloves, charcoal chimney
- Pre-heat time
- 10–15 minutes after coals are placed before adding food, so the cast iron holds steady temperature
- Approximate temperature
- ~350 °F (175 °C) in a 12-inch oven with 12 top and 8 bottom briquettes
Also called
stacking Dutch ovens · Dutch oven stacking
Related

Sear
Blast the surface hot for a deep-browned, savory crust

Sauté
Cook quickly in a little fat over lively heat, tossing as you go

Stir-Fry
Toss bite-sized pieces over roaring heat for fast, smoky cooking

Pan-Fry
Crisp food in a shallow layer of hot fat, turning once or twice

Deep-Fry
Submerge in hot oil for an all-over crackling crust

Roast
Cook uncovered in dry oven heat for browned edges and tender centers

Bake
Cook with steady, surrounding oven heat — the soul of bread and pastry

Broil
Hit food from directly above with fierce overhead heat