Heat & Fire
Tandoor Bread Baking
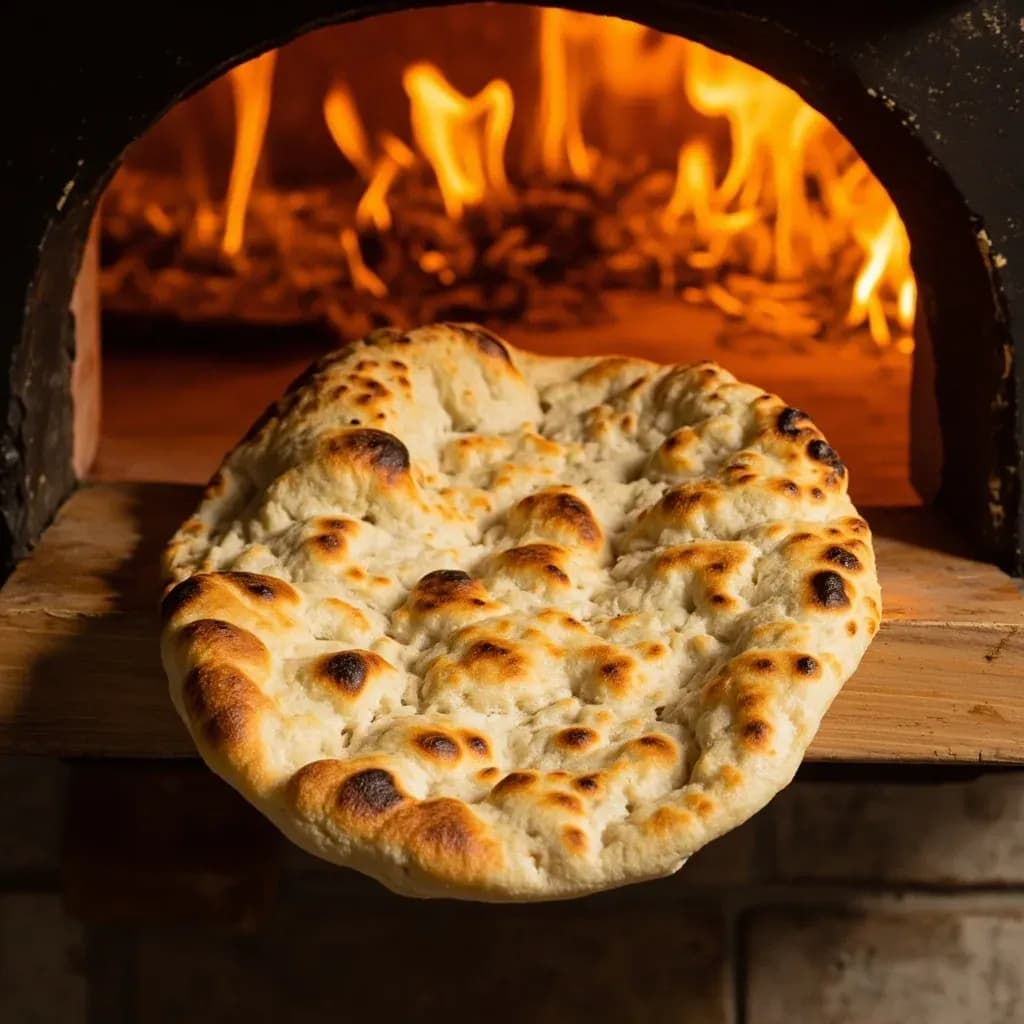
Slapping flatbread dough onto the searing clay walls of a tandoor oven.
Tandoor bread baking presses flattened dough against the inner clay walls of a blazing, charcoal- or wood-fired tandoor, where intense radiant heat puffs and blisters it within minutes. It produces naan, tandoori roti, and similar flatbreads with a smoky char and pillowy interior. The cylindrical oven can reach extreme temperatures, so breads cook fast and the same fire is used to grill skewered meats.
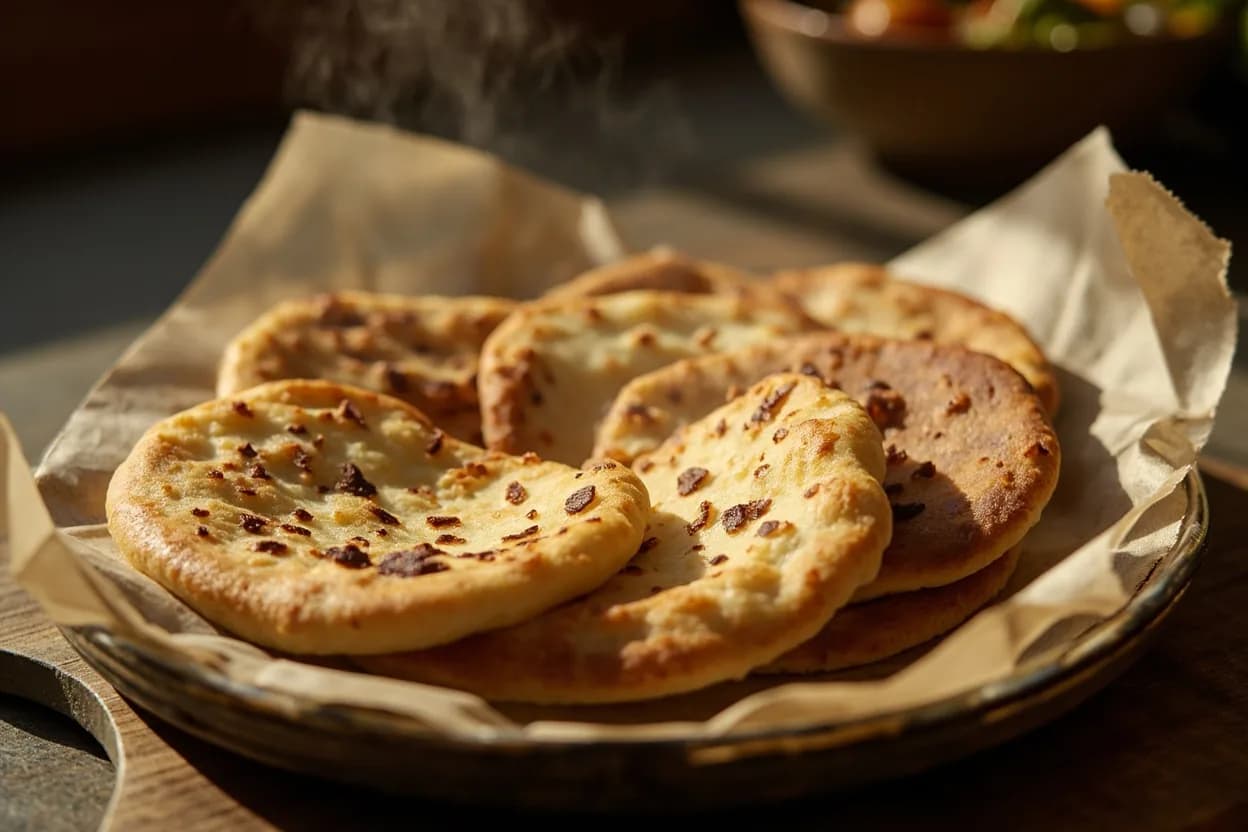
Tandoor bread baking is the practice of shaping a soft, hydrated flatbread dough and pressing it directly onto the radiating clay wall of a tandoor oven, where it cooks in 30 to 90 seconds from radiant heat alone. The bread sticks on contact — a thin film of surface moisture flashes into steam and anchors the dough to the clay — and releases the moment that surface dries and chars, at which point the baker peels it away with a long skewer or hooked tong. The result is unmistakable: a leopard-spotted, blistered exterior over a pillowy, steam-puffed interior that no griddle or sheet pan can quite imitate, finished with a brush of ghee while the crumb is still rolling with vapor. It is the defining bread technique of the Indian subcontinent, Afghanistan, Iran, and the Caucasus, traveling wherever a clay oven of this type is lit.
- Difficulty
- Hard
Types & varieties
Leavened white-flour flatbread, often enriched with yogurt, milk, or egg; the classic tandoor bread.
Unleavened whole-wheat flatbread cooked against the wall; chewier and more rustic than naan.
Leavened and frequently stuffed (paneer, potato, onion, keema), then sealed and baked.
Saffron- and milk-enriched leavened bread with a sweet, fragrant crumb; Mughal lineage.
Iranian leavened flatbread sometimes baked in tandoor-style clay ovens; scented with cardamom and poppy seeds.
Larger, often oval flatbread; peshwari is filled with nuts and dried fruit, kabuli is the everyday version.
Thin, large flatbread of the Caucasus and Iran, often baked on the walls of cylindrical clay ovens.
Mixed-flour flatbread (wheat and chickpea/besan) with spices; sometimes finished in a tandoor.
How to do it
- 1
Build and ripen the fire
Light hardwood charcoal (or wood) in the tandoor and let it burn down until the coals are evenly ashed and the inner wall radiates fierce heat — typically 20–45 minutes from cold. The wall is ready when a flick of water sizzles off it instantly and disappears in a single hiss.
- 2
Mix and rest the dough
Combine flour (maida for naan, atta for tandoori roti), salt, a leavening agent (yeast, starter, or chemical depending on style), yogurt or milk for tenderness, a little sugar, and water to a soft, pliable dough. Knead 8–10 minutes until smooth, then rest under a damp cloth for at least 1–2 hours — or overnight in the fridge — so the gluten relaxes and the surface stays tacky.
- 3
Portion and pre-shape
Divide the rested dough into balls of roughly 80–120 g for naan, 60–90 g for tandoori roti. Roll each ball smooth, lightly oil the surface, and rest 10–15 minutes so the dough does not spring back when rolled.
- 4
Roll out the breads
On a lightly floured surface, roll each ball into an oval or teardrop (the traditional naan shape) about 5–8 mm thick. Use the minimum flour possible — a tacky, damp surface grips the wall far better than a dry, floured one. For stuffed kulcha, roll, fill, seal firmly, then roll again to shape.
- 5
Slap onto the tandoor wall
Wet the back of your hand or a cloth with water. Lift the rolled dough, give a swift outward-and-upward slap so the dough clings to the inner wall roughly 20–30 cm below the rim, and pull your hand away immediately. Work in batches of 2–4 breads spaced around the wall.
- 6
Watch and remove
Within 30–90 seconds the surface will puff into large bubbles and develop brown-to-charred spots. Slide a long flat metal skewer (or a hooked chimta) between the bread and the wall and lift it out in one clean motion — do not let it sit once the bubbles have settled, or it will scorch and dry.
- 7
Finish and serve
Immediately brush the hot bread with melted ghee or butter; the fat soaks into the still-steaming crumb. Stack in a cloth-lined basket or on a wire rack to keep soft, and serve within minutes — tandoor breads are at their best hot.
- 8
Maintain the tandoor between batches
Add small amounts of charcoal to keep wall temperature steady, skim loose ash from the embers, and occasionally wipe the wall with a damp cloth on a stick to clear burnt residue before slapping a new batch.
Why the tandoor wall cooks bread differently
A tandoor is essentially a vertical clay furnace. The charcoal sits at the bottom and radiates heat upward and outward, but the wall itself is the cooking surface, and it stores far more thermal energy than a metal pan or stone deck ever can. When dough contacts that wall, three things happen almost simultaneously: the surface moisture flashes to steam and clings the dough in place; the outer starches gelatinize and dehydrate almost instantly, producing the charred, blistered skin; and the interior of the bread sets gently in the trapped steam, ending up moist and aerated rather than dried out.
- Radiant heat from the clay wall cooks from one side only, which is why the underside chars and the top stays pale and steamy.
- The wall is a heat reservoir, not a pan — it keeps delivering energy even as the bread cools its surface, so cooks are short.
- Breads cook top-to-bottom, not bottom-to-top: the wall-facing side sets first, the inside finishes last from the steam it has already trapped.
Home approximations
A backyard or restaurant tandoor gives the genuine article, but the technique can be imitated at home with care. The closest substitutes are a screaming-hot pizza steel or quarry tiles on the top rack of an oven, or a cast-iron skillet preheated on the burner; breads baked on these still miss the radiant clay wall, but preheating for at least 45 minutes and finishing under the broiler for a few seconds will deliver char and puff. Charring naan directly over the flame of a gas burner is the cheapest and most theatrical option.
- Pizza steel preheated 45–60 minutes on the top rack, then a 60–90 second broil at the end.
- Cast-iron skillet on high, flipped onto a direct flame (gas cooktop) for the last 10–15 seconds.
- Outdoor charcoal or wood-fired grill with a smooth stone leaned against the hot side of the firebox.
Common uses
Tips & pitfalls
- Wait for the wall to be properly ripened — the charcoal should be uniformly gray-ashed and the wall visibly radiating. An under-heated wall will not grab the dough and the bread will slump to the coals.
- Keep dough well hydrated and rested (1–2 hours minimum, longer if cold). Overly floured or dried-out dough slides off the wall instead of sticking.
- Wet your hand or a cloth just before each slap. The thin moisture film is what makes the dough adhere, and what lets it release cleanly once the surface dries against the heat.
- Slap with a confident, smooth motion and withdraw immediately. Hesitating over 400 °C+ heat burns the back of the hand and the forearm on the rim of the oven.
- Pull the bread the moment you see leopard-char spots and large air bubbles. Five to ten seconds longer and it blackens, hardens, and loses its pillowy interior.
- Brush with ghee or melted butter within seconds of removal so it soaks into the still-steaming crumb. Warm fat absorbs better than cold, but either beats brushing on a cooled bread.
- Rotate breads to opposite sides of the wall between batches to manage hot spots — the side facing the embers runs noticeably hotter than the back.
- If the dough refuses to stick, the wall is either too cool or has glazed over with soot and grease from previous batches. Burn the fire hotter and wipe the wall with a damp cloth on a stick before retrying.
Good to know
- Origin
- South and Central Asia — India, Afghanistan, Iran, the Caucasus
- Oven type
- Cylindrical clay tandoor, traditionally terracotta or mud-and-straw
- Wall temperature
- Roughly 400–480 °C (750–900 °F) at the inner wall
- Cook time
- 30–90 seconds per bread, depending on thickness and heat
- Adhesion method
- Surface moisture on the dough flashes to steam and grips the clay; bread releases as that layer dries
- Dough hydration
- 55–65% for naan-style breads; slightly lower for whole-wheat roti
- Retrieval tool
- Long flat metal skewer or hooked tongs (chimta or jhab)
- Difficulty
- Moderate to high — the slap and pull require a practiced hand over very high heat
Also called
Naan Baking · Tandoor Cooking
Dishes that rely on it
Related

Sear
Blast the surface hot for a deep-browned, savory crust

Sauté
Cook quickly in a little fat over lively heat, tossing as you go

Stir-Fry
Toss bite-sized pieces over roaring heat for fast, smoky cooking

Pan-Fry
Crisp food in a shallow layer of hot fat, turning once or twice

Deep-Fry
Submerge in hot oil for an all-over crackling crust

Roast
Cook uncovered in dry oven heat for browned edges and tender centers

Bake
Cook with steady, surrounding oven heat — the soul of bread and pastry

Broil
Hit food from directly above with fierce overhead heat