Prep & Assembly
Cleaning Foraged Mushrooms
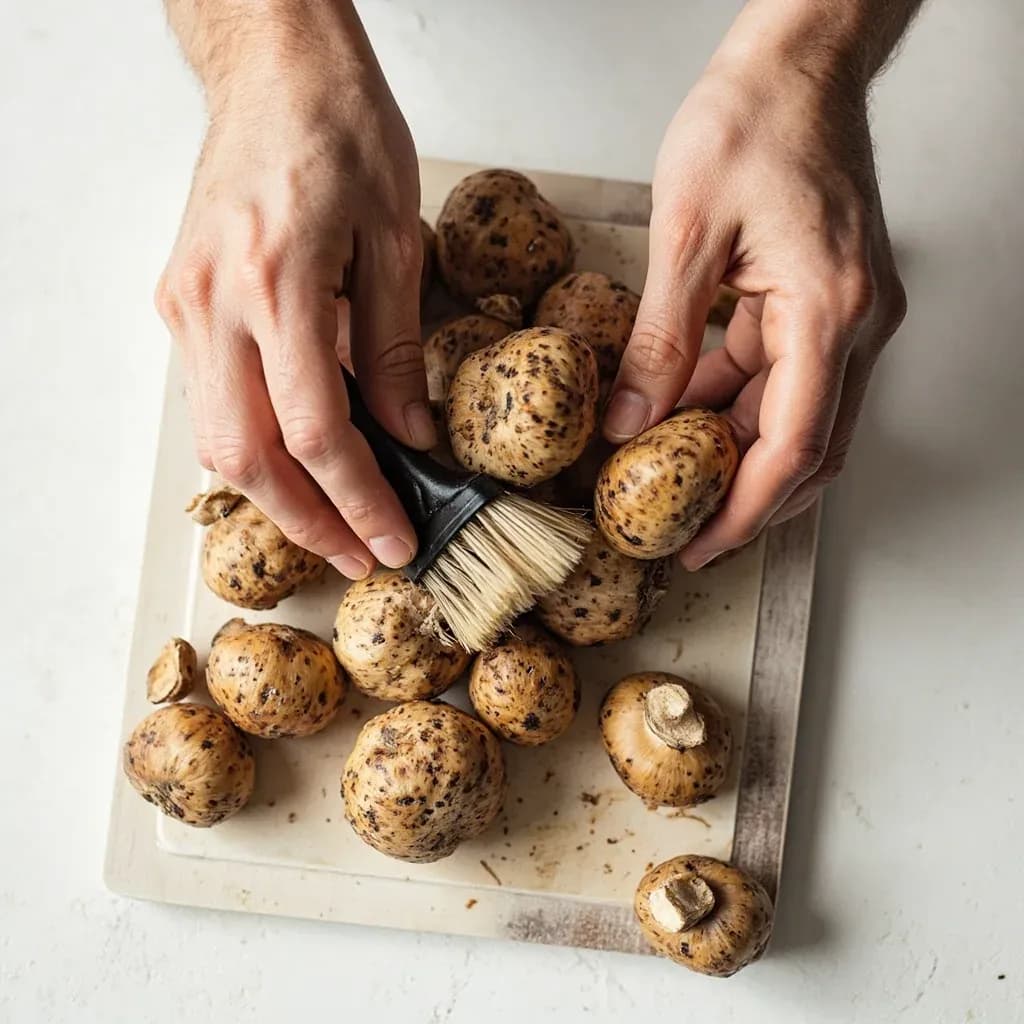
Brushing dirt, grit, and insects from wild mushrooms and sorting out any inedible finds.
Cleaning foraged mushrooms removes soil, pine needles, grit, and insects, usually by brushing or wiping rather than soaking, since mushrooms absorb water. Field cleaning and careful sorting also weed out damaged, wormy, or misidentified specimens. Trimming dirty stem ends and checking gills keeps the harvest safe and clean. A soft brush and a paring knife are the main tools.
Cleaning foraged mushrooms is less about washing and more about triage: sorting the harvest by species, trimming away debris, and removing insects and grit in a way that preserves flavor and texture. Foraged mushrooms arrive with the forest still on them—pine needles, leaf litter, soil, and frequently a healthy insect population—because they were never grown in the clean, controlled environment of a cultivated crop. The cook's job is to recover sound, flavorful flesh from that mess without turning the mushrooms into waterlogged sponges.
The old kitchen rule "never wash mushrooms" is a useful default but slightly overstated. The real principle is about water exposure: mushrooms are porous, and prolonged soaking causes them to absorb water, lose flavor compounds, and steam rather than sear in a hot pan. A brief, targeted rinse on a dense, very dirty specimen—followed by thorough drying—is perfectly acceptable. What ruins mushrooms is sitting in a bowl of water for twenty minutes.
The single biggest risk in any cleaning routine, however, is not water or grit. It is misidentification. Toxic lookalikes share baskets with edible species more often than beginners realize, and the sorting step—before any water touches the harvest—is where dangerous errors are caught. Clean thoroughly, but identify first.
- Difficulty
- Medium
Types & varieties
Hollow interior traps insects; halve lengthwise to inspect, brush, and use a salt-water soak for buggy specimens.
Forked false-gill ridges hold fine grit; brush along the ridges and wipe with a damp cloth—avoid rinsing.
Small, fragile, hollow funnel; swish briefly in water and drain through a cloth, accepting some loss of volume.
Dense caps tolerate a quick rinse; slice stems in coins from the base up—lower halves are often wormy, clean white flesh is fine to keep.
Clustered caps trap leaves, twigs, and dirt between fronds; tear into individual caps, brush thoroughly, and trim the woody base.
Firm orange parasitized flesh tolerates rinsing; scrape off adhering host-mushroom debris and trim discolored edges.
Toothed underside stays clean; brush and wipe—rarely needs water.
Cut top-to-bottom; only firm, uniformly white interior is safe. Any gill outline, yellow or olive flesh, or spore mass means it is not a true edible puffball—discard the whole fruiting body.
Porous, layered surface; wipe with a damp cloth and trim tough or pale edges—soaking makes it rubbery.
Generally clean; trim the woody base where they attached to wood and brush caps.
How to do it
- 1
Sort the harvest on a tray
Spread the mushrooms on a clean tray or sheet pan in a single layer. Pull out leaves, twigs, pine needles, and any obviously inedible finds. Verify each mushroom against a trustworthy field guide—lookalikes are the single greatest risk in foraging, and this is where dangerous misidentifications are caught.
- 2
Separate by species and condition
Group specimens by species, then split each group into 'clean,' 'lightly soiled,' and 'dirty or buggy' piles. Buggy mushrooms go to a salt-water bath; lightly soiled ones get brushed; the dirtiest may need a quick rinse. Mixing species at this stage is a common mistake—different mushrooms need different handling.
- 3
Trim tough or damaged parts
With a paring knife, cut off the dirty base of stems, any soft or slimy spots, and sections showing obvious worm channels. Save clean trimmings for stock; discard anything woody, rotten, or off-smelling. Lower stems of porcini and other boletes are often buggy—slice upward in coins and stop where the flesh is clean.
- 4
Inspect the interior of hollow mushrooms
Halve morels lengthwise and look for insects in the hollow. For puffballs, slice top-to-bottom to confirm a solid, uniformly white interior with no outline of gills or stem—any discoloration or embryonic structure means the specimen is not a true edible puffball and must be discarded in full.
- 5
Brush off loose dirt
Use a soft mushroom brush, pastry brush, or new soft toothbrush to sweep dirt from caps, gills or ridges, and stems. Work from the top down, flicking debris onto the tray. For chanterelles, work the brush along the false gills to dislodge trapped grit.
- 6
Wipe with a damp cloth for stubborn grime
Lightly moisten a paper towel or kitchen cloth and wipe each cap and stem. Change the towel as it picks up dirt. This handles most soil without adding meaningful moisture to the mushroom.
- 7
Rinse only when necessary
Reserve rinsing for dense, very dirty specimens—porcini caps, lobster mushrooms, black trumpets, or morels loaded with grit. Hold under cool running water briefly, swish, and drain. For morels with persistent bugs, soak 15–20 minutes in salt water (about 1 tablespoon kosher salt per quart), then drain and rinse once.
- 8
Dry thoroughly
Pat rinsed mushrooms dry with clean towels or spin in a salad spinner. Spread on a dry towel for a few minutes before cooking—any surface water will prevent proper browning and produce a soggy finished dish.
- 9
Final inspection and proceed
Look over each piece once more, discarding anything off-smelling or off-color. Cut larger mushrooms to size for the intended recipe. Cleaned mushrooms are now ready to cook, dry, or freeze.
When to wash and when to brush
The default for any foraged mushroom is to dry-clean first: brush, wipe, and trim. Water is a last resort, not a first step. Knowing when each approach is appropriate is the core skill.
- Brush and wipe only: chanterelles, hedgehog mushrooms, oysters, chicken of the woods, and any delicate or spongy polypore. These species absorb water readily and turn unpleasantly soft or rubbery when cooked wet.
- Quick rinse acceptable: porcini caps, lobster mushrooms, black trumpets, and dirt-laden morels. Their dense flesh tolerates brief contact with water, provided they are dried thoroughly afterward.
- Salt-water soak reserved for buggy porous mushrooms: morels are the classic case. The salt drives insects out of the hollow interior over 15–20 minutes; rinse once after soaking.
- Never soak: no mushroom benefits from sitting in water. If you would not run the faucet over a slice of bread for half an hour, do not do it to a mushroom.
Common mistakes
Most cleaning errors come from overcorrecting—working too hard, using too much water, or skipping the most important step.
- Soaking mushrooms in a bowl of water. This is the cardinal sin; the result is waterlogged flesh that will not brown.
- Using a stiff brush or scrubbing hard. The goal is to flick dirt off, not abrade the cap surface. A soft brush is enough pressure.
- Skipping the sort step. Running the entire harvest under the tap without separating species is a missed chance to catch toxic lookalikes—and a soggy mess.
- Throwing out buggy mushrooms. Worms indicate a fresh, healthy specimen, not a spoiled one. Cut along the worm channel and keep the clean halves.
- Storing cleaned mushrooms for a week. Once the protective soil is gone, mushrooms dehydrate and spoil faster. Clean only what you will cook in the next day or two.
Common uses
Tips & pitfalls
- Avoid soaking—mushrooms are porous and become waterlogged, then steam instead of browning in the pan.
- Use a soft brush; stiff brushes and high-pressure running water tear delicate caps and gills.
- If you rinse, do it briefly under cool water, then dry thoroughly with towels or a salad spinner before cooking.
- Slice every morel lengthwise before brushing; worms hide deep in the hollow interior and the cut is your best chance to find them.
- Halve every puffball; the cut is your ID check and your freshness check in one step—any gill outline or yellow flesh means discard the whole thing.
- Trim porcini stems in thin slices from the base upward and stop where you reach clean white flesh; save the trimmings for stock.
- Do not discard slightly buggy pieces. Worms mean the mushroom is fresh, not spoiled. Cut along the worm channel and keep the clean halves.
- Smell each batch; sour, fishy, or chemical odors indicate spoilage and the whole lot should be discarded.
- Some color change on bruising is normal for certain species—blue in some boletes, green in some Lactarius—and is not a sign of spoilage once the species is positively identified.
Good to know
- Difficulty
- Beginner to intermediate; varies significantly by species
- Active time
- 10–30 minutes per pound, depending on species and how dirty the harvest is
- Equipment
- Soft-bristled brush (mushroom brush, pastry brush, or soft toothbrush), damp cloth or paper towels, paring knife, cutting board, colander, salad spinner for drying
- Water use
- Minimal by default; brief rinse only when truly needed, never prolonged soaking
- Yield impact
- Expect 5–25% trim loss from stem bases, debris, and buggy sections
- Storage after cleaning
- Paper bag in the refrigerator, 2–5 days; cook before mushrooms turn slimy or dark
- Salt-water soak
- About 1 tablespoon kosher salt per quart cool water, 15–20 minutes, drives worms out of morels and other porous species
- Safety
- The greatest risk in any cleaning routine is misidentification; sort species before washing
Also called
Cleaning Foraged Mushrooms · Field Cleaning & Sorting
Related

Whisk
Beat ingredients smooth and aerated with a looping wire motion

Sift
Pass dry ingredients through mesh to aerate and remove lumps

Strain
Pour through mesh to separate solids from liquid for a smooth result

Filter
Pass liquid through fine material to clarify out the smallest particles

Rice
Press cooked potatoes through small holes for fluffy, lump-free texture

Mash
Crush soft cooked food into a rustic, creamy purée

Grind
Crush food into a coarse to fine texture, from spices to meat

Grate
Shred food into fine bits against a sharp-toothed surface