Transform & Preserve
Conching
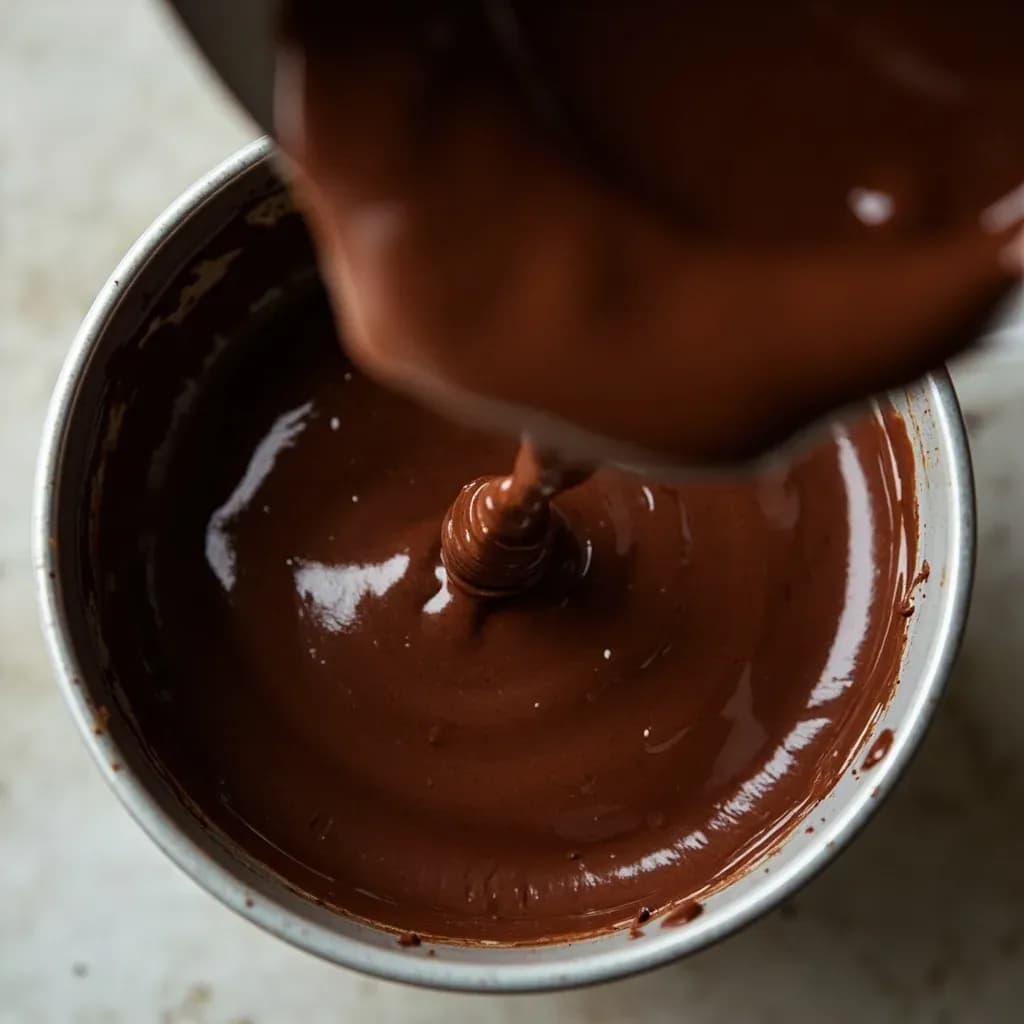
Continuously grinding and aerating chocolate for hours to smooth its texture and refine its flavor.
Conching is the prolonged grinding, kneading, and warming of chocolate mass to develop smoothness and flavor. The mechanical action coats cocoa and sugar particles in cocoa butter and drives off harsh volatile acids, transforming gritty, sour liquor into silky, mellow chocolate. Fine chocolates may be conched for many hours or even days.
Conching is the slow, heated, mechanically agitated stage of chocolate making that turns a refined, gritty mass of cocoa, sugar, and fat into the smooth, mellow, aromatic chocolate you recognize as fine. Invented by Rodolphe Lindt in 1879, it works on four fronts at once: sustained shear that smears cocoa butter over every particle of cocoa and sugar, controlled aeration that wafts away volatile acetic acid and excess moisture, gentle heat in the 55–80°C window that keeps the fat fluid, and long elapsed time that lets flavor chemistry continue working in the fat phase. None of those levers alone is sufficient; conching is the combination that does the job.
The practical payoff is twofold. Texturally, every particle becomes coated in cocoa butter so no sugar or cocoa grit touches the palate, producing the silky melt that distinguishes good chocolate from sweetened cocoa powder. Flavor-wise, harshness softens — green, acidic, or smoky notes recede — while rounder, more developed aromas emerge from continued esterification and slow Maillard-related reactions in the fat. A chocolate can be perfectly refined to under 30 microns and still taste raw and biting if it has not been conched; conversely, you cannot conche your way out of poorly fermented or burnt beans.
Conching is not the same as refining, though artisan melangers combine both. Refining crushes sugar and cocoa to a target particle size; conching assumes that work is done and focuses on coating, degassing, and flavor development. Industrial makers have largely shifted to short-time, high-shear conches that compress the cycle to hours, while bean-to-bar makers often favor traditional long conching or melanger-style processing for greater depth. Either way, conching is the step that turns a chocolate formula into chocolate.
- Difficulty
- Hard
Types & varieties
Lindt-style 48–72+ hour cycle with gentle agitation; deep flavor development, still favored by premium makers.
High-intensity shear in modern rotary or high-speed conches; cycles of 6–24 hours, standard in industrial chocolate.
Begins without the full cocoa butter dose to maximize shear and drive off moisture and volatiles; remaining butter is added later.
All cocoa butter is in the mass from the start; shorter, gentler cycle, common for milk chocolate.
Original Lindt design: a long trough with reciprocating granite or metal rollers.
Rotating paddles or agitators inside a jacketed vessel; the modern workhorse of mid- and large-scale production.
Intensive shear over short cycles, used for mass-market chocolate where throughput trumps depth.
Stone wheels running on a granite bed for 24–72 hours; artisan-scale method that combines refining and conching in one pass.
How to do it
- 1
Prepare the refined chocolate mass
Start with chocolate that has been roasted, winnowed, refined to under 30 microns, and combined with cocoa butter at recipe ratio. For milk chocolate, incorporate milk powder during refining so it is fully integrated before conching begins.
- 2
Load the conche
Transfer the chocolate mass into the conche vessel. For dry conching, hold back a portion of the cocoa butter; for wet conching, include all fat from the start.
- 3
Set temperature and begin agitation
Bring the mass to roughly 55–80°C via the jacket — darker chocolate toward the upper end, milk chocolate toward the lower end to protect dairy aromatics. Start rollers or paddles at low speed and ramp up once the mass is fluid.
- 4
Run the cycle
Agitate continuously. Traditional conching runs 48–72 hours; short-time industrial conching runs 6–24 hours. Throughout, monitor temperature, viscosity, and aroma — a clean, rounded smell (rather than acetic or raw) is the earliest sign you are on track.
- 5
Add remaining cocoa butter (dry conch only)
Once volatile acids and moisture have been driven off — typically after 60–70% of the cycle — gradually incorporate the reserved cocoa butter to bring the chocolate to a fluid, pourable consistency.
- 6
Add emulsifier if using
Add lecithin at roughly 0.3–0.5% of total weight in the final hours of the cycle. Adding it too early over-emulsifies the mass and steals viscosity control. Skip it entirely for clean-label chocolate and adjust fluidity with extra cocoa butter instead.
- 7
Test for finish
Pull a small sample and check three things: (1) rub a smear between thumb and forefinger — there should be no detectable grittiness; (2) taste on the tongue — acidity should be mellow, texture silky, melt clean; (3) smell — no lingering acetic or raw-cacao notes.
- 8
Discharge and temper
Discharge the finished chocolate into a tempering machine or onto a marble surface, then temper, mold, or enrobe as the recipe calls for. Conched chocolate that is not properly tempered will still bloom and lose snap.
- 9
Clean the equipment
Scrape and wash the conche thoroughly while it is still warm. Residual chocolate polymerizes onto surfaces on cooling and will scorch into the next batch if left behind.
What conching actually changes
Three things are happening in the conche, and a good operator watches all three. First, mechanical shear coats every cocoa and sugar particle with cocoa butter, eliminating the gritty mouthfeel that even finely refined chocolate can show. Second, controlled aeration and heat lift volatile acids — chiefly acetic acid from under-fermented beans — out of the mass, taking raw sourness with them. Third, time and warmth allow slow flavor reactions to continue in the fat phase, building the rounded, complex character associated with fine chocolate. None of these is a quick fix: shortening the cycle cuts texture, acidity removal, or aromatic development, often all three.
- Shear coats particles with fat; this is why even 20-micron chocolate can taste gritty without conching.
- Volatile acid removal is what tames harsh, sour cacao into something palatable.
- Flavor development continues via esterification and slow Maillard-related reactions in the fat phase.
- Conching cannot rescue poorly fermented, under-roasted, or burnt cacao — it only refines what is already there.
Dry versus wet conching
The choice between dry and wet conching is a lever for matching the process to the bean. Dry conching starts with the chocolate mass thick and lean — some cocoa butter is held back — which maximizes friction between particles and accelerates the removal of moisture and volatile acids. The reserved butter is folded in toward the end, once the harshness is gone, to bring the chocolate to fluid consistency. It is the right approach for acidic, under-fermented, or very fruity cacaos that need aggressive taming. Wet conching includes the full fat dose from the start; it is gentler and shorter, and is the standard for milk chocolate, where you want to preserve dairy aromatics rather than scorch them off.
- Use dry conching for highly acidic or under-fermented cacao that needs aggressive acid removal.
- Use wet conching for milk chocolate to protect delicate dairy and malt notes.
- Add reserved cocoa butter in dry conching at roughly 60–70% of the cycle, not sooner.
- If viscosity climbs too high mid-cycle, that is a sign of inadequate fat — add a portion of the reserved butter earlier.
Conching at artisan scale
Small-batch makers usually conch in a melanger: two heavy granite or stone wheels rotating on a granite bed, grinding and smearing the mass for 24–72 hours. The melanger combines refining and conching, which is efficient for a single 5–20 kg batch but means the operator has less independent control over particle size. The advantage is flavor: melanger-conched chocolate tends to develop deeper, rounder profiles than short-time industrial conches, in part because the cycle is long and the shear is gentle. The disadvantages are throughput, labor, and the temptation to open the lid and taste too often, which interrupts the steady thermal and aerodynamic conditions the process depends on.
- Feed chocolate into a melanger gradually over the first few hours; overloading stalls the stones.
- Resist opening the lid to sample; every opening cools the mass and disrupts volatilization.
- Expect 24–72 hours from start to fluid, finished chocolate; do not rush the final third of the cycle.
- A melanger that runs too cold will not conch — it will just sit. Keep the room and machine warm.
Common uses
Tips & pitfalls
- Do not shortcut conching time. Rushed chocolate tastes flat, acidic, and slightly gritty, no matter how fine the grind.
- Keep the mass in the 55–80°C window. Too cool and the chocolate thickens and stalls the shear; too hot and you scorch milk notes and drive off desirable volatiles.
- Use dry conching for very acidic, under-fermented, or unusually fruity cacaos that need aggressive acid removal.
- Add lecithin in the final hours only — early addition over-emulsifies and robs you of viscosity control.
- Aim to finish below 1% moisture. Cocoa mass entering conching should already be under 2% or you will never drive it low enough in a reasonable time.
- In milk chocolate, avoid over-aeration; trapped air bubbles cause pinholes in molded bars and brittle shells on enrobed pieces.
- Sample at intervals. The fingertip smear test (no grittiness) and a clean, rounded aroma are reliable finish indicators.
- If using a melanger, feed chocolate in gradually over the first few hours — overloading stalls the stones and leaves dry pockets.
- Conching cannot fix poorly fermented, under-roasted, or burnt cacao. It refines what is already there.
- Clean the conche between every batch; scorched residue will contaminate the next run and taint its flavor.
Good to know
- Invented by
- Rodolphe Lindt, 1879, in Bern, Switzerland
- Etymology
- From Latin concha (shell), after the shell-shaped trough of Lindt's original machine
- Typical duration
- 12 to 72+ hours, depending on chocolate style and conche type
- Working temperature
- Approximately 55–80°C (130–175°F)
- Target moisture
- Below 1% for shelf-stable finished chocolate
- Primary function
- Smooths texture, reduces bitterness and astringency, and drives off volatile acids and moisture
- Aeration effect
- Controlled air exposure removes acetic acid and other volatile acids
- Industrial evolution
- Short-time, high-shear conching (Lipp and successors) cut traditional cycles from days to hours
Also called
Chocolate Conching
Related

Confit
Cook slowly submerged in fat for silky tenderness and keeping

Cure
Draw out moisture with salt and time to preserve and concentrate

Pickle
Steep in acidic brine for bright, tangy, crunchy preservation

Ferment
Let friendly microbes transform food into tangy, complex flavor

Marinate
Soak in a seasoned mix to flavor and tenderize before cooking

Brine
Soak in salt water so meat stays juicy and seasoned throughout

Dehydrate
Slowly dry out moisture to concentrate flavor and extend shelf life

Cold-Smoke
Perfume cured food with smoke without cooking it through