Transform & Preserve
Dehydrating
Removing water from food with gentle warm air to preserve it or concentrate its flavor.
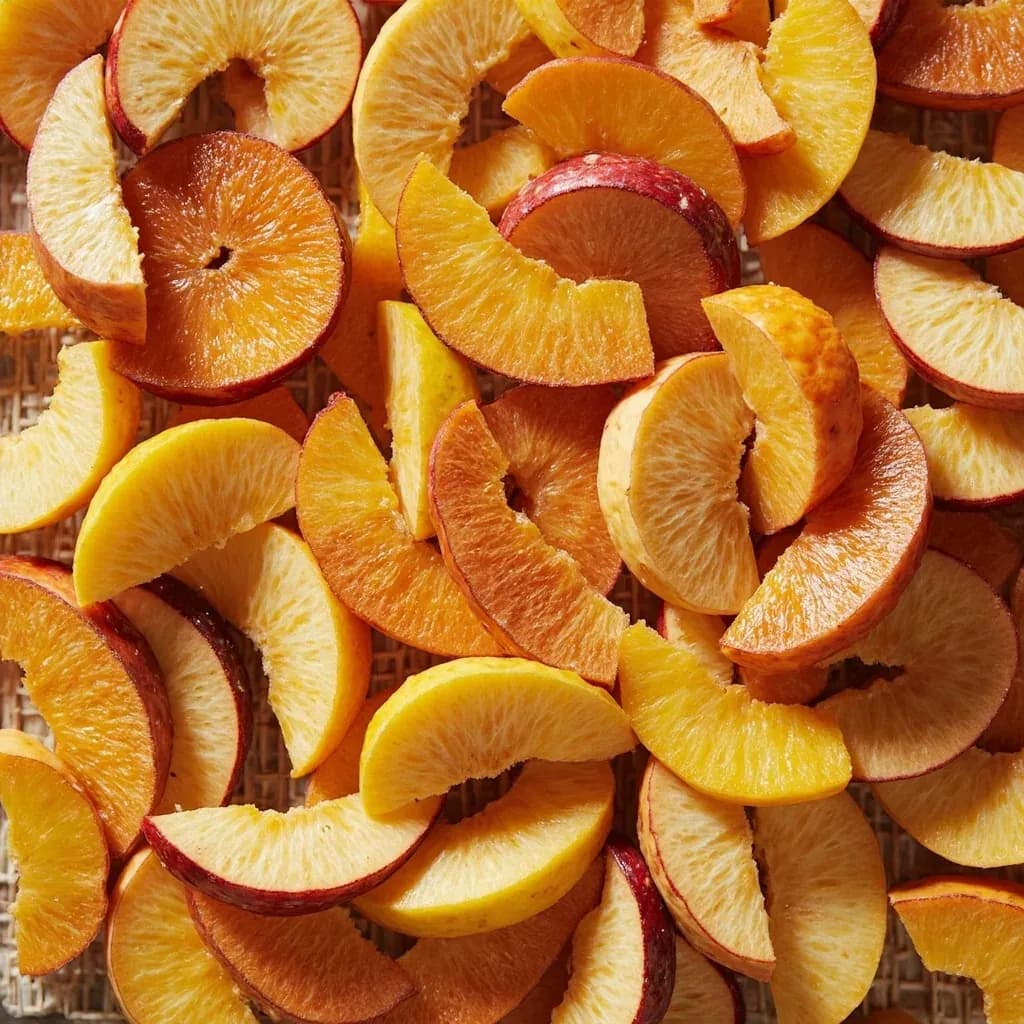
Dehydrating removes moisture from fruits, vegetables, herbs, or meat using low, steady warm air, which halts spoilage and concentrates flavor and sweetness. The dried food keeps for long periods and can be eaten as is or ground into powders for seasoning. Modern variations include powderization with maltodextrin to turn fats into dry powders, though the core principle is always low heat over time to drive off water without cooking.
Dehydrating is the controlled removal of moisture from food using gentle heat and moving air, one of the oldest preservation techniques known to cooking. By lowering water activity — the measure of unbound water available to microbes and enzymes — below roughly 0.60, dehydrating creates an environment in which bacteria, molds, and yeasts cannot grow, while the enzymes responsible for ripening and decay are largely inactivated. The method works on almost any food, from a sprig of oregano to a flank steak, and unlike canning or freezing, it requires no jars, no brine, and almost no energy to keep the finished product on the shelf.
The technique matters as much for flavor as for preservation. Water is a diluent: it carries sugars, salts, acids, and aromatic compounds past the tongue in low concentrations. Remove it, and those compounds stack on top of one another, which is why a sun-dried tomato tastes savory-sweet-umami in a way a fresh tomato only hints at. The same principle underlies dried mushrooms, jerky, raisins, and bottarga. Properly dried food is lighter, more portable, and intensely flavored, and the cook who learns to dry well gains a year-round pantry independent of season or freezer space.
Modern home equipment has made the technique more reliable than ever, but the principles have not changed since the Egyptians laid figs on reed mats: cut thin, dry evenly, control the rate of drying so the surface does not seal before the interior moisture escapes, and store the finished product in a cool, dark, airtight place. Dehydration is not a single technique but a family of related methods — sun, air, oven, electric, smoke, salt, and industrial freeze-drying — each suited to a different climate, food, and ambition.
- Difficulty
- Easy
Types & varieties
Traditional method using direct sunlight on open trays or rooftops; requires hot, dry, low-humidity climates and is widely practiced in the Mediterranean, Middle East, Mexico, and Southeast Asia.
Enclosed cabinet with a glass or black-panel solar collector that traps heat and channels airflow; faster, more sanitary, and more reliable than open sun drying.
Hanging herbs, chili ristras, garlic braids, beans, or cured sausages in a warm, well-ventilated space; needs no heat source and works well in dry climates.
Standard kitchen oven set to its lowest temperature (170–200°F) with the door propped open for airflow; accessible but uses significant energy and offers uneven heat.
Dedicated countertop appliance with a thermostat, fan, and stackable mesh trays; the most common modern home method and the most reliable for uniform results.
Industrial technique using vacuum and sublimation; preserves more color, aroma, and nutrients than heat-based drying but requires specialized equipment rarely found in home kitchens.
Combines dehydration with smoke; used for jerky, salmon, and sausages. Smoke compounds add antimicrobial properties and a distinct flavor.
Draws moisture out by osmotic pressure; used for capers, bottarga, salt cod, and citrus peels, often before further air or oven drying.
How to do it
- 1
Select and prepare the food
Choose ripe, unblemished produce or fresh, trimmed meat. Wash thoroughly; peel, pit, deseed, or remove cores and stems as appropriate. For jerky, trim all visible fat — fat oxidizes and turns rancid long before properly dried meat would spoil, ruining flavor and shelf life.
- 2
Cut to uniform size
Slice 1/8 to 1/4 inch thick. Uniform thickness is the single biggest factor in even drying; pieces of different sizes finish at different times and the slower ones may never reach a safe moisture level. A mandoline gives the most consistent results for firm vegetables and fruits, while a sharp knife works best for soft items like tomatoes or strawberries.
- 3
Pre-treat where appropriate
Dip pale fruits (apples, pears, bananas, potatoes) in a 1:4 lemon juice and water bath for 3–5 minutes to prevent browning. Blanch firmer vegetables such as green beans, broccoli, carrots, and corn in boiling water for 2–4 minutes, then shock in ice water to inactivate enzymes and lock in color. For jerky, marinate in a salt-and-vinegar-based cure, optionally with curing salt, and preheat the strips to 160°F (71°C) internal temperature for food safety.
- 4
Load trays in a single layer
Arrange pieces on mesh trays without overlap or crowding — air must circulate around every piece for moisture to escape. Pat the surface dry with a clean towel before loading to remove excess surface water.
- 5
Set temperature and dry
Run herbs at 95–110°F, fruits and vegetables at 125–135°F, and jerky at 155–165°F. Drying takes 4–24 hours depending on the food and slice thickness. In box-style dehydrators, rotate trays top-to-bottom and front-to-back every 2–3 hours to compensate for hot spots near the heating element.
- 6
Test for doneness
Cool a sample to room temperature — warm food always feels softer than it actually is. Properly dried fruit is leathery and pliable with no sticky centers; vegetables should be brittle (kale, carrots) or leathery (tomatoes, peppers) depending on type; jerky should bend and crack without snapping in two; herbs should crumble easily between the fingers.
- 7
Condition the dried food
Place the cooled, dried food loosely in a glass jar and set it in a dry spot for 5–7 days, shaking once a day. This equalizes residual moisture between pieces. If condensation appears on the jar, return the food to the dehydrator for another 1–2 hours and test again.
- 8
Store properly
Pack conditioned, fully cooled food into airtight containers — glass jars with tight lids, Mylar bags, or vacuum-sealed pouches. Add oxygen absorbers for storage beyond a few months. Keep in a cool (below 60°F), dark, dry place. Label every container with contents, batch, and date. Properly dried food keeps 6–12 months, often longer.
The science: water activity, not just water
Drying is effective because it lowers water activity (aw), not simply because it removes water. Water activity measures unbound, free water — the kind microbes and enzymes use. Bound water, locked inside starches and proteins, remains. Most bacteria need aw above 0.91, most yeasts above 0.88, and most molds above 0.80. Xerophilic molds, however, can grow down to roughly 0.60, which is why that lower threshold is the practical safe target for shelf-stable dried food — from raisins to biltong. Understanding this explains why some seemingly dry foods (commercial bread, for instance) still spoil, while a brittle, leathery strip of jerky keeps for a year on a shelf.
Conditioning and storage
Conditioning is the quiet step most home dehydrators skip, and it is the single biggest reason dried food molds in storage. After drying, individual pieces hold slightly different residual moisture. Packed tightly, the wetter pieces can raise the local humidity inside the jar and restart mold growth. Conditioning equalizes that moisture by sealing food loosely in a glass jar for 5–7 days and shaking daily; any condensation means more drying is needed. Once conditioned, food is packed airtight and stored cool, dark, and dry — ideally below 60°F — to protect color, flavor, and nutrients.
Common uses
Tips & pitfalls
- Cut food to uniform thickness (1/8 to 1/4 inch) so all pieces finish at the same time; a mandoline gives the most consistent results for firm produce.
- Avoid drying at too high a temperature — case-hardening creates a tough crust that traps moisture inside and invites mold weeks later.
- Rotate trays top-to-bottom and front-to-back every 2–3 hours in box-style dehydrators to compensate for hot spots near the heating element.
- Pre-treat pale fruits and vegetables in a 1:4 lemon juice and water dip for 3–5 minutes to prevent browning; blanch firmer vegetables for 2–4 minutes to inactivate enzymes and lock in color.
- For jerky safety, preheat strips to 160°F (71°C) before drying or use an acidulated cure with curing salt to control Salmonella and E. coli.
- Test doneness at room temperature — warm food always feels softer than it actually is, and a false read leads to under-dried, mold-prone storage.
- Condition dried food in a loosely sealed glass jar for 5–7 days, shaking daily; condensation means some pieces still hold moisture and need another 1–2 hours of drying.
- Cool food completely before storing; any residual warmth creates condensation inside containers and promotes mold growth within weeks.
Good to know
- Definition
- Preservation technique that lowers water activity in food by removing moisture through gentle heat and airflow, inhibiting microbial and enzymatic spoilage.
- Safe water activity
- Final water activity must drop below approximately 0.60 for safe shelf storage; typical targets are 15–20% moisture for fruits, about 10% for vegetables, and 10–15% for jerky.
- Temperature range
- Herbs 95–110°F (35–43°C); fruits and vegetables 125–135°F (52–57°C); jerky 155–165°F (68–74°C). Higher temperatures risk case-hardening the surface.
- Time range
- 1–3 hours for thin herbs; 4–8 hours for fruit leathers; 6–14 hours for sliced fruit; 8–24 hours for jerky and thick vegetable slices.
- Yield loss
- Tomatoes lose roughly 90% of their weight during drying; apples about 80%; herbs 70–80%.
- Storage life
- 6 to 12 months in airtight containers kept cool, dark, and dry; longer with oxygen absorbers, vacuum sealing, or Mylar bags.
- Jerky safety
- USDA recommends preheating meat to 160°F (71°C) internal temperature before drying to control Salmonella and E. coli.
- Historical roots
- Sun-drying of dates, figs, and grapes is documented in ancient Egypt around 5,000 years ago; air-drying and smoke-drying developed independently in nearly every food culture.
Also called
Dehydration · Drying · Powderization
Dishes that rely on it
Related

Confit
Cook slowly submerged in fat for silky tenderness and keeping

Cure
Draw out moisture with salt and time to preserve and concentrate

Pickle
Steep in acidic brine for bright, tangy, crunchy preservation

Ferment
Let friendly microbes transform food into tangy, complex flavor

Marinate
Soak in a seasoned mix to flavor and tenderize before cooking

Brine
Soak in salt water so meat stays juicy and seasoned throughout

Dehydrate
Slowly dry out moisture to concentrate flavor and extend shelf life

Cold-Smoke
Perfume cured food with smoke without cooking it through