Prep & Assembly
Double-Crust Pie Assembly
Building a pie with both a bottom and a top crust sealed around the filling.
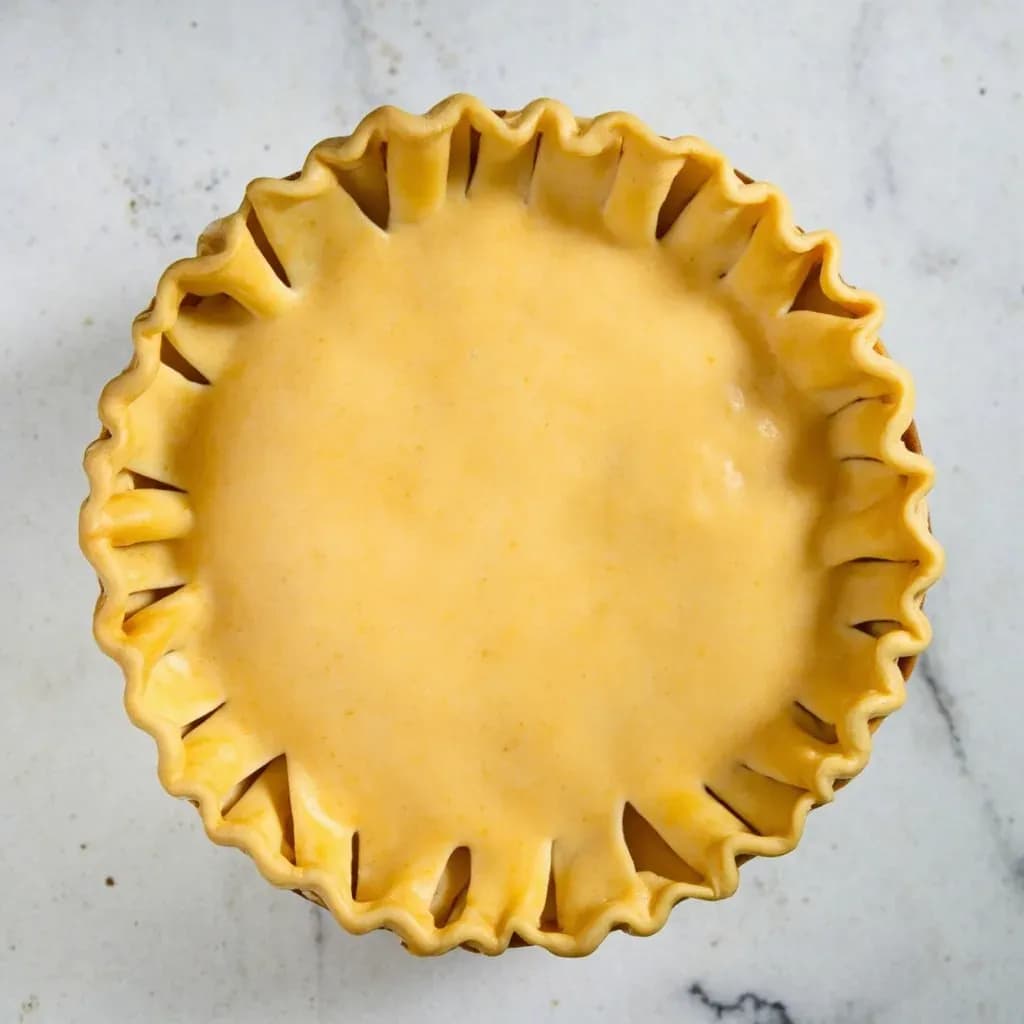
Double-crust pie assembly lines a pan with a bottom crust, adds the filling, then drapes a top crust over it and seals the edges before baking. Vents or a lattice are cut into the top to let steam escape so the crust stays crisp. The technique is standard for fruit pies and savory pot pies where a full enclosure holds a juicy filling.
A double-crust pie is the most fully enclosed expression of pastry work: a fitted bottom crust, a mounded filling, and a continuous top crust sealed to it at the rim. The defining act is the seal — the moment when top overhang meets bottom overhang, gets tucked under, and is crimped hard enough to hold back a bubbling, expanding filling through 45 minutes or more of oven heat. Done well, the two crusts bake into distinct flaky layers with a juicy, just-set interior between them; done poorly, they part company at the rim and the filling escapes onto the sheet pan.
What makes the technique its own discipline, rather than simply a bottom crust with something on top, is that the top crust must do two jobs at once. It seals in moisture and steam so the filling cooks in its own aromatic vapor, but it also has to release enough of that steam to keep the crust from going slack, pale, or soggy. That tension — trap the steam but vent the steam — is solved with a proper rim seal and a deliberate venting pattern, and it is the structural reason every step in double-crust assembly exists: cold dough, gentle fitting, generous overhang, real crimping pressure, and slits cut before baking.
The reward is a pie that slices cleanly into a tidy wedge with a defined top and bottom of pastry, holds its shape on the plate, and travels well. That portability and sliceability is why double-crust remains the canonical form for American fruit pies, British raised meat pies, and the savory pot pie — formats where you want a self-contained pastry parcel rather than an open face that must be eaten with a spoon.
- Difficulty
- Medium
Types & varieties
Full sheet of dough covering the filling; the classic American apple, cherry, and peach pie.
Woven strips of dough that allow more steam release and visible fruit; structurally still a double-crust pie.
A solid sheet with shapes (leaves, stars, hearts) cut from it before laying on, used decoratively over the filling.
Edges pressed with fork tines — quick, decorative, and a secure seal for fruit pies.
Thumb-and-index pinch forming a scalloped rope; the traditional finish for fruit and savory pies.
Thin dough strips woven along the rim for an ornate finish.
British pork pie and game pies use a hot-water crust molded around a shaped form, then capped.
How to do it
- 1
Chill the dough
Prepare your double-crust dough and divide it into two equal discs. Wrap each in plastic and refrigerate at least 2 hours; overnight is better. Cold dough is the single biggest factor in a flaky crust.
- 2
Prep the filling
Combine the fruit or savory filling with sugar, salt, spices, and thickener (tapioca, cornstarch, or flour). For juicy fruits, macerate 15–30 minutes, drain off the liquid, and reduce it in a saucepan to a syrupy consistency before returning it to the fruit. This step prevents a soggy lower crust.
- 3
Roll the bottom crust
On a lightly floured surface, roll one disc from the center outward into a 12-inch round about 1/8 inch thick. Rotate the dough a quarter turn every few strokes to keep it even. If it softens, slide it onto a floured sheet pan and chill 10 minutes before continuing.
- 4
Fit into the pie plate
Drape the rolled dough over a 9-inch pie plate. Gently lift and settle it into the contours without stretching. Trim with kitchen shears, leaving a 1/2 to 3/4 inch overhang all around. Refrigerate the lined plate while you roll the top.
- 5
Fill the pie
Spoon the filling into the chilled bottom crust, mounding slightly in the center — fruit will settle as it bakes. Pour any thickened juices over the top. Do not overfill; leave at least 1/2 inch of headspace below the rim.
- 6
Roll and apply the top crust
Roll the second disc into an 11-inch round. Brush the overhanging rim of the bottom crust with water or egg wash so the two crusts will adhere. Drape the top crust over the filling and center it.
- 7
Seal and crimp
Trim the top crust even with the bottom overhang. Tuck the overhang under itself so the doubled edge sits flush with the plate rim. Crimp firmly in your chosen style — fork, finger, or rope — pressing hard enough that the two crusts fuse and filling cannot escape.
- 8
Cut vents
With a sharp knife or pastry cutter, cut 4–6 slits radiating from near the center, or a central 1-inch round hole, or a decorative pattern. For a lattice top, weave the strips and seal their ends to the rim.
- 9
Finish the surface
Brush the top crust (not the crimped edge) with egg wash for a glossy brown finish. Sprinkle with coarse sugar if desired. For savory pies, brush with milk or egg yolk for color.
- 10
Bake
Place on a rimmed sheet pan. Bake at 400–425°F for 20–25 minutes to set the structure, then reduce to 350–375°F for another 30–45 minutes until the crust is deep golden and the filling bubbles vigorously through the vents. Tent the edges with foil if they brown too quickly.
- 11
Cool before slicing
Transfer to a wire rack. Fruit pies need 2–4 hours for the juices to set; savory pies need only 20–30 minutes. Slicing too early causes the filling to run.
The Two Seams
A double-crust pie has two distinct seals, and both matter. The first is where the bottom crust meets the pie plate — a gentle, unstretched fit that lets the dough shrink inward as the fat melts rather than pulling away from the rim. The second is the top-to-bottom seal at the rim, made by trimming with overhang, tucking the overhang under itself to double its thickness, and crimping firmly. This doubled, pressed rim is what holds back a filling that may rise several inches during baking. Press hard when crimping; a decorative scallop that looks lovely raw can spring open in the oven if the two layers were not actually fused.
- Bottom-to-plate seal: settle the dough without stretching; the rim itself is the anchor.
- Top-to-bottom seal: trim, tuck, and crimp; the doubled overhang is what holds under oven pressure.
- Glue the two crusts: brush the bottom rim with water or egg wash before draping the top so they adhere all the way around.
Venting and the Soggy-Bottom Problem
The top crust of a double-crust pie is working against itself: it must trap enough steam to cook the filling through, yet release enough to keep the dough from going gummy. Vent slits — four to six radiating cuts or a central 1-inch hole — are not decorative. Without them, steam pressure builds beneath the top crust, the dough turns pale and slack, and the seal eventually ruptures at the weakest crimp. The flip side of the venting problem is a soggy bottom: the steam that does escape condenses on the cooler lower crust, and a watery filling compounds the damage. Pre-thickening the juices by cooking them down with sugar and thickener before filling is the most reliable cure; baking on a preheated sheet pan is the second.
- Cut 4–6 slits or a 1-inch central hole; small pricks are not enough.
- Macerate juicy fruit with sugar and thickener, drain, and reduce the liquid to a syrup before filling.
- Bake on a preheated rimmed sheet pan to crisp the bottom and catch any drips.
- Tent the rim with foil or a pie shield if it browns before the filling is done.
Common uses
Tips & pitfalls
- Keep everything cold — flour, fat, water, rolling surface, and finished dough. If the dough softens while rolling, slide it onto a sheet pan and chill 10–15 minutes before continuing.
- Do not stretch the bottom crust into the plate; let it fall in and settle, then press gently. Stretched dough shrinks during baking and the filling leaks.
- For juicy fruit fillings, macerate with sugar and thickener for 15–30 minutes, drain, and reduce the liquid to a syrup before returning it to the fruit. This is the single most effective defense against a soggy lower crust.
- Trim both crusts to leave a 1/2 to 3/4 inch overhang. Tuck the overhang under itself so the edge is doubled, then crimp; folding in creates a sealed, thickened rim that holds filling in.
- Moisten the bottom rim with water or egg wash before laying the top crust — this is what actually glues the two crusts together. Press firmly around the entire circumference before crimping.
- Cut vents that are large enough and numerous enough. Steam from the filling must escape, or the top crust turns pale and floppy and the pie overflows.
- Brush the top with egg wash only — never the crimped edge overhang, or the crimp can fuse into a hard ridge and crack unevenly as the crust sets.
- Bake on a preheated sheet pan or rimmed baking sheet; it catches drips and conducts heat to crisp the bottom crust.
- If the edges brown too fast, tent with a pie shield or strips of aluminum foil for the remainder of baking.
- Cool the pie on a rack for at least 2 hours (fruit pies) or 30 minutes (savory pot pies) before slicing — fillings need time to set, otherwise they run.
Good to know
- Standard yield
- One 9-inch pie (about 8 servings) per batch of double-crust dough
- Bake temperature
- 400–425°F initial, reduced to 350–375°F to finish
- Bake time
- 45–75 minutes depending on filling
- Difficulty
- Intermediate — requires cold handling, rolling, and crimping skill
- Key equipment
- 9-inch pie plate, rolling pin, pastry brush, sharp knife or pastry wheel, bench scraper, rimmed sheet pan
- Dough resting
- Chilled 2 hours minimum, overnight preferred
- Egg wash
- 1 large egg beaten with 1–2 tsp water or milk
- Vent guidance
- Minimum 4–5 slits or a central 1-inch opening — steam must escape or crust pales and filling boils over
- Storage of assembled unbaked pie
- Refrigerate up to 24 hours; freeze solid on a sheet pan, then wrap, up to 3 months
Also called
Top-and-Bottom Crust · Covered Pie
Related

Whisk
Beat ingredients smooth and aerated with a looping wire motion

Sift
Pass dry ingredients through mesh to aerate and remove lumps

Strain
Pour through mesh to separate solids from liquid for a smooth result

Filter
Pass liquid through fine material to clarify out the smallest particles

Rice
Press cooked potatoes through small holes for fluffy, lump-free texture

Mash
Crush soft cooked food into a rustic, creamy purée

Grind
Crush food into a coarse to fine texture, from spices to meat

Grate
Shred food into fine bits against a sharp-toothed surface