Heat & Fire
Lid & Oven Rotation (Even Bake)
Turning dishes and adjusting lids during cooking to even out hot spots for uniform browning.
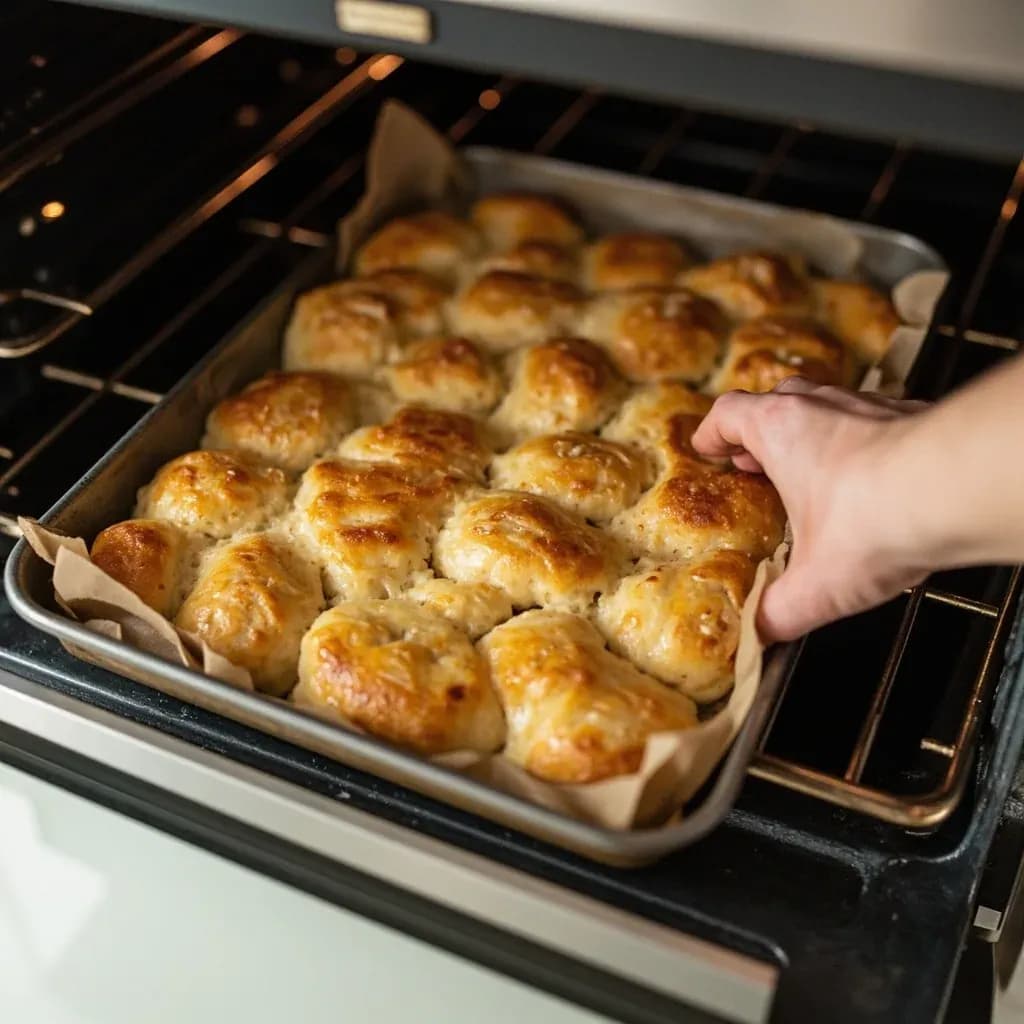
Lid and oven rotation is the practical habit of rotating a pan or tray partway through baking and removing or repositioning a lid to manage heat and moisture. Most ovens and stovetops have hot spots, so turning the food ensures even browning and rise, while lifting the lid lets steam escape for crisping. It is a small adjustment that prevents one side from over- or under-cooking.
Every home oven is, to some degree, an unfair oven. Heating elements radiate more strongly from the side they sit on, the rear corners trap heat, and the door side stays cooler than the walls — together producing temperature swings of 25°F (≈14°C) or more from one rack position to another. Lid and oven rotation is the cook's answer to that asymmetry: a small, deliberate intervention partway through cooking that turns pans, swaps rack positions, and opens or closes lids to redirect where the heat lands. It costs almost nothing, requires no special equipment beyond an oven mitt, and is the single most reliable way to get the back of a sheet pan of cookies to match the front.
Rotation is a corrective move, not a shortcut. Done well, it does not shorten cook time or rescue a poorly calibrated oven — it simply makes sure the side of the food facing the hot zone receives the same total exposure as the side facing the cooler zone. The same logic governs lids: a covered pot steams in its own moisture and browns slowly, an uncovered pot reduces and crusts fast, and most long-cooked dishes benefit from a planned shift from one mode to the other at a chosen moment.
In professional convection kitchens, the fan already equalizes heat and rotation is often unnecessary — sometimes even counterproductive, because the fan's dead zone can introduce its own asymmetry. In a conventional home oven, where radiant heat from a single element does most of the work, the technique is close to essential. The cook's job is to read the oven — by feel, by sight, and ideally with a hanging thermometer — and to step in at the right moment to even out what the appliance cannot.
- Difficulty
- Easy
Types & varieties
Spinning the pan front-to-back so the side that faced the door now faces the rear wall; the most common move for sheet-pan items
Quarter-turn used when one long edge browns faster than the other, common with rectangular pans and rimmed half-sheets
Moving pans between upper and lower racks when baking two sheets at once; the top sheet usually browns faster
Taking off or cracking the lid in the final stretch of cooking to drive off surface moisture and trigger Maillard browning
Putting the lid back on to trap moisture and finish cooking gently, used for braises and dense stews that dry out on top
Loosely covering with foil then rotating, used for large roasts where one shoulder cooks faster than the other
On a stovetop, moving pots between burners of different BTU output to level heat across multiple saucepans
How to do it
- 1
Confirm there is a hot spot before you act
Hang an oven thermometer on the center rack and run the oven at 375°F (190°C) for 20 minutes. Note the reading, then move the thermometer to each corner and repeat. A spread of more than 25°F tells you rotation is worth doing.
- 2
Load the pan off-center if your oven runs hot in back
Place sheet pans, roasting pans, and Dutch ovens 2–3 inches (5–7 cm) forward of center, closer to the door. This single shift solves the majority of home-oven asymmetry without any mid-cook intervention.
- 3
Set a rotation reminder at roughly two-thirds of the bake time
Use the oven timer or a separate kitchen timer. Two-thirds is late enough that the item has set, early enough that the Maillard phase is still active and can be redirected.
- 4
Open the door quickly and identify the paler side
Pull the rack out only partway. Note which side is browning faster — the side facing the heating element or the rear wall is almost always the culprit.
- 5
Rotate 180° (or 90° for rectangular pans)
Spin the pan so the paler side now faces the hot zone. For rectangular pans, a 90° turn is often more useful than a 180° turn because the long edges face the elements.
- 6
Swap rack positions if baking more than one pan
Move the upper pan to the lower rack and vice versa, and rotate each 180°. This is the only way two-sheet-pan bakes come out evenly.
- 7
Manage lids based on moisture
If the surface is still wet and steaming, keep the lid on or tent with foil. The instant beads stop forming and the surface looks matte, crack or remove the lid to let browning begin.
- 8
Close the door and finish without reopening unless necessary
Resist the urge to check again in five minutes. Heat loss accumulates, and the second opening rarely improves results.
- 9
Verify doneness with a thermometer or tester, not by color alone
Even with perfect rotation, color can mislead. Use an instant-read thermometer for proteins, a toothpick for cakes, or the visual cues appropriate to the dish.
Lids as a Heat Lever
A lid is not just a cover; it is a heat dial. Sealed tight, it traps steam, slows evaporation, and keeps the surface pinned near 212°F (100°C) — well below the threshold where browning can occur. Removed or cracked, it vents moisture, lets the surface climb past that ceiling, and opens the door to the Maillard reaction and a forming crust. Most long-cooked dishes — braises, stews, rice, beans, pot roasts — benefit from a planned shift from one mode to the other rather than a fixed lid schedule.
- Keep the lid on while the pot is still releasing beads of condensation on the lid's underside; that is visual proof the food has more moisture to lose.
- Crack or remove the lid the moment the surface looks matte rather than glossy — browning cannot begin under wet steam.
- For a braise that threatens to dry out on top, finish covered; for a braise that needs a glazed crust, finish uncovered for the last 20–30 minutes.
- A sheet of parchment laid directly on the food (a cartouche) behaves like a partial lid — it slows evaporation without sealing the surface completely.
Common uses
Tips & pitfalls
- Open the door quickly and purposefully — every second counts when 25–50°F is escaping.
- Rotate just once for most items; two or more rotations often cause sinking in cakes or jaggies on cookie edges.
- Use a light-colored aluminum pan if rotation is hard to remember — dark steel pans hide hot-spot asymmetry until it is too late to fix.
- For lids, pull them the moment surface moisture stops beading; that is the visual cue that browning can begin.
- Load the pan closer to the door if the back of your oven runs hot — this often removes the need to rotate at all.
- An oven thermometer is more useful than any rotation schedule — confirm the temperature before blaming hot spots.
- Avoid rotating delicate items like custards, panna cottas, or soufflés once they have set; the jiggle tells you they are done, and a jiggle disrupted mid-cook may not recover.
- On gas ranges, back burners run cooler than front burners on most models — use this when staggering saucepans for even simmer.
Good to know
- Primary purpose
- Compensate for uneven heat distribution inside an oven (and across stovetop burners) by repositioning vessels and adjusting lids partway through cooking
- Typical hot-spot variance
- Most home ovens run 25°F (≈14°C) or more hotter in some zones than others, with rear corners and the area near the heating element being common trouble spots
- First rotation point
- Roughly two-thirds through the stated bake time is the standard window, when the item is set enough to move but browning is still active
- Effect on cook time
- Rotating does not meaningfully change total cook time; the goal is uniform appearance and interior doneness, not speed
- Heat loss per opening
- Opening a standard oven door drops internal temperature 25–50°F and requires 5–10 minutes to fully recover
- Best paired with
- An oven thermometer hung in the center of the rack to confirm actual vs. dialed temperature
- Difficulty
- Beginner; no special equipment required beyond an oven mitt and a clear marker
- Applicable equipment
- Sheet pans, cake pans, skillets, Dutch ovens, roasting pans, braisers, saucepots, and covered casseroles
Also called
pan rotation · even bake rotation
Related

Sear
Blast the surface hot for a deep-browned, savory crust

Sauté
Cook quickly in a little fat over lively heat, tossing as you go

Stir-Fry
Toss bite-sized pieces over roaring heat for fast, smoky cooking

Pan-Fry
Crisp food in a shallow layer of hot fat, turning once or twice

Deep-Fry
Submerge in hot oil for an all-over crackling crust

Roast
Cook uncovered in dry oven heat for browned edges and tender centers

Bake
Cook with steady, surrounding oven heat — the soul of bread and pastry

Broil
Hit food from directly above with fierce overhead heat