Heat & Fire
Pan-Roasting
Searing food in an ovenproof pan on the stove then finishing it in the oven for a crust plus even cook.
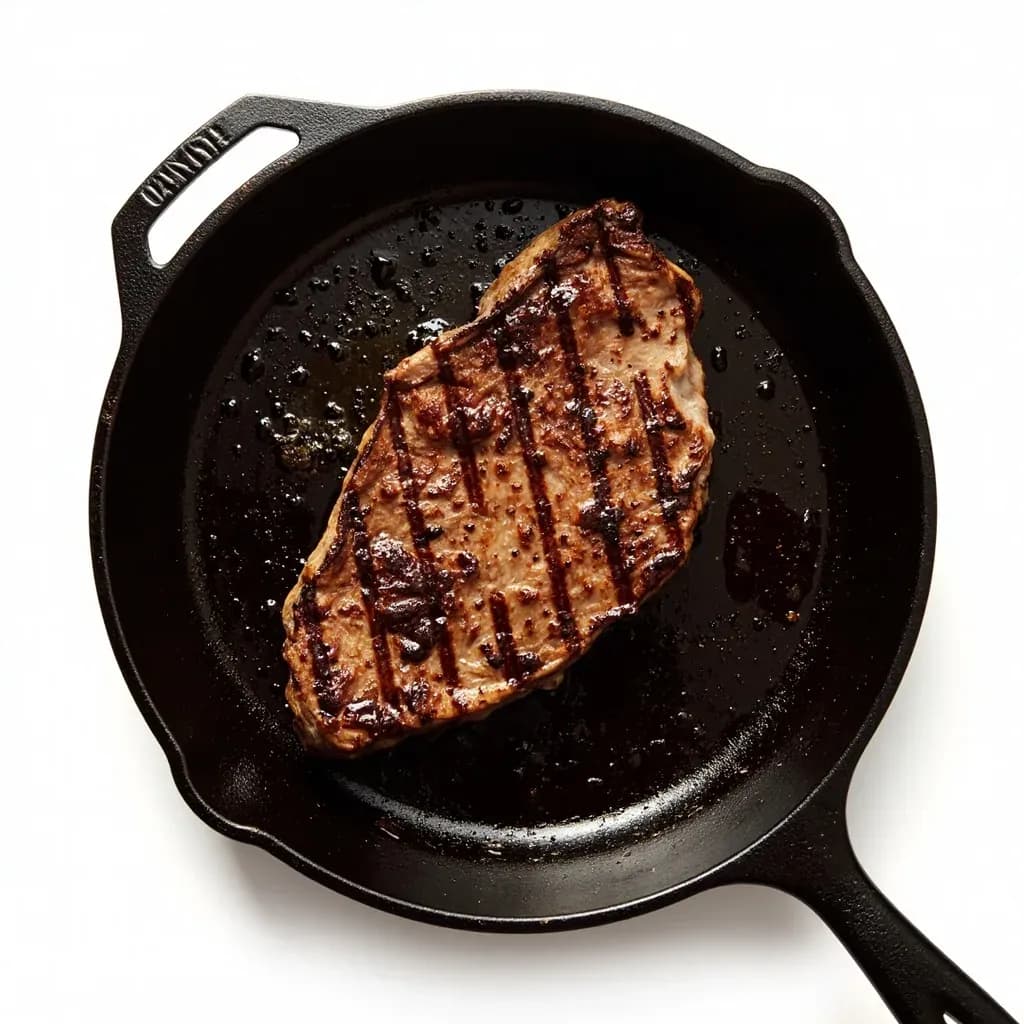
Pan-roasting starts a protein or vegetable with a hard stovetop sear to build a browned crust, then transfers the same ovenproof pan into the oven so the food cooks through evenly. The combination gives a deeply caramelized surface with a juicy interior, classic for thick steaks, chicken and fish. Using one pan also lets the rendered fat and fond become the base for a quick pan sauce.
Pan-roasting is a combination dry-heat method that begins with a hard stovetop sear and finishes the cook in a hot oven, all in the same ovenproof pan. The technique solves a specific problem: a stovetop alone can deliver a deep brown crust but leaves thick cuts raw in the center, while a pure oven roast can color the surface before the interior is done. By moving the food from direct pan conduction to ambient oven heat, the cook gets a true Maillard crust on every exposed face and a gentle, even finish to the target internal temperature.
The method behaves predictably once you understand the handoff. The sear phase is short, hot, and dry — its only job is to build flavor and color through browning of proteins and sugars. The oven phase is longer, gentler, and more forgiving, but it depends entirely on accurate temperature tracking because timing varies with food thickness, pan material, and oven calibration. The fond left clinging to the pan is not waste; it is the foundation of an almost free pan sauce built in the same vessel after the food has been removed to rest.
Good pan-roasting comes down to three things: a heavy, ovenproof pan, a dry surface on the food, and an honest thermometer. With those in hand, the technique is repeatable for everything from a single thick steak to a holiday duck breast to a tray of Brussels sprouts.
- Difficulty
- Medium
Types & varieties
Dry sear on the stovetop, then transfer to a hot oven to finish with no basting or added liquid.
After the sear, whole butter with crushed garlic and woody herbs (thyme, rosemary, sage) is added to the pan and spooned repeatedly over the food during the oven phase; the classic treatment for steak, duck breast, and bone-in chicken.
Mirepoix, shallots, or whole garlic and herbs go in partway through the oven phase and become the bed for the food or the base of the pan sauce.
Smaller items such as potato wedges, Brussels sprouts, carrot batons, and cauliflower steaks are seared flat-side down and finished in the oven in fat and aromatics.
Skin-on fillets seared in clarified butter or oil, flipped, and finished in a moderate oven (around 400°F / 200°C); preferred for thick, even fillets like halibut, salmon, swordfish, and monkfish.
How to do it
- 1
Set up
Position a rack in the center of the oven and preheat to 400–450°F / 200–230°C (drop to about 275°F / 135°C for very thick roasts or delicate fish). Choose an ovenproof heavy pan just large enough to hold the food with a little space around each piece.
- 2
Prep the food
Pat the food completely dry with paper towels. Season generously with salt and pepper, plus any dry rub. If working ahead, dry-brine in the refrigerator uncovered for 40 minutes to overnight for deeper seasoning and a drier surface.
- 3
Heat the pan and oil
Place the empty pan on the stovetop over medium-high to high heat. When hot, add a thin film of high-smoke-point oil and wait until it shimmers and just begins to ripple or smoke.
- 4
Sear
Lay the food away from you into the pan and leave it alone. Listen for an immediate, hard sizzle — silence means the pan was not hot enough. Sear the first side until a deep brown crust forms and the food releases on its own, 2–4 minutes for most steaks and chops, 3–5 minutes for skin-on poultry or fish.
- 5
Flip and add aromatics (optional)
Turn the food. For butter-basting, lower the heat slightly, add 2–3 tablespoons of whole butter with crushed garlic and woody herbs, then tilt the pan and spoon the foaming butter over the food repeatedly for 30–60 seconds before the oven transfer.
- 6
Transfer to oven
Move the pan directly into the preheated oven. For thicker cuts, set an oven-safe probe thermometer in place now so you do not have to open the door repeatedly. Cook until the food reaches 5–10°F / 3–6°C below your target internal temperature.
- 7
Rest
Transfer the food to a warm plate or rack. Tent loosely with foil and rest for at least 5 minutes, longer for larger roasts. The internal temperature will continue to climb during this time and juices will redistribute through the muscle.
- 8
Build the sauce (optional)
Set the hot pan back on the stovetop over medium heat. Pour off excess fat if needed, then deglaze with wine, stock, or citrus, scraping up the fond. Reduce, whisk in cold butter cubes off the heat to mount, season to taste, and serve alongside the rested food.
The right pan for the job
Pan-roasting lives or dies on the pan. You need something that holds heat well, goes from burner to oven without complaint, and releases its fond readily when you deglaze. Clad stainless steel is the most forgiving all-rounder — its aluminum or copper core heats evenly and the non-reactive cooking surface lifts fond cleanly. Cast iron is the classic choice: heavy, nearly indestructible, and aggressive on the crust, but it can scorch fond if you are not careful and it runs hot on a stovetop. Carbon steel behaves like a lighter cast iron and works beautifully once seasoned. Oven-safe copper (with a stainless lining) is the professional kitchen choice for thermal responsiveness. Avoid nonstick at these oven temperatures — the coating will degrade and you want fond, which nonstick resists. Most importantly, confirm the handle: any phenolic or plastic knob, or a handle rated below 400°F / 200°C, will fail in the oven. The wet-towel-around-the-handle trick is unsafe and not worth the risk.
Pan-roasting vs. reverse-searing and broiling
Pan-roasting is often confused with two related methods. In reverse-searing, a thick cut goes into a low oven first to bring it gently to just under the target internal temperature, then is seared hard in a pan for the final crust — the order is reversed, and the technique favors very thick roasts where edge-to-edge pink is the goal. Broiling uses top-down radiant heat from the oven's broiler element; it is faster and more aggressive on the surface but does not provide the same even, ambient finish or the steady conduction needed to build a usable fond for a pan sauce. Pan-roasting sits squarely in the middle: a short, hot sear followed by a moderate-heat oven finish, all in one vessel, with the fond reserved for a quick sauce.
Common uses
Tips & pitfalls
- Dry the surface of the food thoroughly with paper towels; surface moisture is the single biggest enemy of a Maillard crust.
- Salt in advance — 40 to 60 minutes for steaks, overnight for thick chops — to season more deeply and dry the surface through dry-brining.
- Preheat the empty pan, then add the oil, then wait until the oil shimmers or just barely smokes before adding the food.
- Do not crowd the pan; cook in batches if needed. Crowding drops the pan temperature and steams the food instead of browning it.
- Resist moving or peeking during the sear — leave the food alone until it releases from the pan on its own.
- Use a heavy-bottomed pan. Thin pans create hot spots and scorch the fond before the oven phase even starts.
- Confirm your pan is ovenproof: no plastic or phenolic handles, no glued-on knobs, no handles with a manufacturer-set temperature limit. Wrapping handles in wet towels is unsafe.
- Track internal temperature, not time. Pull at 5–10°F / 3–6°C below target; carryover cooking will finish the job during the rest.
- Rest the food on a warm rack, not on a cold plate, so the bottom does not steam and lose its crust.
- Save the fond: deglaze the hot pan with wine, stock, or citrus, reduce, mount with cold butter, and you have a sauce with essentially no extra work.
Good to know
- Technique family
- Combination dry-heat cooking (stovetop conduction + oven convection)
- Also called
- Sear-and-roast, sauté-roast, pan-roast finish
- Key requirement
- Ovenproof, heavy-bottomed pan (cast iron, carbon steel, clad stainless, or oven-safe copper)
- Finishing oven temperature
- 400–450°F / 200–230°C; lower (~275°F / 135°C) for very thick roasts or delicate fish
- Best oil for the sear
- High smoke point: grapeseed, canola, sunflower, or clarified butter
- Doneness check
- Instant-read or leave-in probe thermometer — pan-roasting is time-unreliable
- Resting time
- Roughly half the cook time, minimum 5 minutes, loosely tented or on a warm rack
- Lineage
- Classical French/European combination method; standardized in modern American restaurant kitchens from the late 20th century onward
Also called
sear and roast · stovetop-to-oven
Related

Sear
Blast the surface hot for a deep-browned, savory crust

Sauté
Cook quickly in a little fat over lively heat, tossing as you go

Stir-Fry
Toss bite-sized pieces over roaring heat for fast, smoky cooking

Pan-Fry
Crisp food in a shallow layer of hot fat, turning once or twice

Deep-Fry
Submerge in hot oil for an all-over crackling crust

Roast
Cook uncovered in dry oven heat for browned edges and tender centers

Bake
Cook with steady, surrounding oven heat — the soul of bread and pastry

Broil
Hit food from directly above with fierce overhead heat