Prep & Assembly
Stretch and Fold
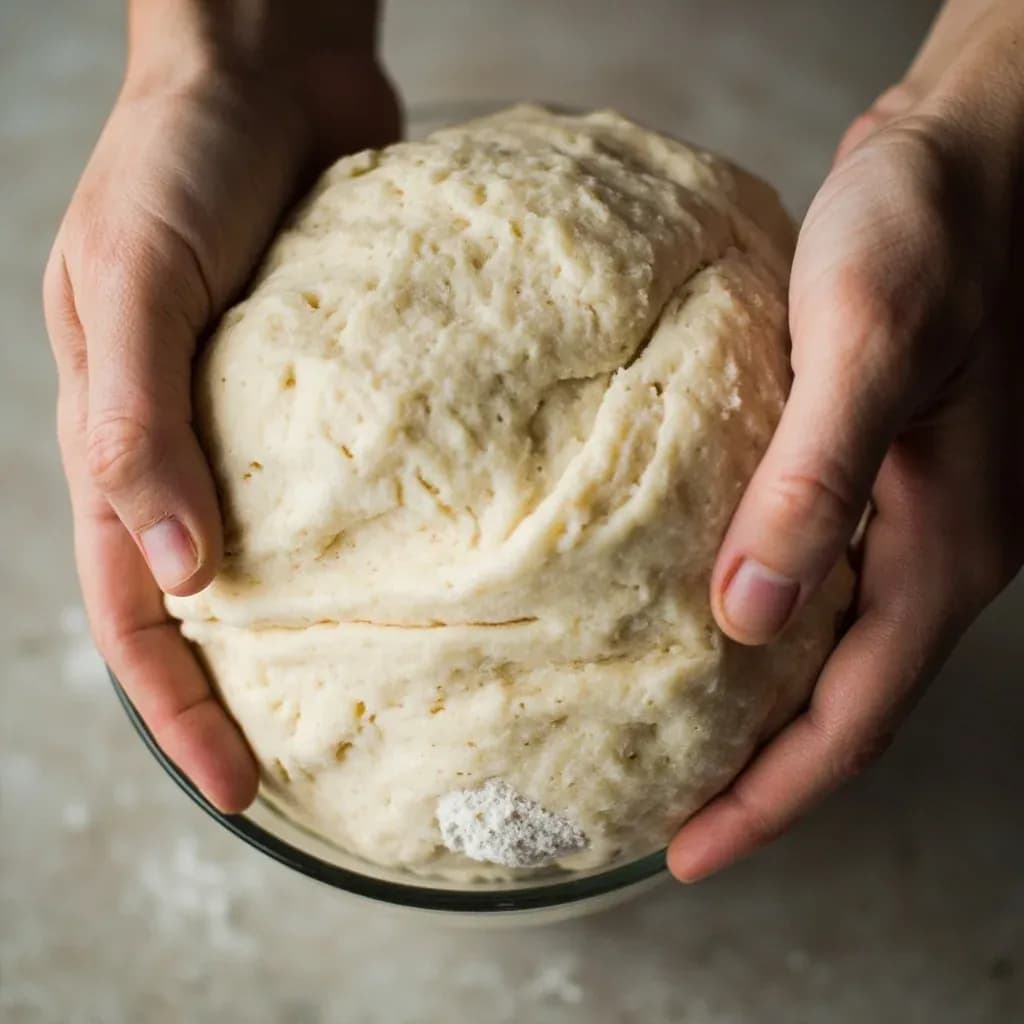
Gentle dough strengthening: stretch one side of the dough up and fold it over itself.
Stretch and fold builds gluten strength in wet doughs without kneading. During bulk fermentation the baker grabs one side of the dough, stretches it upward, and folds it over the center, rotating the bowl and repeating on each side. Done in a few sets spaced apart, it develops structure gently while keeping the dough hydrated and airy, which is why it is central to sourdough and high-hydration bread.
Stretch and fold is a gentle dough-strengthening technique used in place of traditional kneading, especially for wet, slack doughs that would tear under more aggressive handling. Instead of working the dough against a surface, the baker reaches under one side, lifts it until gentle resistance is felt, and folds it over the top. Rotating the bowl a quarter turn and repeating builds a tidy, tensioned package in under a minute, with far less friction, oxidation, and dough warming than ten minutes of hand kneading.
The technique became central to modern sourdough baking through Chad Robertson's Tartine method, where high-hydration doughs (often 75% or more) would be impossibly sticky to knead on a counter. Stretch and fold sidesteps the problem: it organizes gluten strands, evens out yeast and temperature distribution, and incorporates a little air, all while the dough sits in a bowl. Because the dough is barely handled, it stays cooler and paler, and the finished loaf tends toward the open, glossy, irregular crumb the style is known for.
Stretch and fold belongs to the first half of bulk fermentation only. The window is roughly the first 90 to 150 minutes after mixing, when the dough is extensible and gassing has just begun. After that, the dough is too fragile — folding will deflate it rather than strengthen it — and the work should move to pre-shape, final shape, and the final proof.
- Difficulty
- Medium
Types & varieties
The standard method: stretch one side up and fold it over the opposite side, rotating 90° between folds until all four sides are folded.
A Tartine-style alternative. Both hands slip under the center of the dough, lift it, and let it stretch under its own weight before coiling it over itself.
A lamination-style fold used in the same window of bulk fermentation; the dough is folded in thirds like a letter to create internal layers.
The dough is stretched thin across the counter and the edges folded in like a business letter, building layers in enriched or laminated breads.
How to do it
- 1
Prepare the dough
After mixing, optionally rest the dough for a 20–60 minute autolyse to fully hydrate the flour. Transfer it to a straight-sided, lightly oiled container or a wide bowl. The dough should be soft, sticky, and well-hydrated — typically 70% hydration or higher.
- 2
Wet your hands
Dip both hands in cool water or rub them with a thin film of neutral oil before each set. Wet hands keep the dough from sticking without deflating it or pulling flour into the bowl.
- 3
Stretch the first side
Reach under the side of the dough nearest to you, lift it straight up until you feel gentle resistance, and fold it over to the opposite side. Stretch only as far as the dough gives freely — never force it to the point of tearing.
- 4
Rotate and repeat
Turn the bowl 90° (or rotate the dough a quarter turn), re-wet your hands if they have started to grab, and stretch the next side up and over. Continue until all four sides have been folded onto the top.
- 5
Settle the dough
The dough should now form a neat, rounded package. Smooth the top with damp hands, cover, and let it rest for about 30 minutes in a warm spot (roughly 75–80°F / 24–27°C for most sourdoughs).
- 6
Repeat at intervals
Perform 2–3 more sets at 30-minute intervals. Most bakers find 3–4 total sets are enough to reach a dough that looks smooth, holds its shape, and jiggles like a water balloon when the bowl is tapped.
- 7
Know when to stop
Stop folding when the dough pulls cleanly away from the bowl, holds its shape when prodded, and looks aerated and pillowy. Move on to pre-shape, bench rest, final shape, and the final proof.
How stretch and fold works on the dough
Each fold aligns gluten strands in a single direction and then layers them at a right angle, the same mechanical logic as a French fold in croissants, just gentler. Repeating the action at 30-minute intervals gives the gluten time to relax and re-bond between sets, so each fold progressively tightens the dough without tearing it. The small air incorporated during the lift brightens the crumb without producing the dense, even texture that aggressive kneading tends to create.
- Folds align gluten strands in alternating directions, building a network without heavy work.
- Wet hands act as a release, letting you handle a 75%-hydration dough without flour or a bench.
- A 20–60 minute autolyse before the first fold maximizes extensibility and shortens the total schedule.
- Dough that has had a long, cold autolyse will accept folds more readily and show earlier structure.
When not to stretch and fold
Stretch and fold is a tool for the early, slack phase of bulk fermentation. Once the dough has visibly puffed, domed the container, and feels pillowy rather than extensible, further folds will pop the gas you have been building. Switch to a single, careful pre-shape, then bench rest and final shape, and let the final proof do the rest of the work.
- Skip folds once the dough has risen 50% or more and feels airy.
- Do not fold after pre-shape or shape — the gluten pattern has already been set.
- Whole-grain-heavy doughs sometimes need an extra early set because bran cuts gluten strands.
- Very stiff doughs (under 65% hydration) generally benefit from traditional kneading instead.
Common uses
Tips & pitfalls
- Wet or lightly oil your hands before each fold — dry hands will tear the dough's surface and drag gluten strands out of alignment.
- Work the dough while it still feels slack and extensible; if it resists a stretch, give it 15–20 more minutes of rest and try again.
- Stretch only until you feel tension — never pull the dough to its full limit, as that snaps the strands you are trying to organize.
- Always fold into the center or to the opposite side so the dough forms a tight package that holds its shape between sets.
- Stop folding once the dough springs back noticeably when poked and looks pillowy and aerated; further work will deflate the gas you have built.
- Reserve stretch and fold for the first half of bulk fermentation — late in the rise, the dough is too fragile and folds do more harm than good.
- Pair the technique with a 20–60 minute autolyse before the first fold to maximize extensibility and shorten the total schedule.
- Do not stretch and fold after shaping — that work belongs to bulk fermentation only, not to the final proof.
Good to know
- Also called
- Stretch-and-fold, S&F, four-corner fold
- Primary use
- Gluten development in high-hydration bread doughs
- Typical schedule
- 3–4 sets at 30-minute intervals during the first 1.5–2.5 hours of bulk fermentation
- Best for
- Wet doughs (70%+ hydration) and enriched or rustic loaves
- Dough temperature
- Minimal friction keeps dough cooler than traditional kneading
- Oxidation
- Low — gentler than kneading, helping preserve crumb color and flavor
- Popularized by
- Chad Robertson's Tartine method; standard in modern sourdough baking
- Equipment needed
- Wet or lightly oiled hands; no bench scraper or kneading surface required
- Time per set
- About 30–60 seconds
- Effect on crumb
- Encourages an open, irregular crumb and a glossy dough surface
- Skill level
- Beginner-friendly
Also called
Stretch & Fold · S&F
Related

Whisk
Beat ingredients smooth and aerated with a looping wire motion

Sift
Pass dry ingredients through mesh to aerate and remove lumps

Strain
Pour through mesh to separate solids from liquid for a smooth result

Filter
Pass liquid through fine material to clarify out the smallest particles

Rice
Press cooked potatoes through small holes for fluffy, lump-free texture

Mash
Crush soft cooked food into a rustic, creamy purée

Grind
Crush food into a coarse to fine texture, from spices to meat

Grate
Shred food into fine bits against a sharp-toothed surface