Transform & Preserve
Wax Rendering
Melting and clarifying beeswax or comb to separate clean wax from honey and debris.
Wax rendering melts raw honeycomb or wax cappings, usually over or in hot water, so the pure wax floats and clarifies above the heavier honey, pollen, and debris. The cooled clean wax can be lifted off and reused for food wraps, finishing, or sealing. Low, indirect heat is important because beeswax scorches and discolors if overheated.
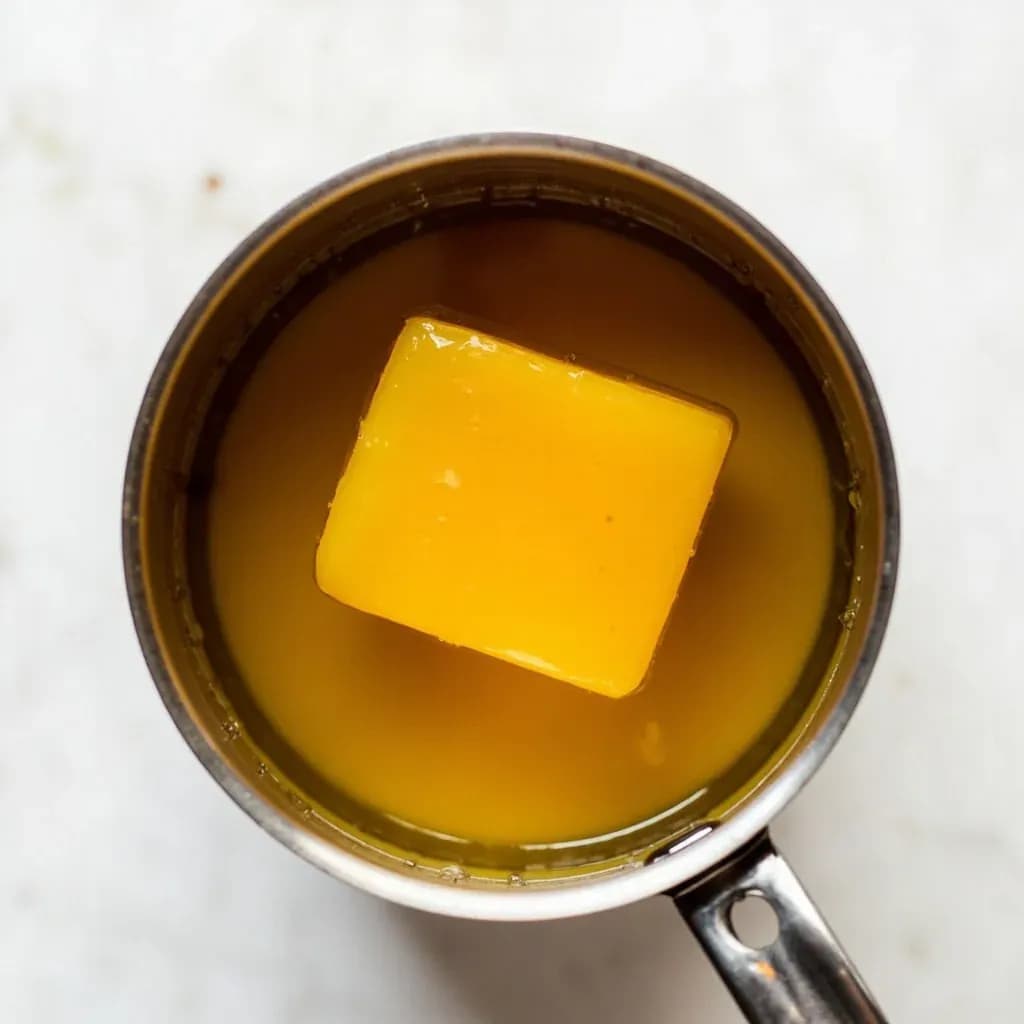
Wax rendering is the gentle clarification of raw beeswax — cappings, burr comb, or old brood comb — into a clean, food-grade block that can be reused in the kitchen. The principle is simple: beeswax melts at 144–147°F (62–64°C) and, because it is less dense than water, floats on top of a melt while heavier impurities (honey, propolis, pollen, and the dark cocoon residue called slumgum) sink. By melting comb in a deep pot of water, straining the molten liquid, and letting it cool slowly, you lift a single clean disc of wax off the surface, scrape the sediment away, and end up with material suitable for beeswax wraps, cheese coatings, jar seals, and wooden-kitchen maintenance.
For most cooks, the appeal is that beeswax is a beautiful, food-safe, plastic-free material, but the blocks sold for crafts are not always cheap or food-grade. Anyone with access to a beekeeper, a farmer's-market comb-honey supplier, or their own hives can render far more wax from a season's worth of cappings than they could ever buy, and at a quality they control. The process itself is forgiving: a stovetop, a deep pot, water, and cheesecloth are essentially all that is required. The two non-negotiables are gentle, indirect heat and a water buffer — direct high heat will scorch the wax and, because beeswax is flammable, can ignite.
The block that lifts off a properly cooled pot is the same wax used to seal aged hard cheeses, to grease bannetons and loaf pans, and to coat the rims of fermented preserves. Render it well once and the same material will serve a kitchen for years.
- Difficulty
- Medium
Types & varieties
Comb melted in a deep pot of water on gentle heat; the classic kitchen-scale method using equipment most cooks already own.
Wax melted indirectly in the top of a double boiler; the best choice for small batches of cappings, with very clean results and minimal scorching risk.
Set-and-forget variant of the water bath; steady low heat prevents scorching but takes considerably longer.
An insulated box with a glass lid and a metal collection tray; the sun melts comb and clean wax drains into a separate container. Cheapest and lowest-energy method, but weather-dependent and slow.
A beekeeping-scale technique using a steam chest and screw or basket press; recovers the most wax from old, dark brood comb and is usually overkill for kitchen use.
How to do it
- 1
Collect and sort the comb
Gather cappings, burr comb, and clean comb in one pile and old dark brood comb in another. Drain cappings on a screen overnight, or rinse lightly with cool water if you don't need to recover the honey. Honey left in the pot will scorch and darken the wax.
- 2
Set up a water bath
Place the comb in a deep stainless-steel or enameled pot and cover with several inches of water. The water suspends the wax, distributes heat evenly, and lets impurities sink. Do not fill the pot more than two-thirds full — molten wax expands and foams.
- 3
Melt gently
Heat over low to medium-low until the wax fully melts and the water reaches a gentle, barely-moving simmer. Beeswax melts at 144–147°F (62–64°C); you don't need, and shouldn't reach, a rolling boil. Stir occasionally with a long wooden spoon, pressing down any floating pieces.
- 4
Strain into a settling vessel
Line a second pot, pitcher, or wax-mold spout with several layers of cheesecloth, a piece of clean cotton pillow ticking, or a fine nylon straining bag. Pour the molten wax-water mixture through slowly so debris is caught in the cloth. A ladle works well for the first, dirty pass.
- 5
Cool and lift the cake
Set the vessel in a warm, draft-free spot to cool slowly overnight. As it solidifies, the wax forms a solid disc floating on the water. Honey, propolis, pollen, and slumgum settle to the bottom under the wax.
- 6
Clean the underside
Lift the wax disc off, scrape the dark sediment off the bottom with a knife or spoon, and rinse the bottom briefly with warm water. For food-grade clarity, repeat the melt-strain-cool cycle once more, this time through fresh cloth.
- 7
Store the finished wax
Pat the block dry and store in a clean glass jar, silicone mold, or wrapped block in a cool, dark cupboard. Properly stored beeswax keeps for years without going rancid.
- 8
Clean up
Wipe pots and tools with paper towels while still warm, then wash with the hottest tap water you can get. Save the dirty melt water for the garden — beeswax-trapped impurities are great for woody plants but will clog drains if poured down the sink.
Why a water bath?
Beeswax is unforgiving over direct heat. Honey trapped in the comb caramelizes quickly, which is the usual cause of a dark, smoky-smelling batch, and dry wax above ~400°F will ignite. Melting it in a few inches of water solves both problems at once: the water caps the temperature near 212°F (100°C) so the wax cannot run away hot, the water suspends the comb so heat reaches it evenly, and the wax itself floats to the surface while heavy impurities drop to the bottom of the pot. The same water also keeps any residual honey diluted rather than caramelized. Treat the water as a working partner, not a convenience.
- Cap your heat at a bare simmer; vigorous boiling can drive water into the wax and cloud the final block.
- Fill the pot no more than two-thirds full — molten wax expands and foams, especially when fresh comb still holds trapped air.
- A long wooden spoon is the right tool for pressing floating comb down; a ladle works for skimming or transferring the molten wax.
Choosing comb for food-grade wax
Not all comb renders equally. Cappings — the thin wax lids the bees seal over ripe honey — are the cleanest starting material and produce nearly white wax with one melt. Burr comb and freshly drawn white comb are a close second. Old dark brood comb, by contrast, is loaded with propolis, pollen, cocoon residue, and foot traffic from generations of bees; the wax you recover from it is dark, aromatic, and better suited to candles, salves, and wood conditioner than to anything that will touch food. Keep these streams separate from the start; mixing them downgrades the cleanest wax in the batch.
Common uses
Tips & pitfalls
- Never heat beeswax directly over a gas flame or hot burner — use a water bath or double boiler. The wax is flammable and scorches easily.
- Always add water to the pot with the comb; the water keeps the temperature even and lets impurities settle out.
- Strain molten wax through several layers of cheesecloth, fine nylon mesh, or an old cotton pillowcase for a clean final block.
- Pour a thin final rinse of hot water over the cooled wax block before scraping; it flushes fine debris off the underside.
- Clean equipment with hot water only. Cold water hardens wax onto pans and makes it nearly impossible to remove.
- Render old brood comb separately from cappings — brood comb carries more propolis and dark pigments and is better suited to non-culinary uses like candles or salves.
- Avoid aluminum, copper, and cast iron pots; they react with beeswax and turn it greenish or grey.
- Work in a warm room or warm the receiving molds; cold molds cause the wax to crust over before it has finished settling, trapping debris inside.
- Re-render the first block a second time for the clearest, food-grade result — two melts with straining between beats one long boil.
Good to know
- Melting point
- 144–147°F (62–64°C)
- Flash point
- ~400°F (204°C); wax is flammable and must never be heated over a direct, unattended flame
- Density
- Less than water — clean wax floats while honey, propolis, pollen, and slumgum sink to the bottom of the melt
- Solubility
- Insoluble in water; soluble in turpentine, mineral spirits, and warm oils
- Yield
- Roughly 1 lb (450 g) of wax per 8–10 lb of old brood comb; cappings yield several times more wax per pound of material
- Food-grade standard
- Render from cappings or clean comb for culinary use; reserve dark brood comb for candles and salves
- Safe vessels
- Stainless steel, enameled steel, or food-grade plastic; avoid aluminum, copper, and cast iron, which discolor the wax
- Storage
- Cool, dark, dry; a clean dry block keeps for years without going rancid
Also called
Wax Rendering · Rendering Beeswax
Related

Confit
Cook slowly submerged in fat for silky tenderness and keeping

Cure
Draw out moisture with salt and time to preserve and concentrate

Pickle
Steep in acidic brine for bright, tangy, crunchy preservation

Ferment
Let friendly microbes transform food into tangy, complex flavor

Marinate
Soak in a seasoned mix to flavor and tenderize before cooking

Brine
Soak in salt water so meat stays juicy and seasoned throughout

Dehydrate
Slowly dry out moisture to concentrate flavor and extend shelf life

Cold-Smoke
Perfume cured food with smoke without cooking it through